How to Create Quick Emails from Your Blog the Stress-Free Way
“Build an email list.”
“Write a blog.”
You’ve heard the advice about how to market your small business online.
The value of an email list makes sense to you. The reasons for writing informative and engaging blog posts are sound.
But there’s just one problem:
How do you find the time to do both and run your business?
Fortunately, there’s a simple solution.
How to Create Quick Emails from Your Blog the Stress-Free Way
Welcome to the Blog Post Conveyor Belt
You’ve written an amazing blog post. Now you want to tell everyone about it. The best people to tell first are your subscribers.
That’s what they signed up for!
The simplest way to do this is with Really Simple Syndication (RSS). I know what you’re thinking.
This sounds so techy.
Let me clarify.
RSS is like an instant conveyor belt. As soon as you publish your blog post anyone who looks at the conveyor belt (RSS) can read your post.
Most blog platforms support RSS. But I’m going to explain the steps below with WordPress given how many small business blogs use it.
The Ape and the Conveyor Belt
The second key ingredient you’ll need is a simple email marketing tool.
Your email tool will read your blog posts from the conveyor belt (RSS) and send them out to the subscribers on your list.
And the best part is:
You only need to create one email campaign for all of your blog posts.
Once you’ve set it up, every blog post you publish will automatically be sent to your subscribers.
I’ll show you how to do this with MailChimp, but other email marketing tools can do the same thing.
Here’s how you can do it for yourself.
How to Setup Your WordPress Blog
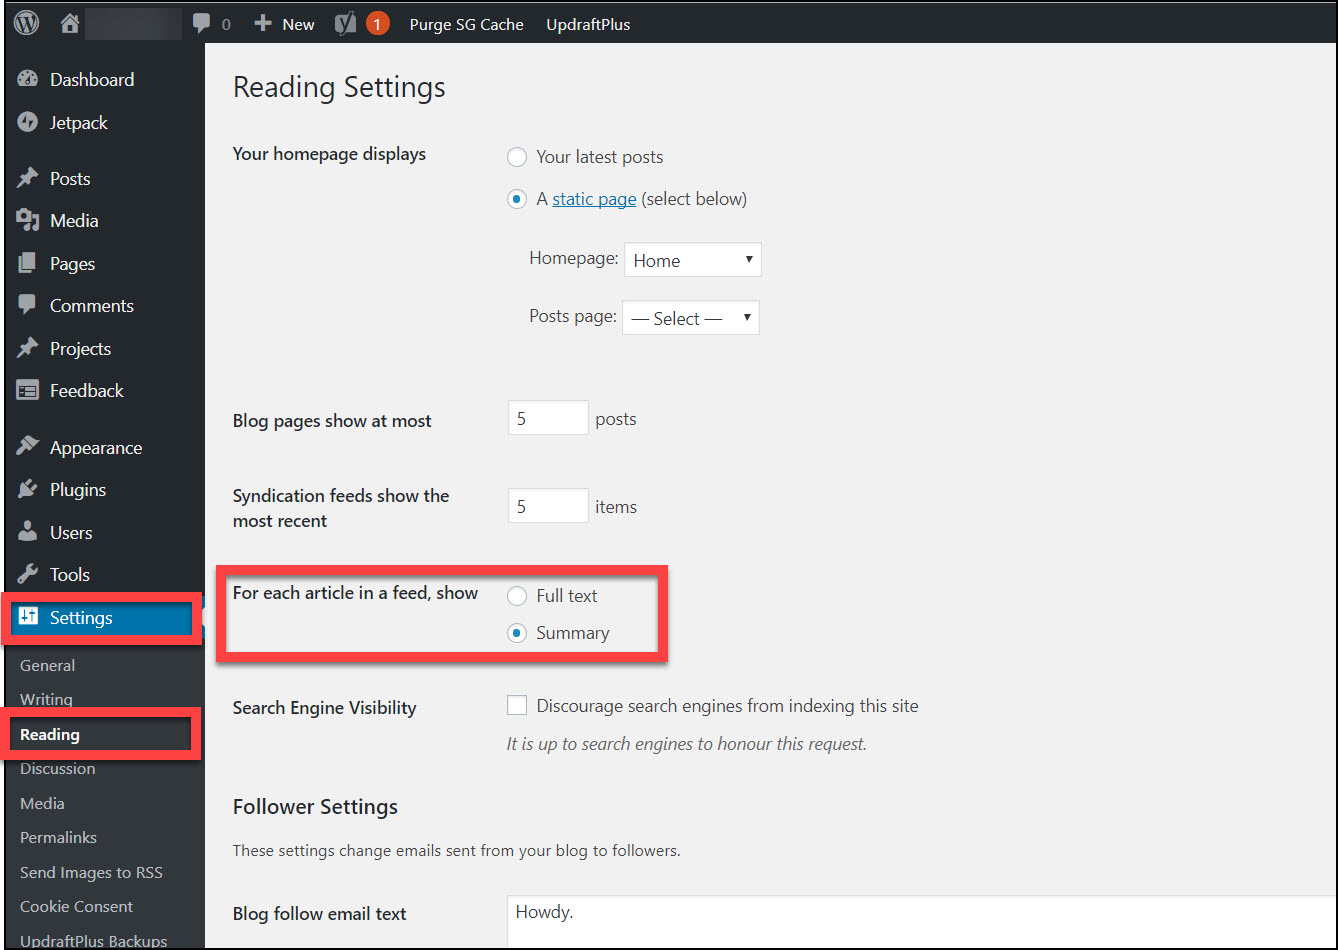
1. Firstly, we’re going to check the RSS feed settings on your blog. Login to your Wordpress site as the Admin user. Go to the Reading and then Settings menu. Make sure that Summary is checked where it says ‘For each article in a feed, show’. Scroll down and click Save Changes.
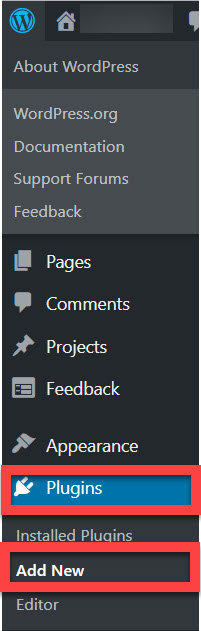
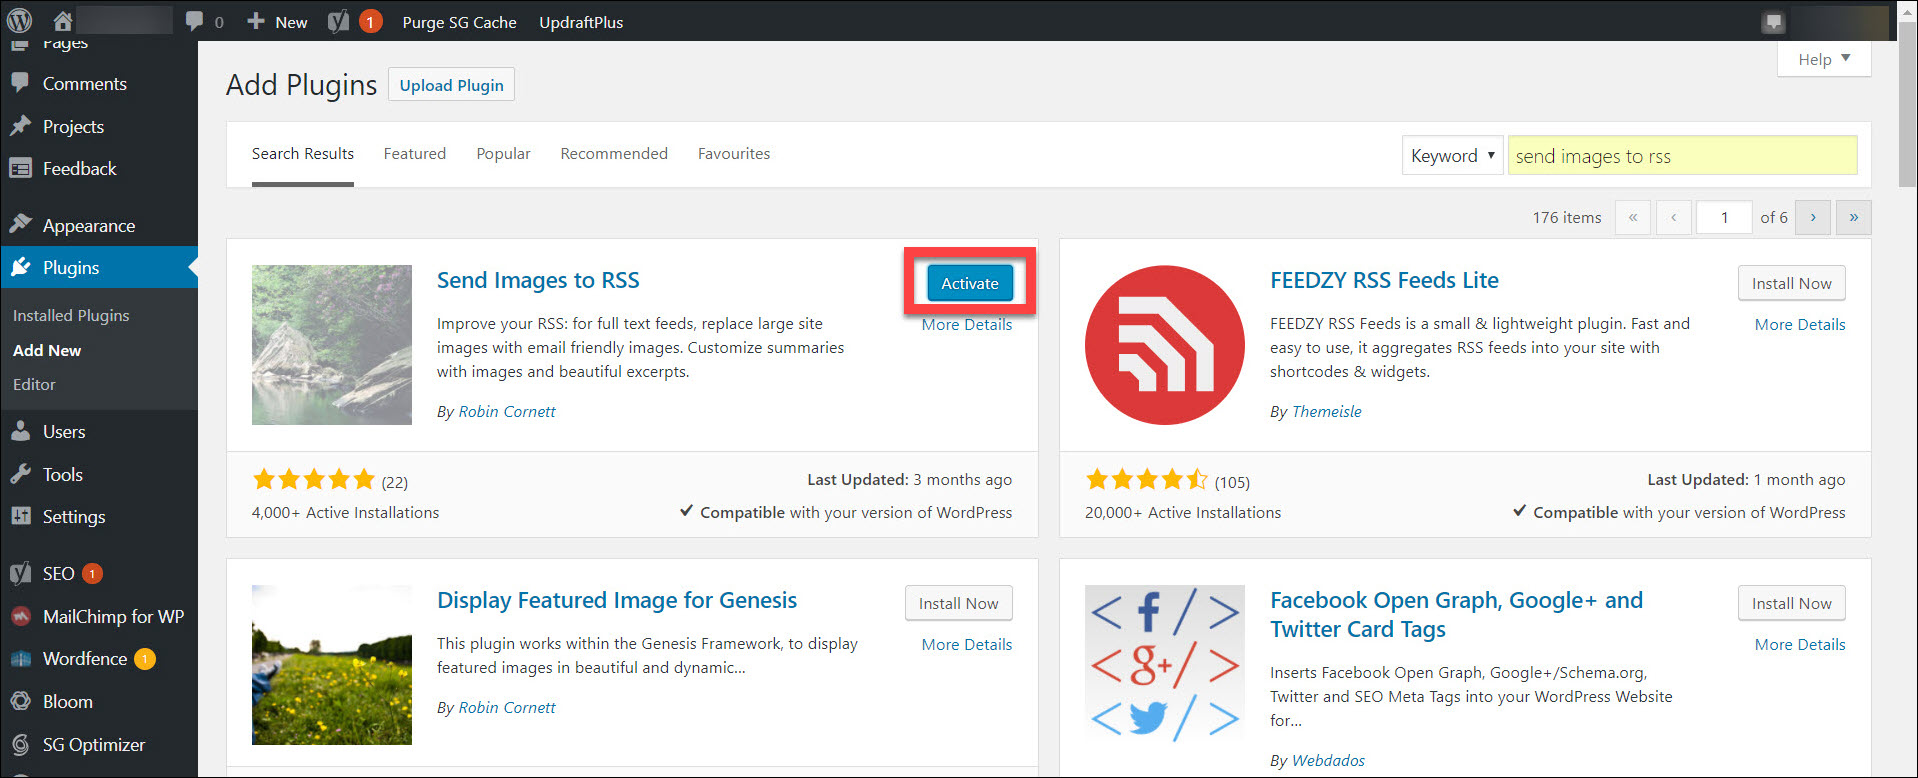
2. You now need to install a plugin to ensure that your blog post image is included in your RSS feed. Click on Plugins and Add New.
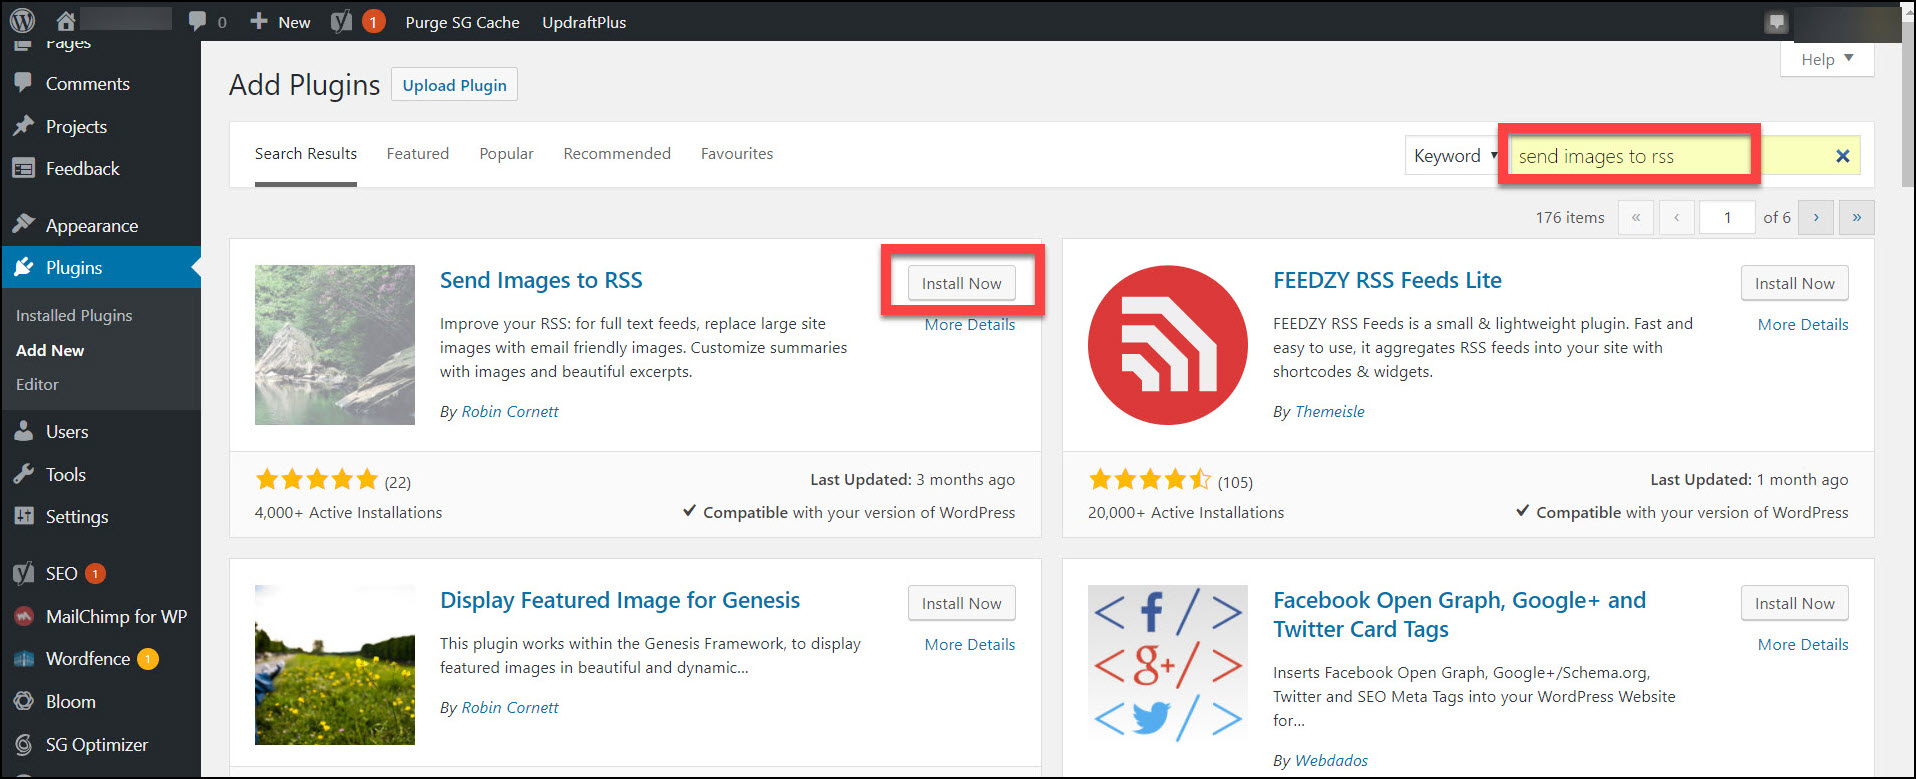
3. Type ‘send images to rss’ into the Keyword box. The Send Images to RSS plugin should appear as the first search result. Click on Install.
4. Click Activate to activate plugin for your site.
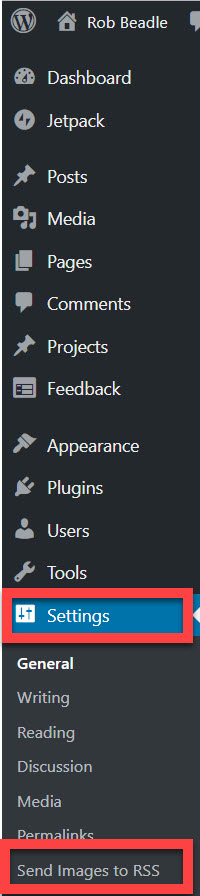
5. Go to Settings and Send Images to RSS.
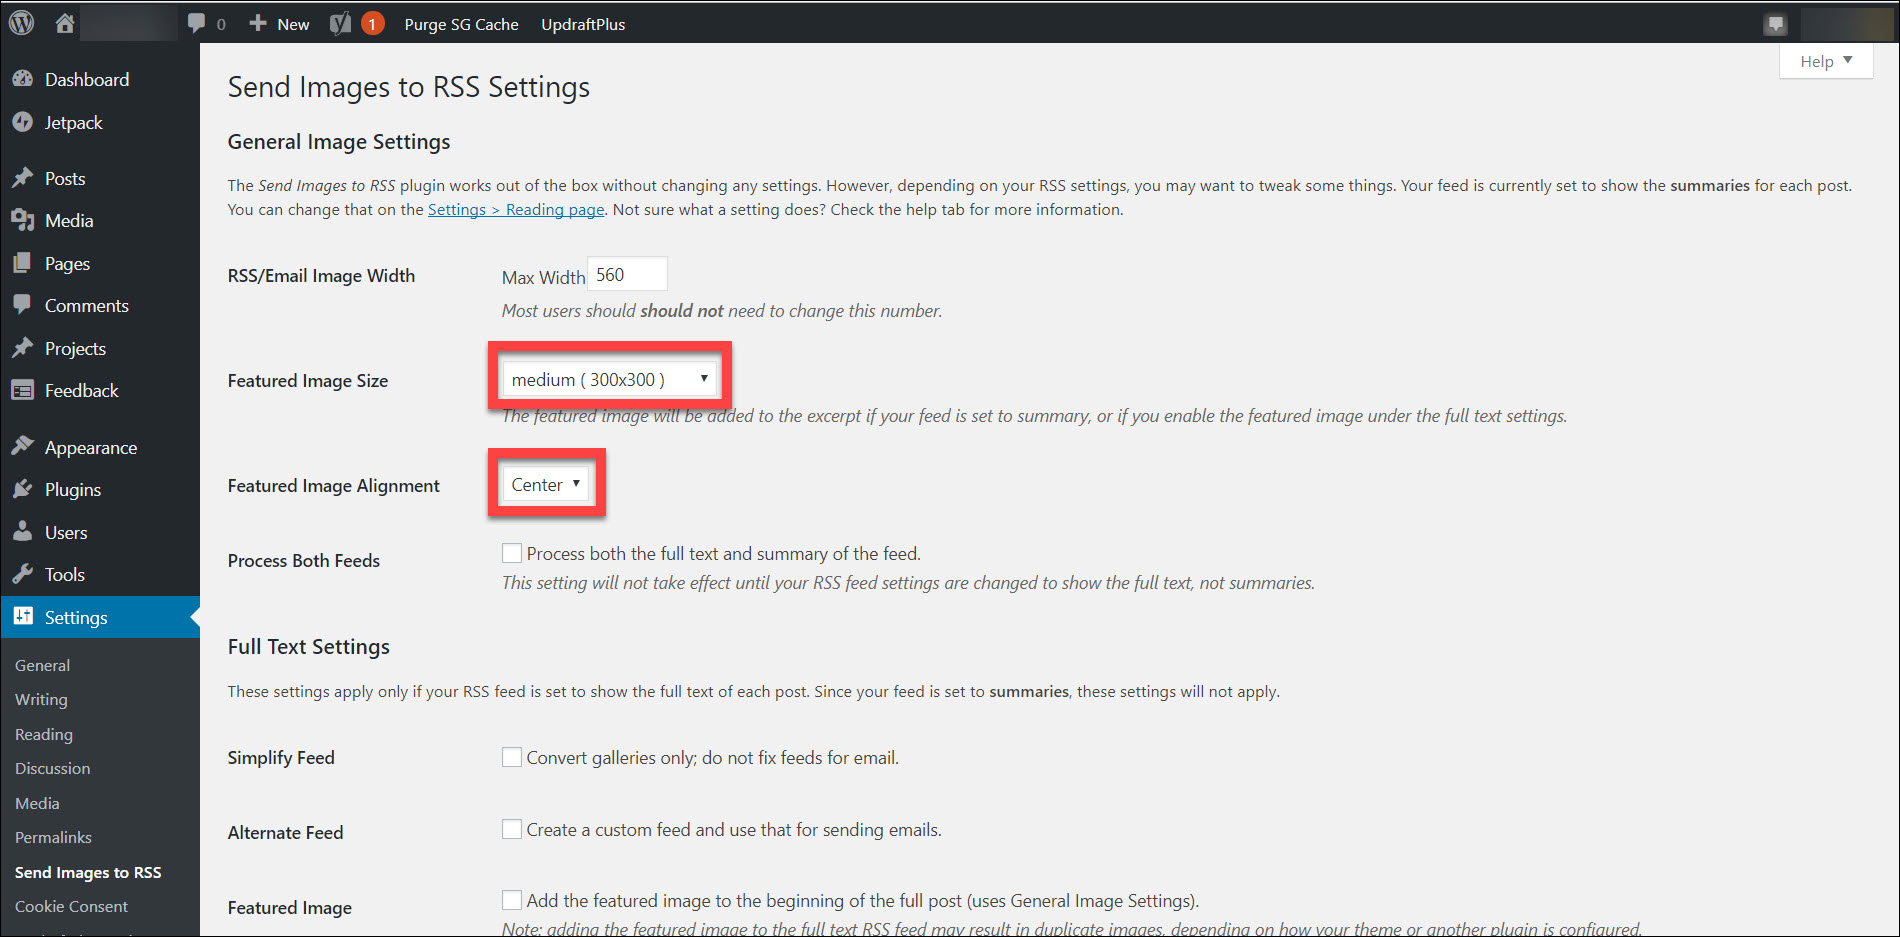
6. Here you change the setting for the Send Images to RSS plugin. The settings which I change for my blog are Featured Image Size which I set to Medium (so the image does not appear too large on mobiles).
Also Featured Image Alignment which I set to Centred. When you preview your Blog Post Campaign Email (see steps 21 to 27) you’ll see how the image appears. So, you can return here and change your settings if needed.
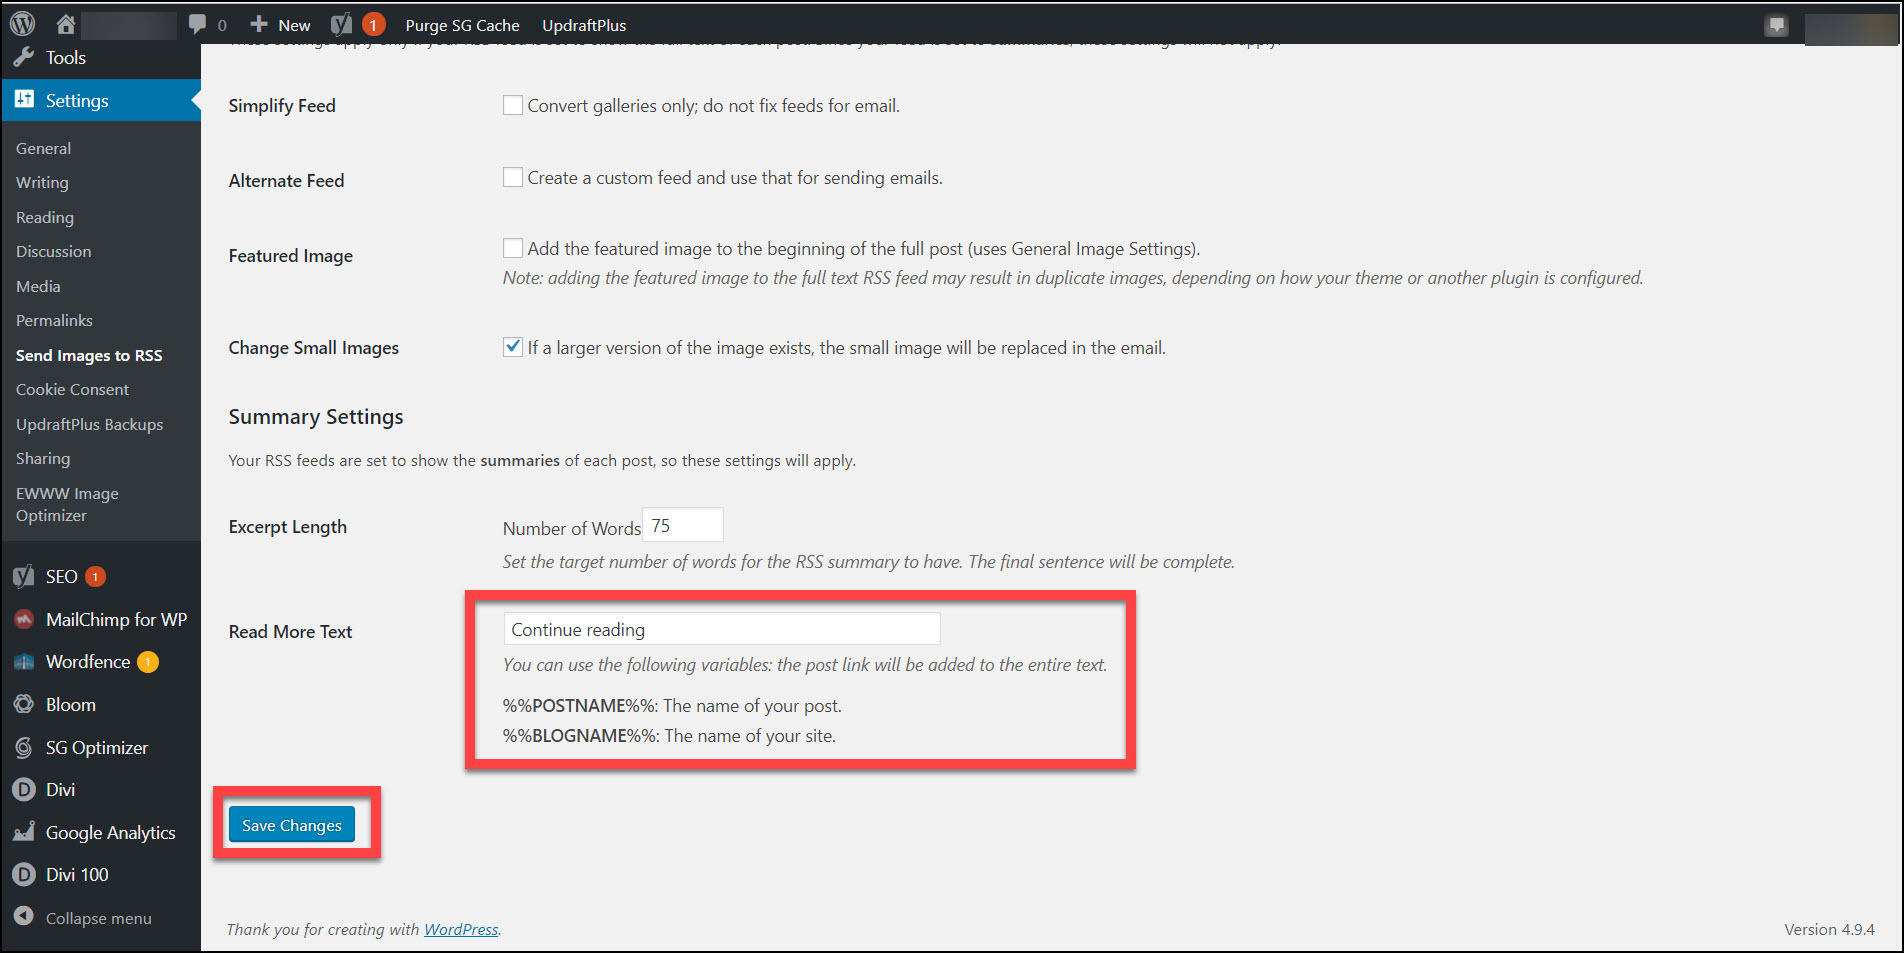
7. Scroll down and under Summary Settings change how you want your Read More text to appear. The default which appears is ‘Continue reading %%POSTNAME%% at %%BLOGNAME%%’.
However, I’ve changed this to simply read ‘Continue reading’. This is entirely down to your personal preference. Again, when you preview your Blog Post Campaign Email in MailChimp you’ll see how this text appears.
How to Setup Your MailChimp Campaign
8. Enter the Campaigns menu and select Create Campaign.
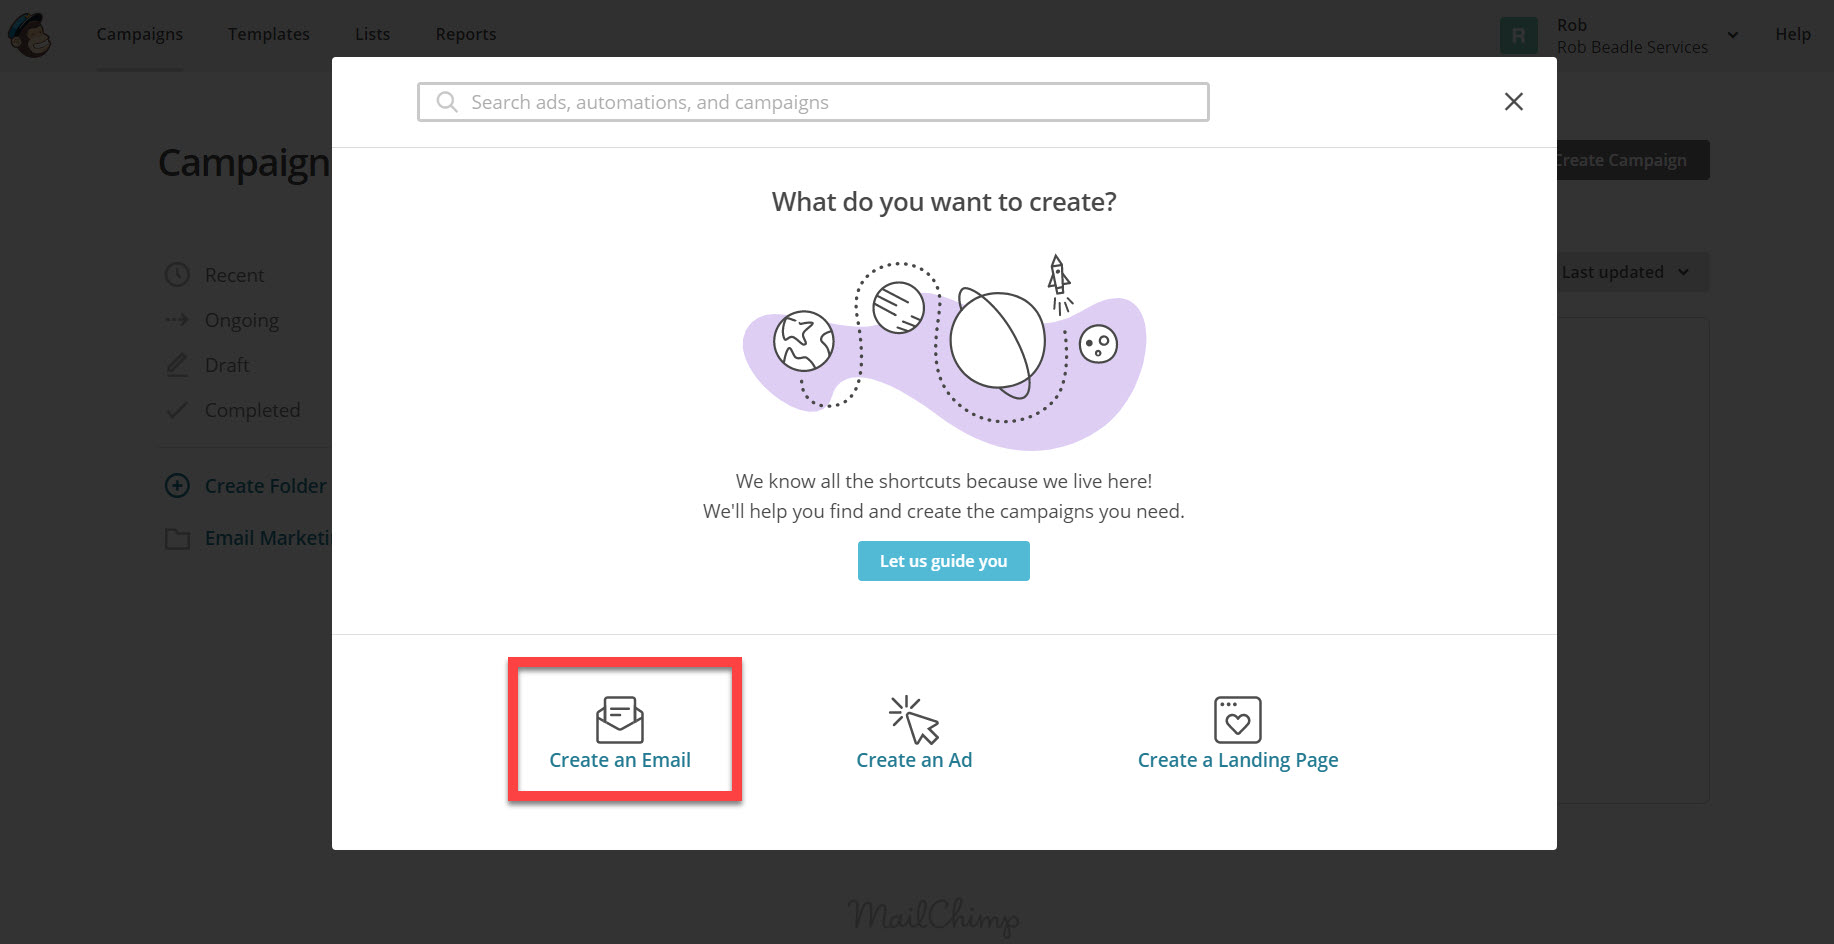
9. Select Create an Email.
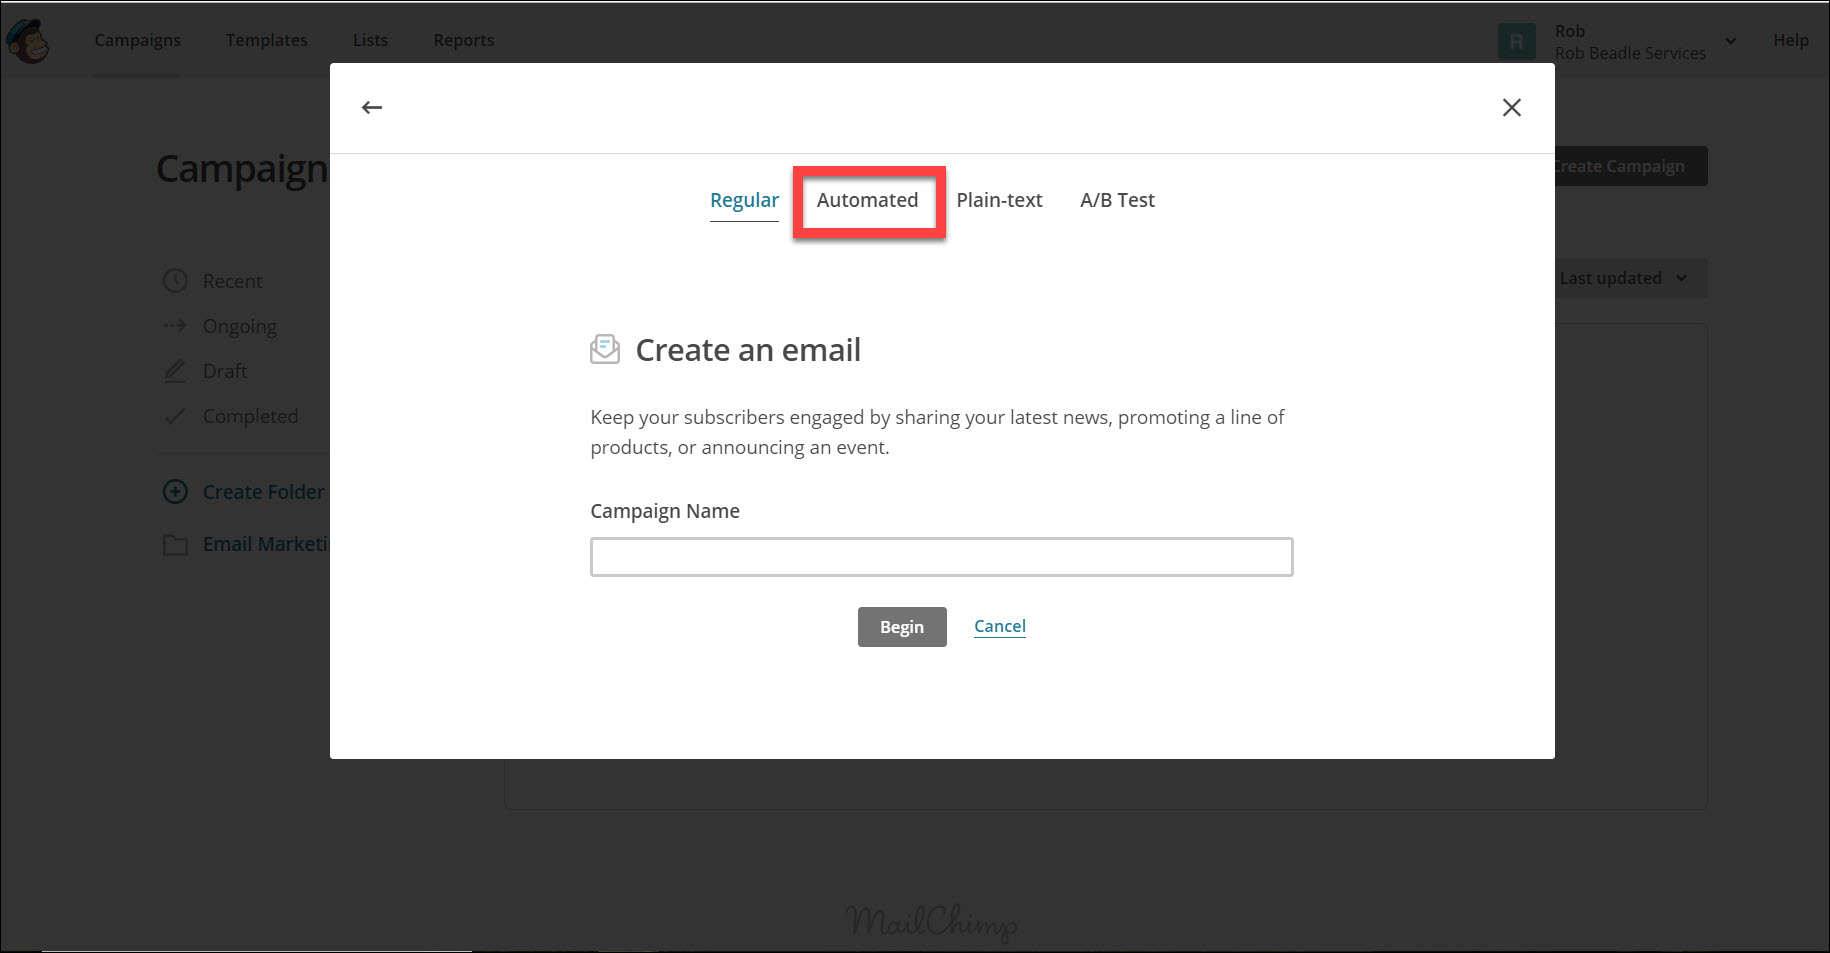
10. Select Automated campaign.
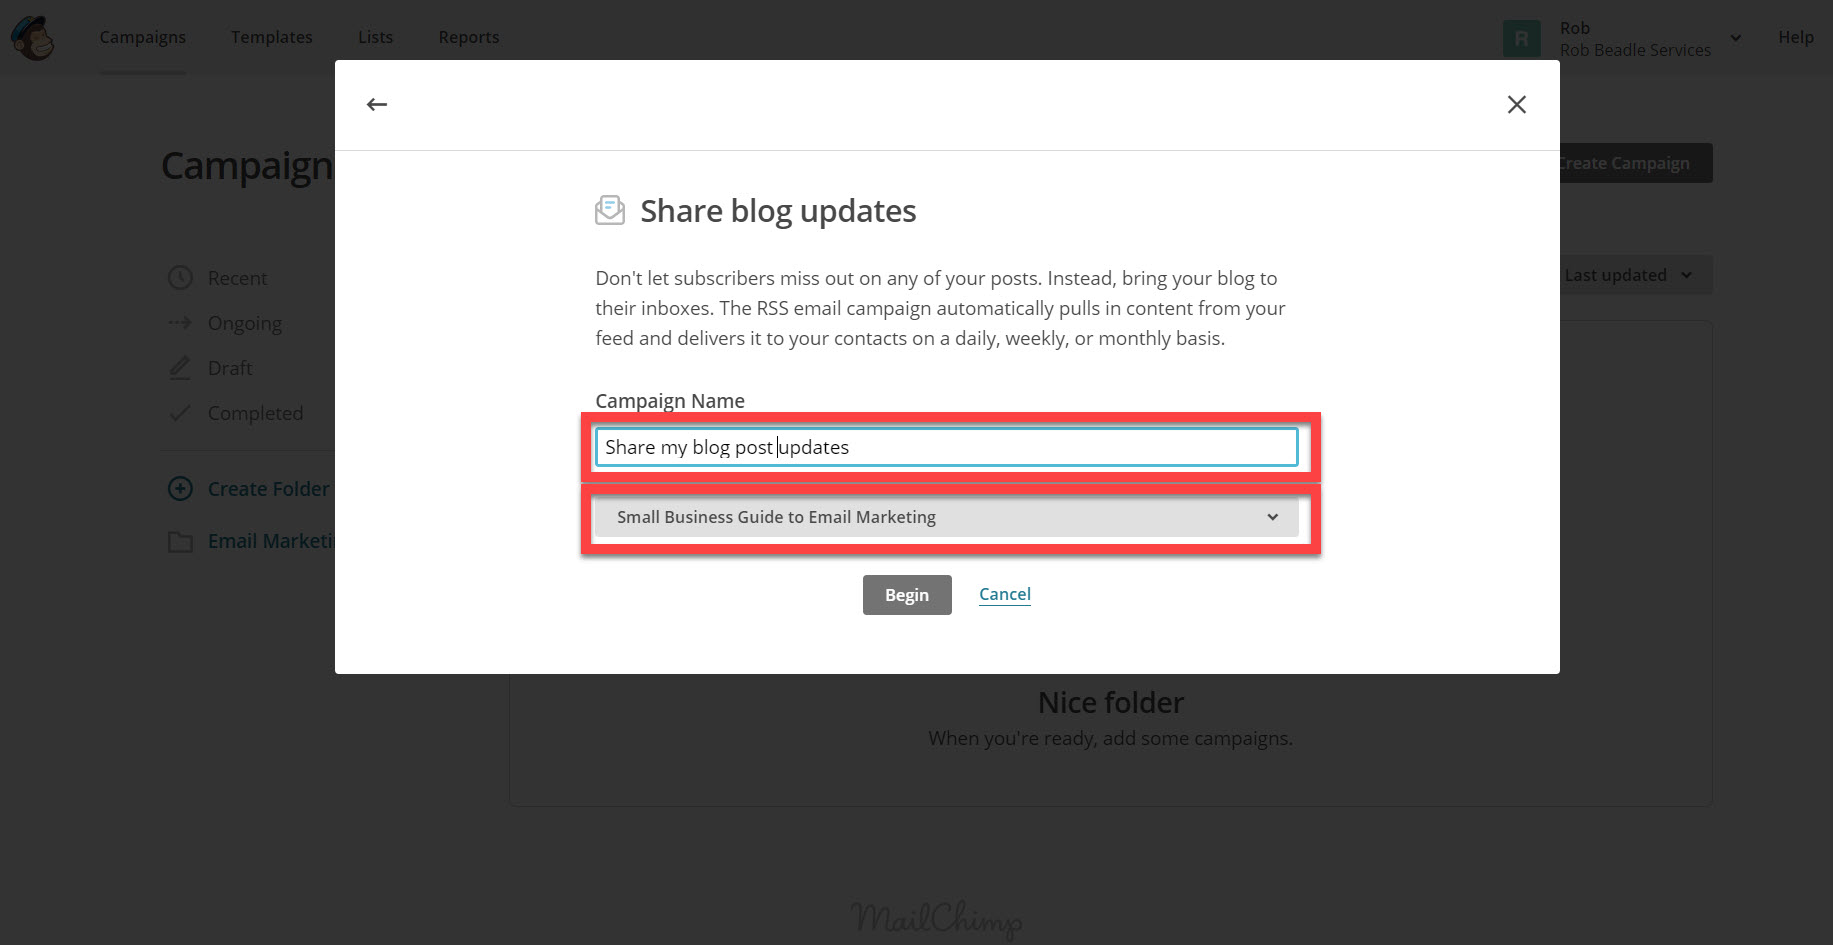
11. Select Share blog updates.

12. Enter the name of your campaign in Campaign Name– this will only be visible to you. Choose the list you want to run the campaign for. Select Begin.
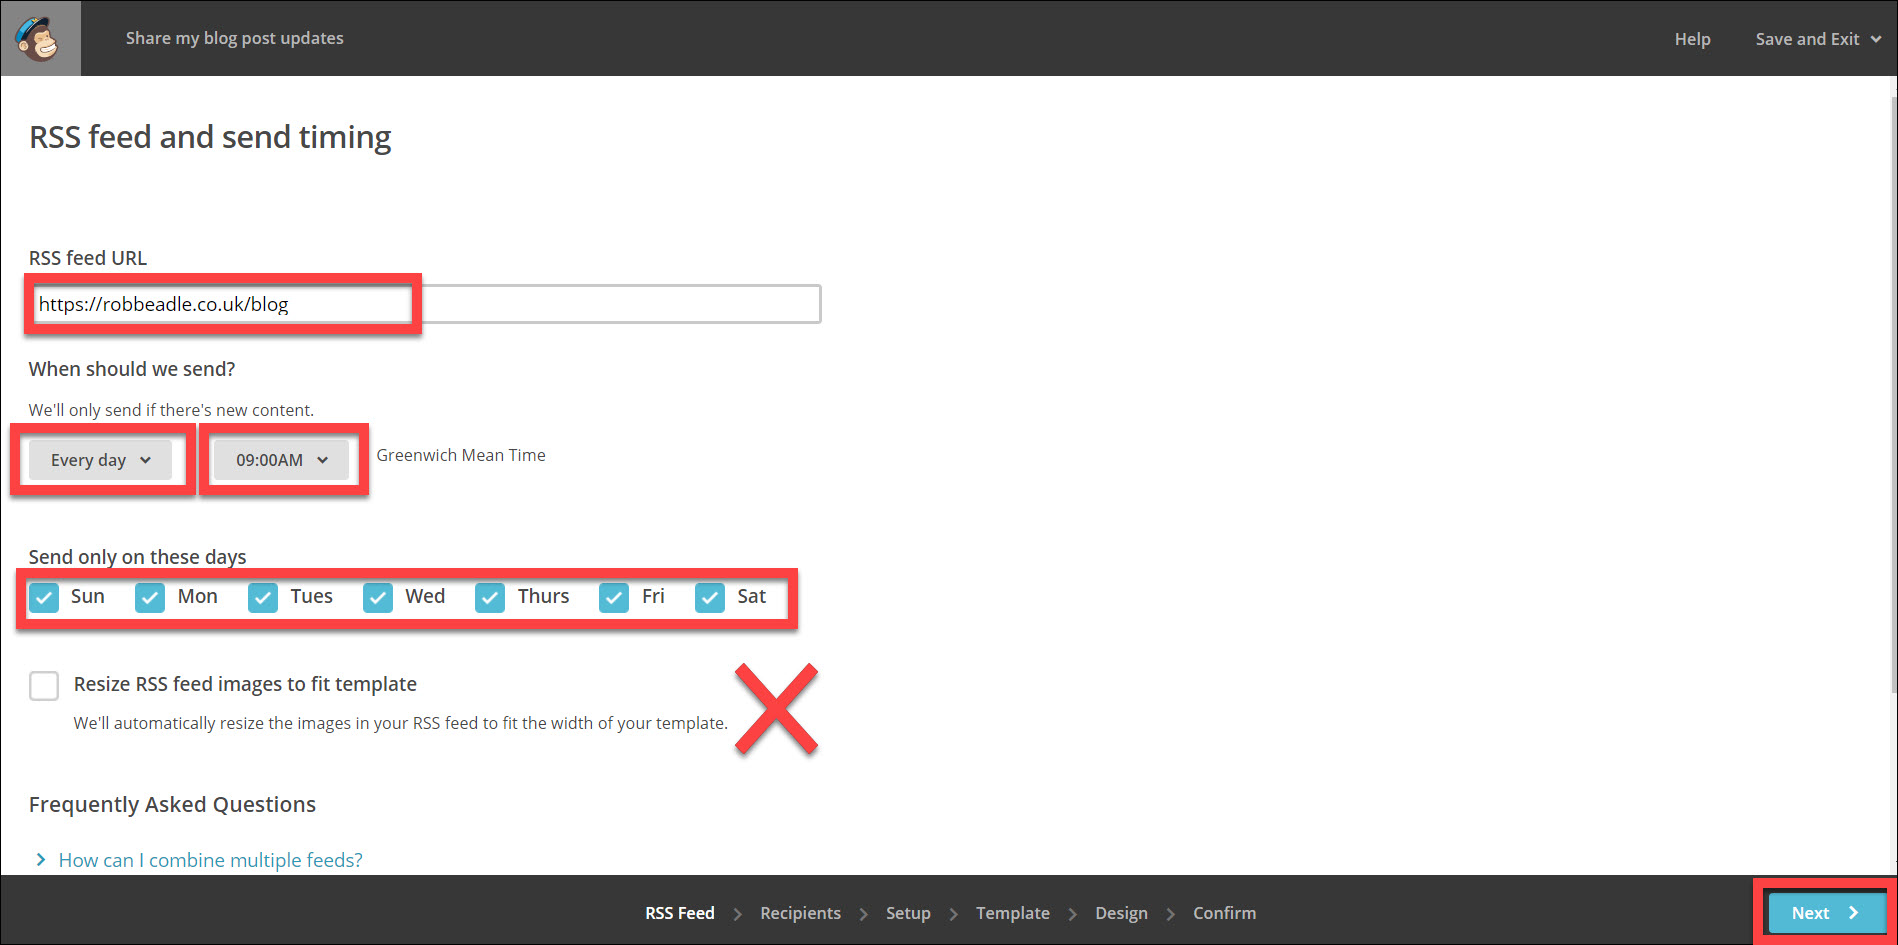
13. Enter the URL of your blog into RSS feed URL. This will usually be yourdomain.com/blog but if you’ve changed the name of your blog page it will be different. If you want to limit the days and times that the blog email is sent, you alter those setting here.
Don’t select the Resize RSS feed images to fit template – otherwise, this causes problems with the Send Images to RSS plugin.
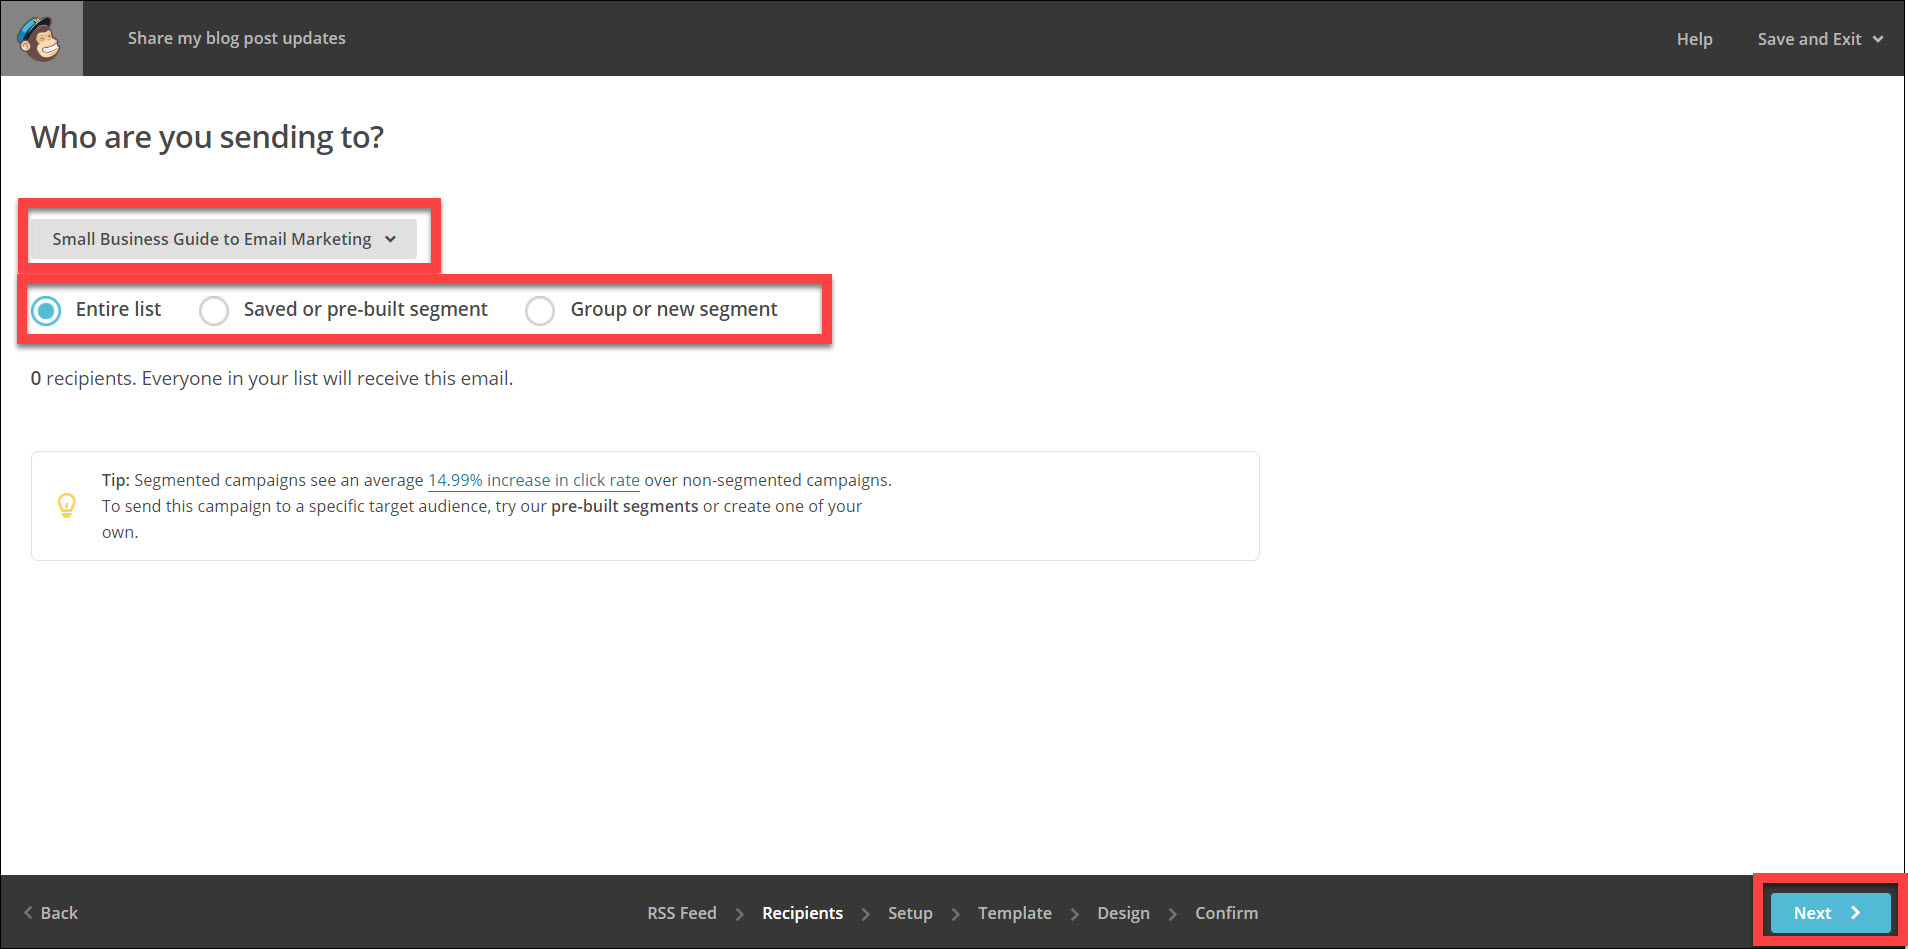
14. Leave these setting unchanged, unless you wish to only send your blog updates to a subset of your subscribers.
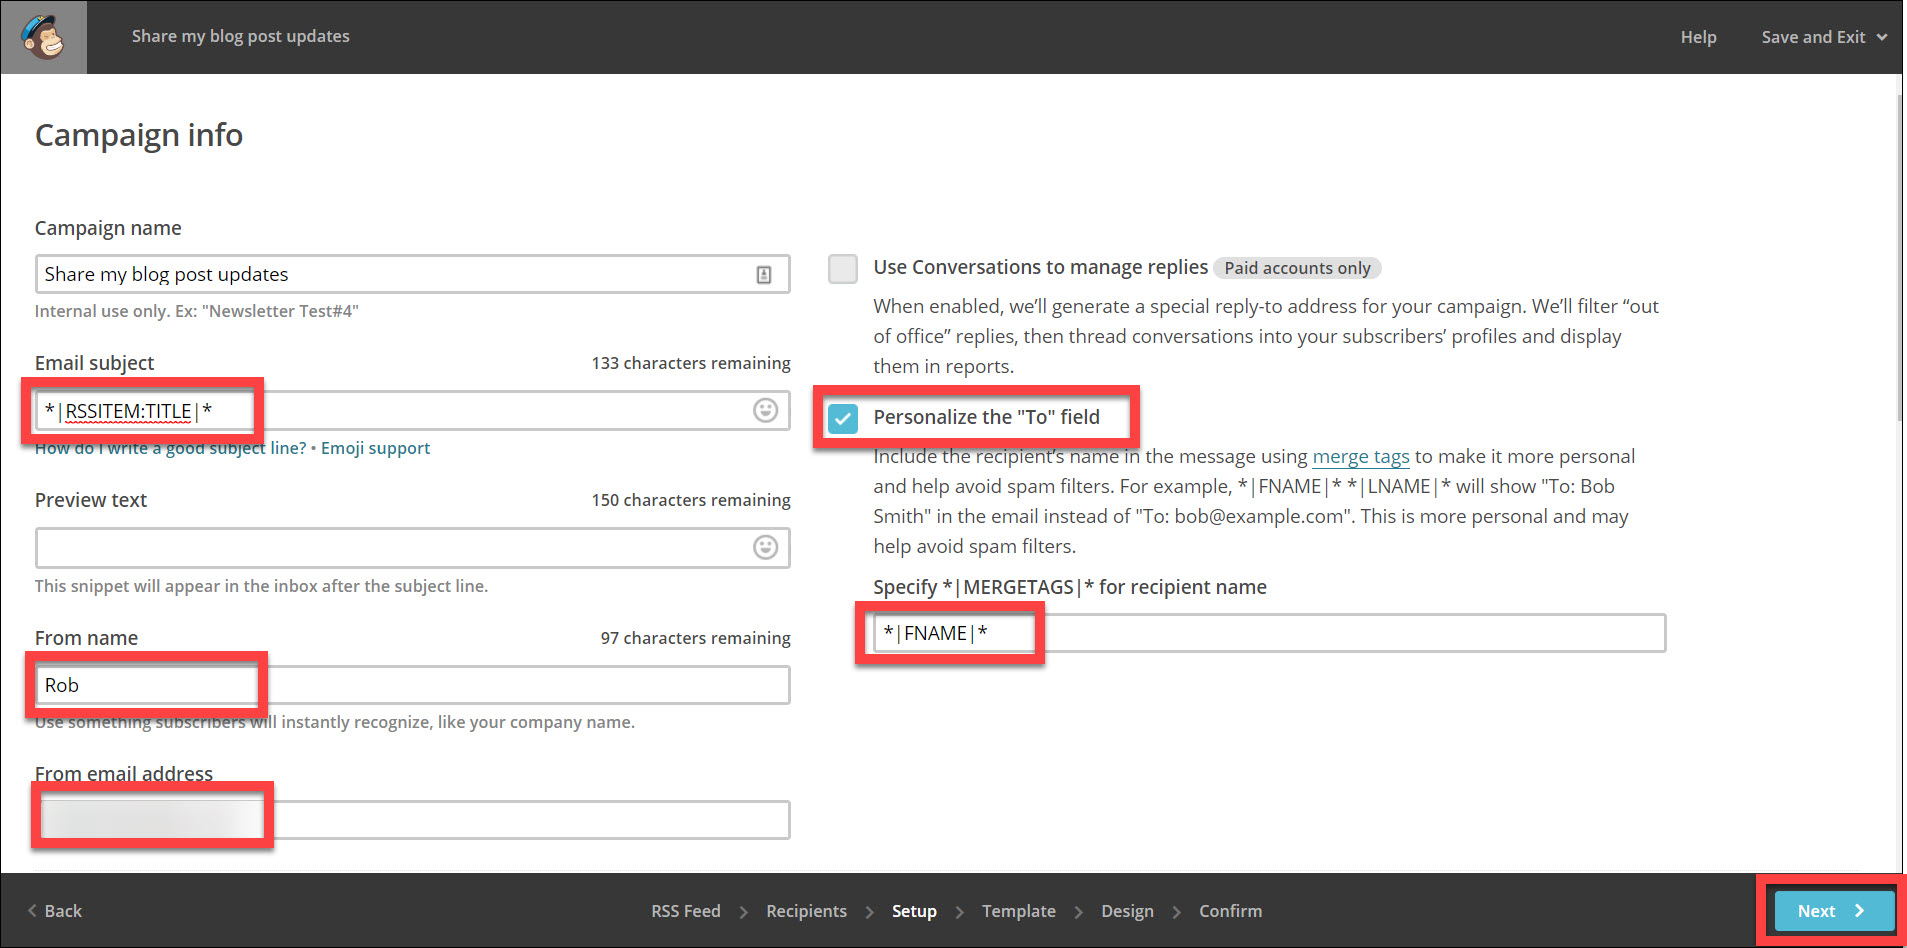
15. To use the name of your blog post as the Email subject, use the Merge Tag *|RSSITEM:TITLE|*. Add the From name and From email address to appear in the email. To personalise the “To” field with the subscriber’s first name enter the Merge Tag *|FNAME|*. Select Next.
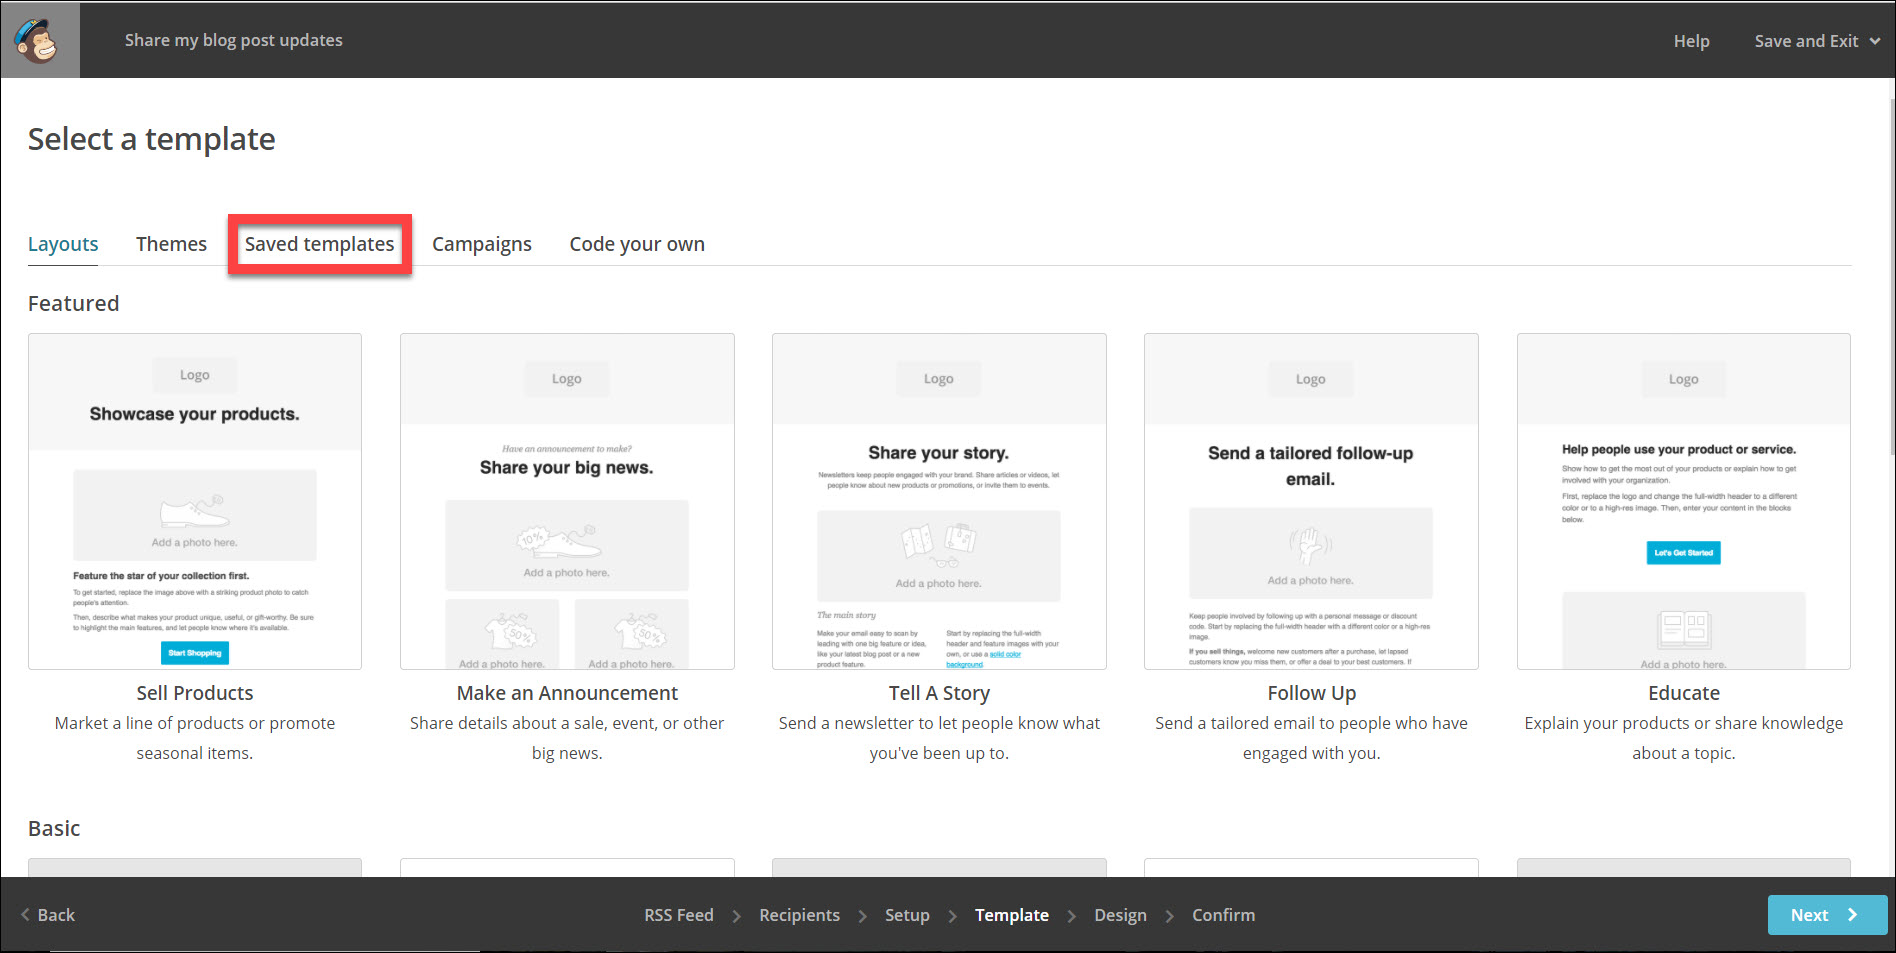
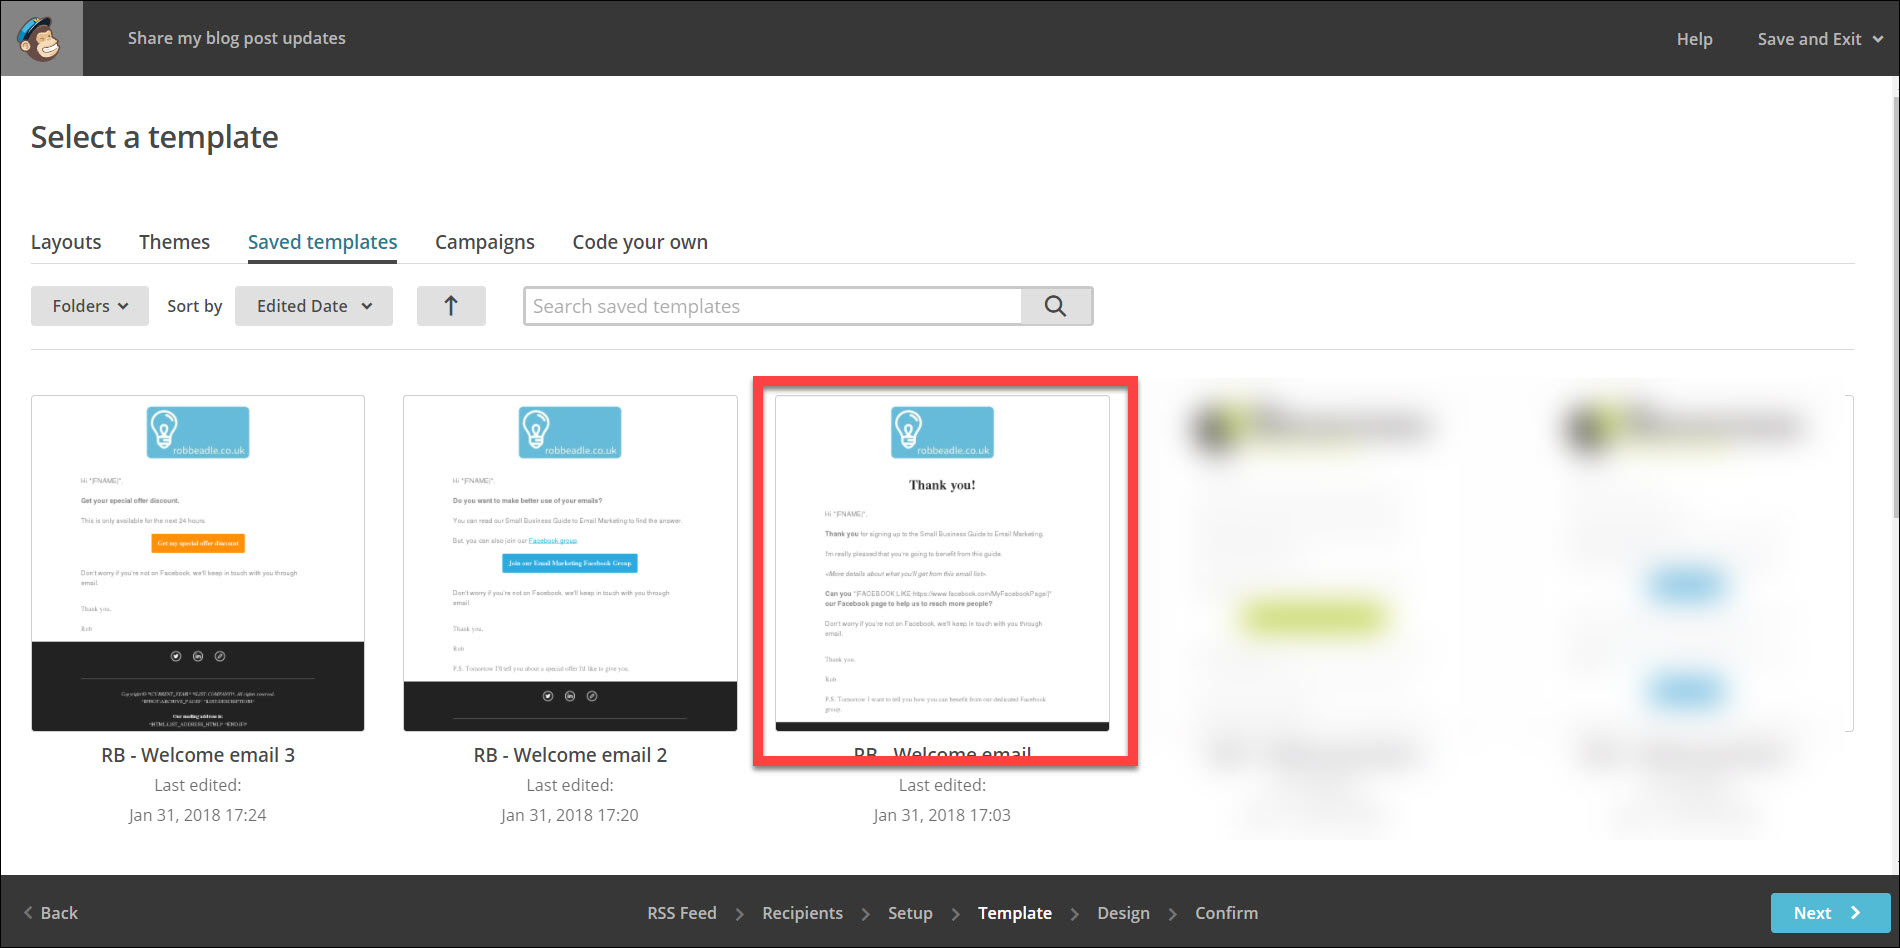
16. Click on Saved templates to use an existing template for your email.
17. Select the template that you want to use.
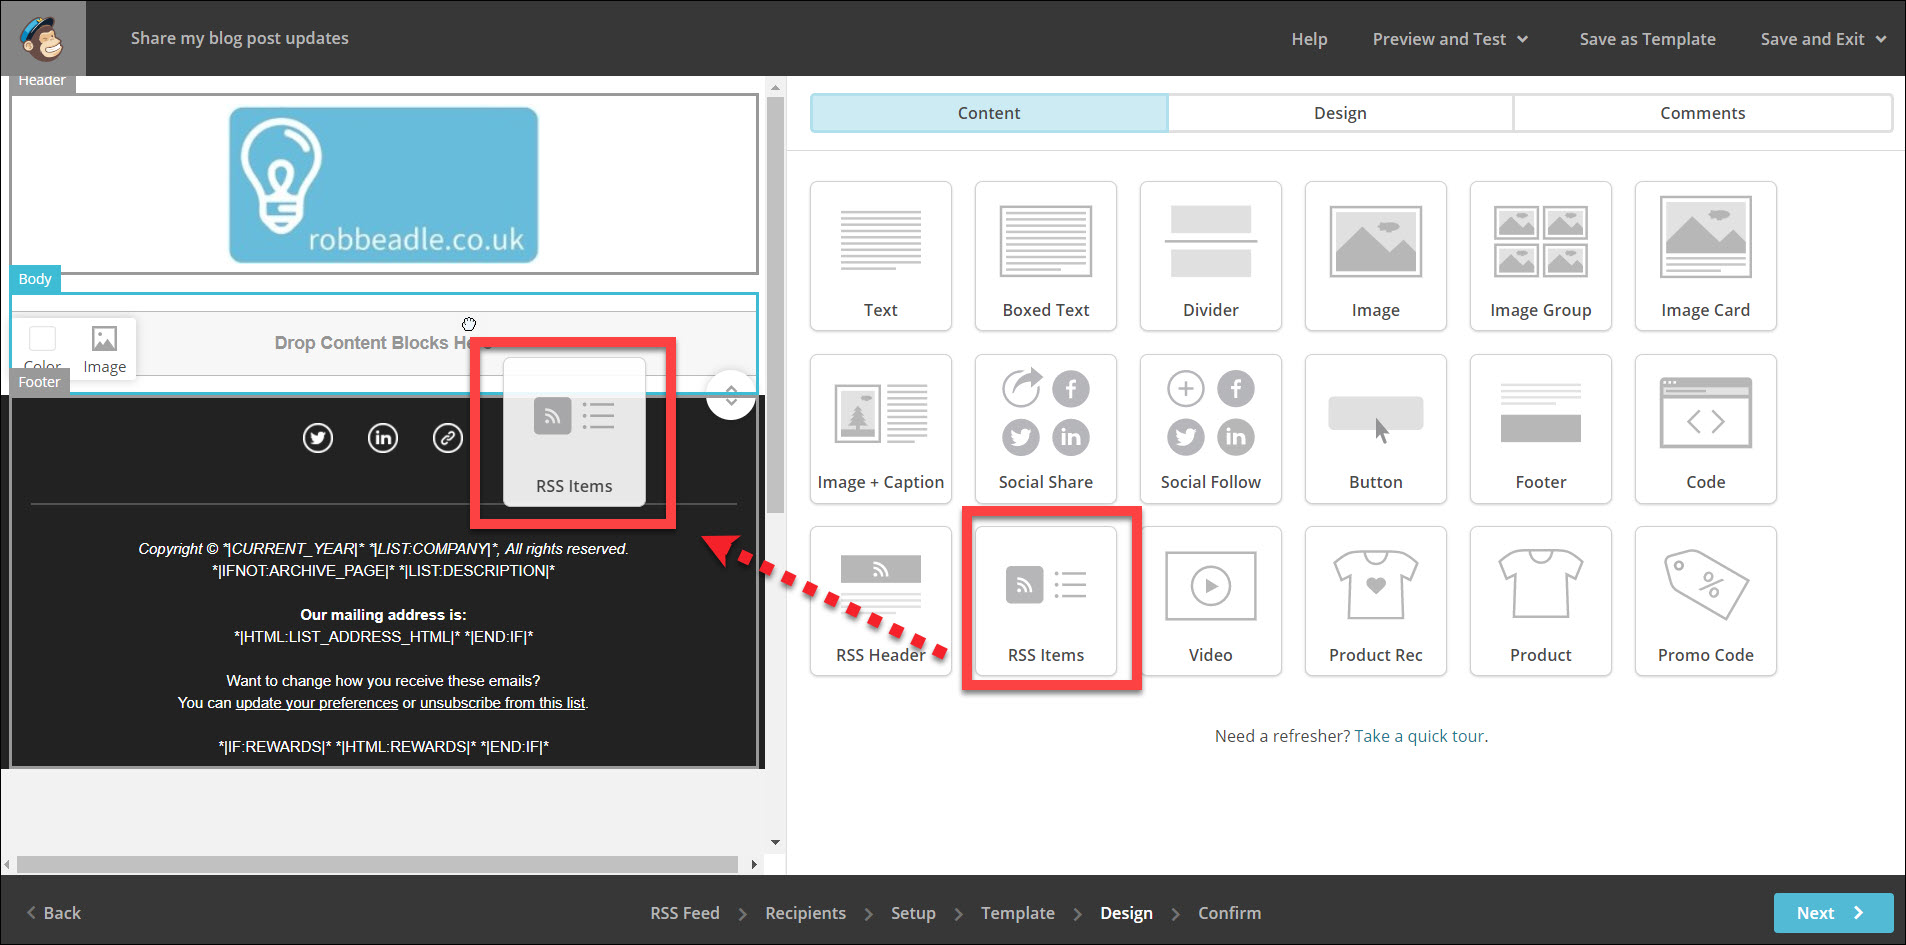
18. Now you’re going to add the content to your email template. To start, click on the RSS Items button.
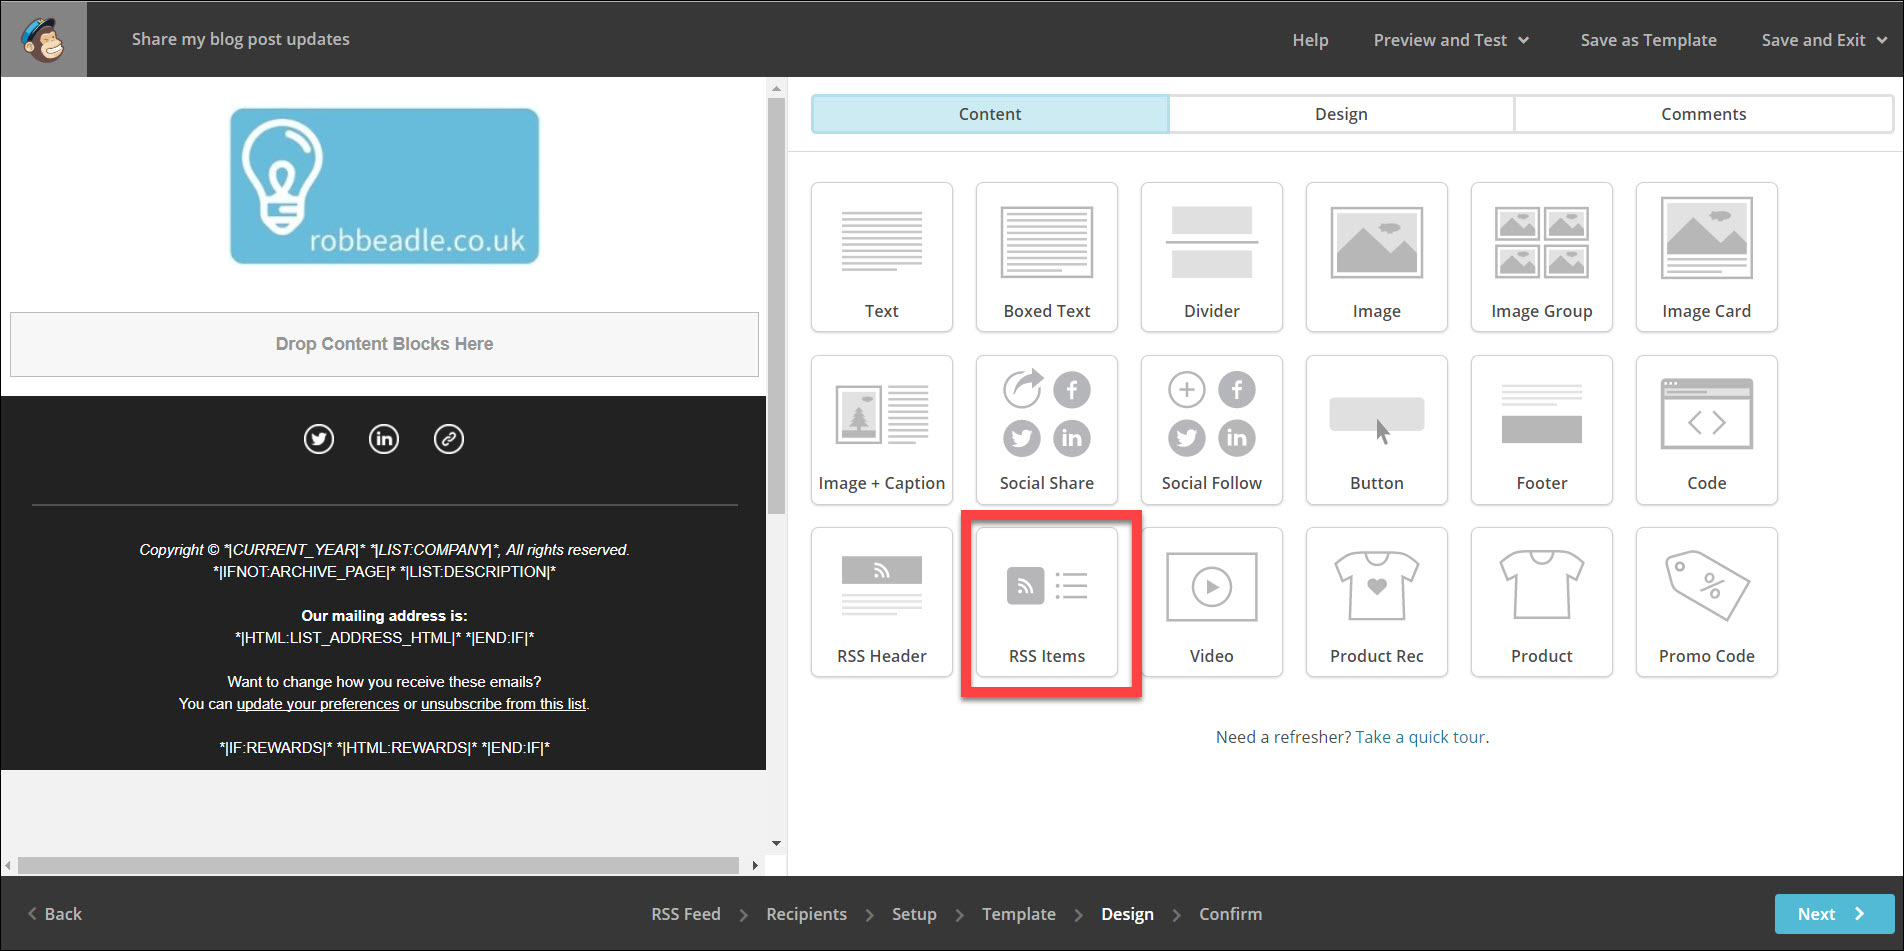
19. Drag and drop the RSS Items button into your email template.
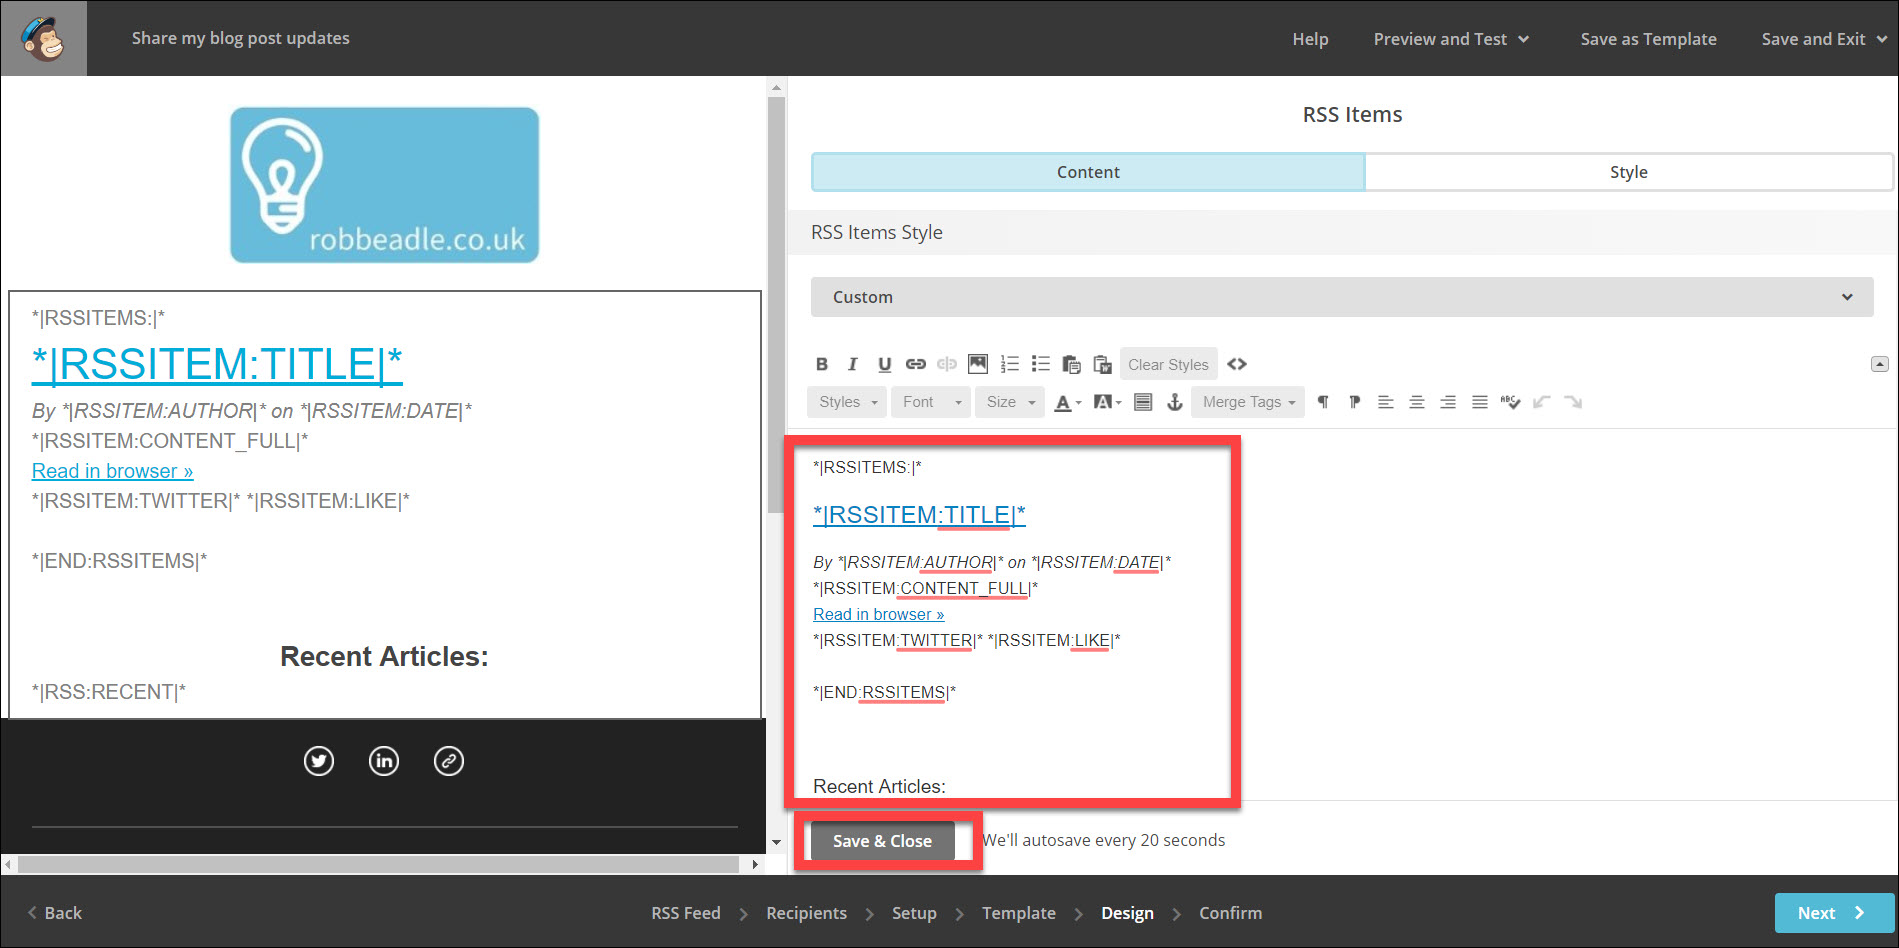
20. This is the default RSS information that will appear in your email. Click Save & Close.
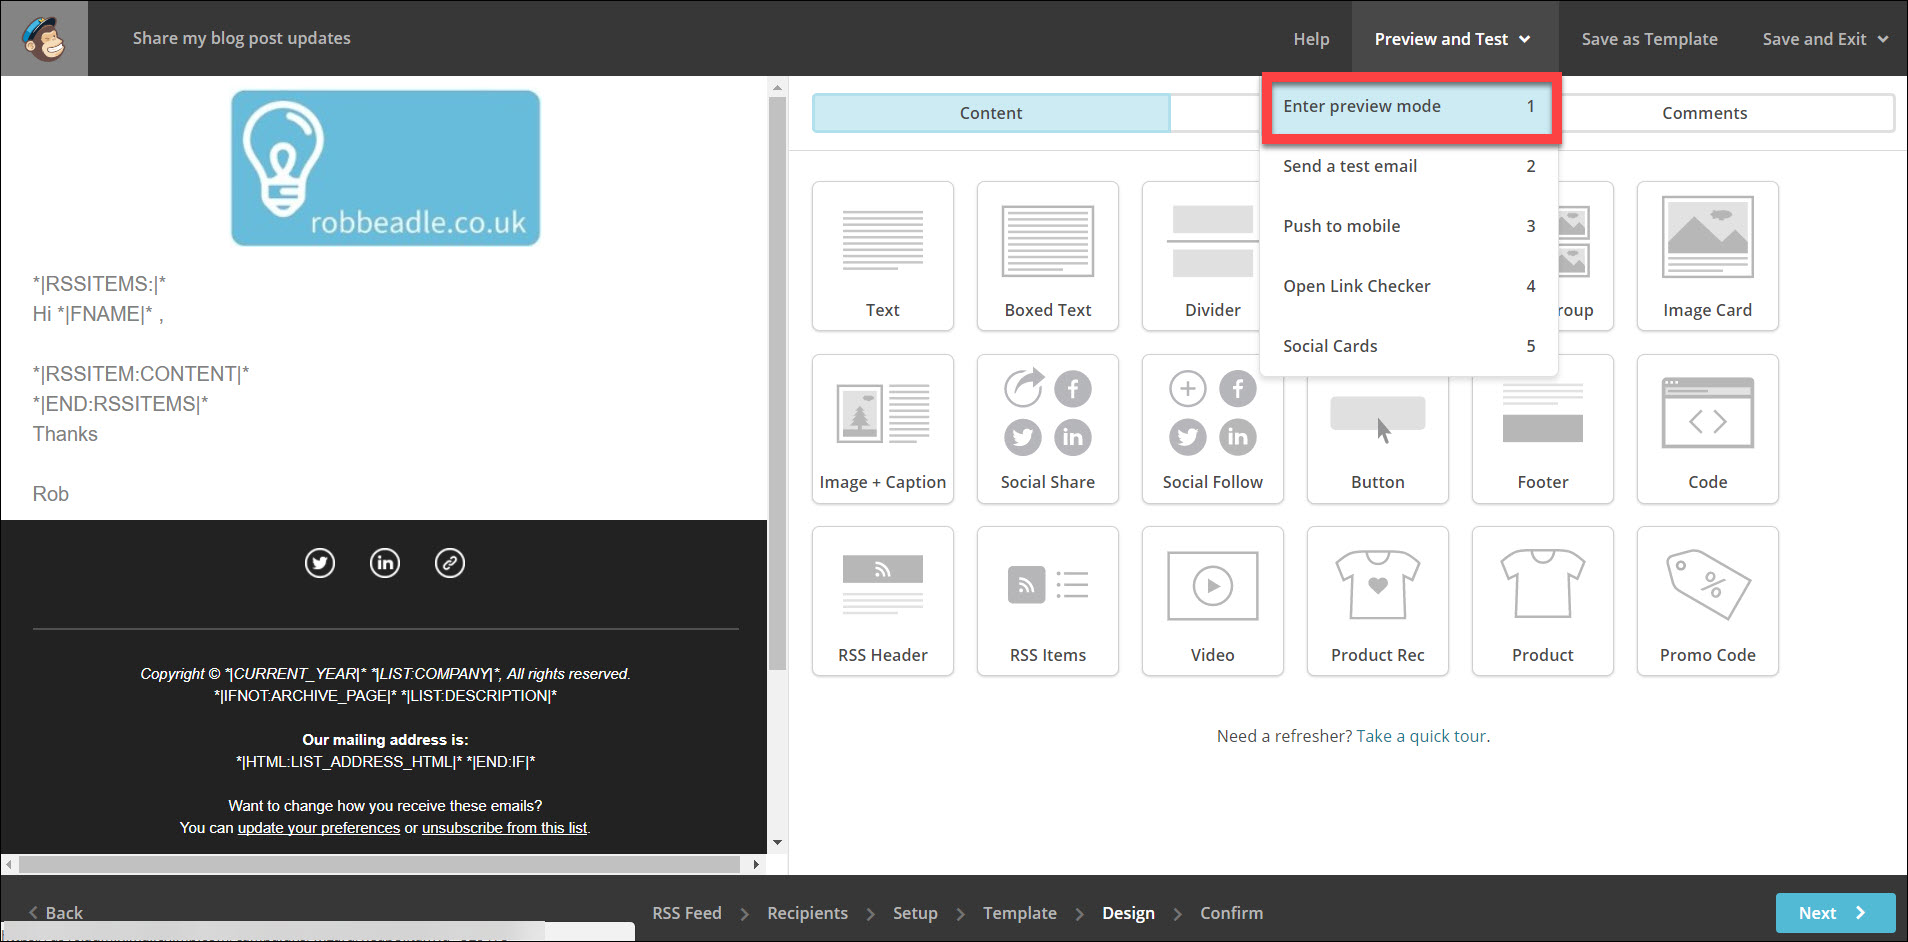
21. Select Enter preview mode to see what the default email will look like.
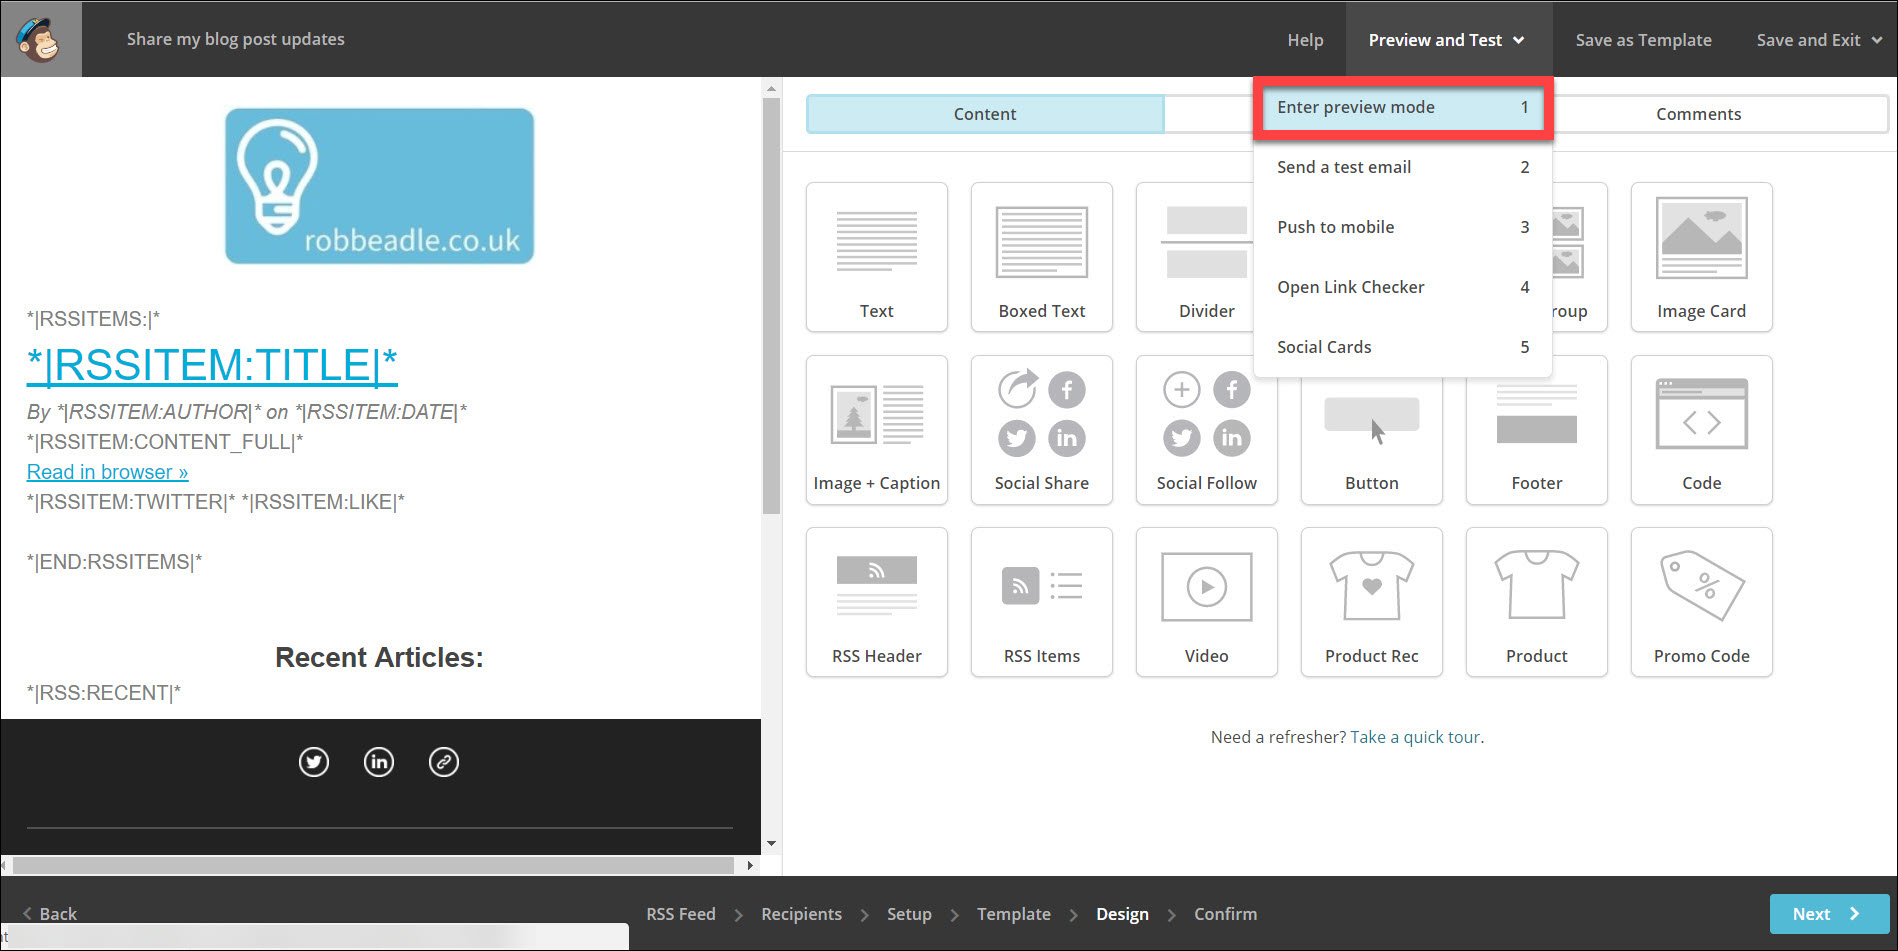
22. View how the email appears.
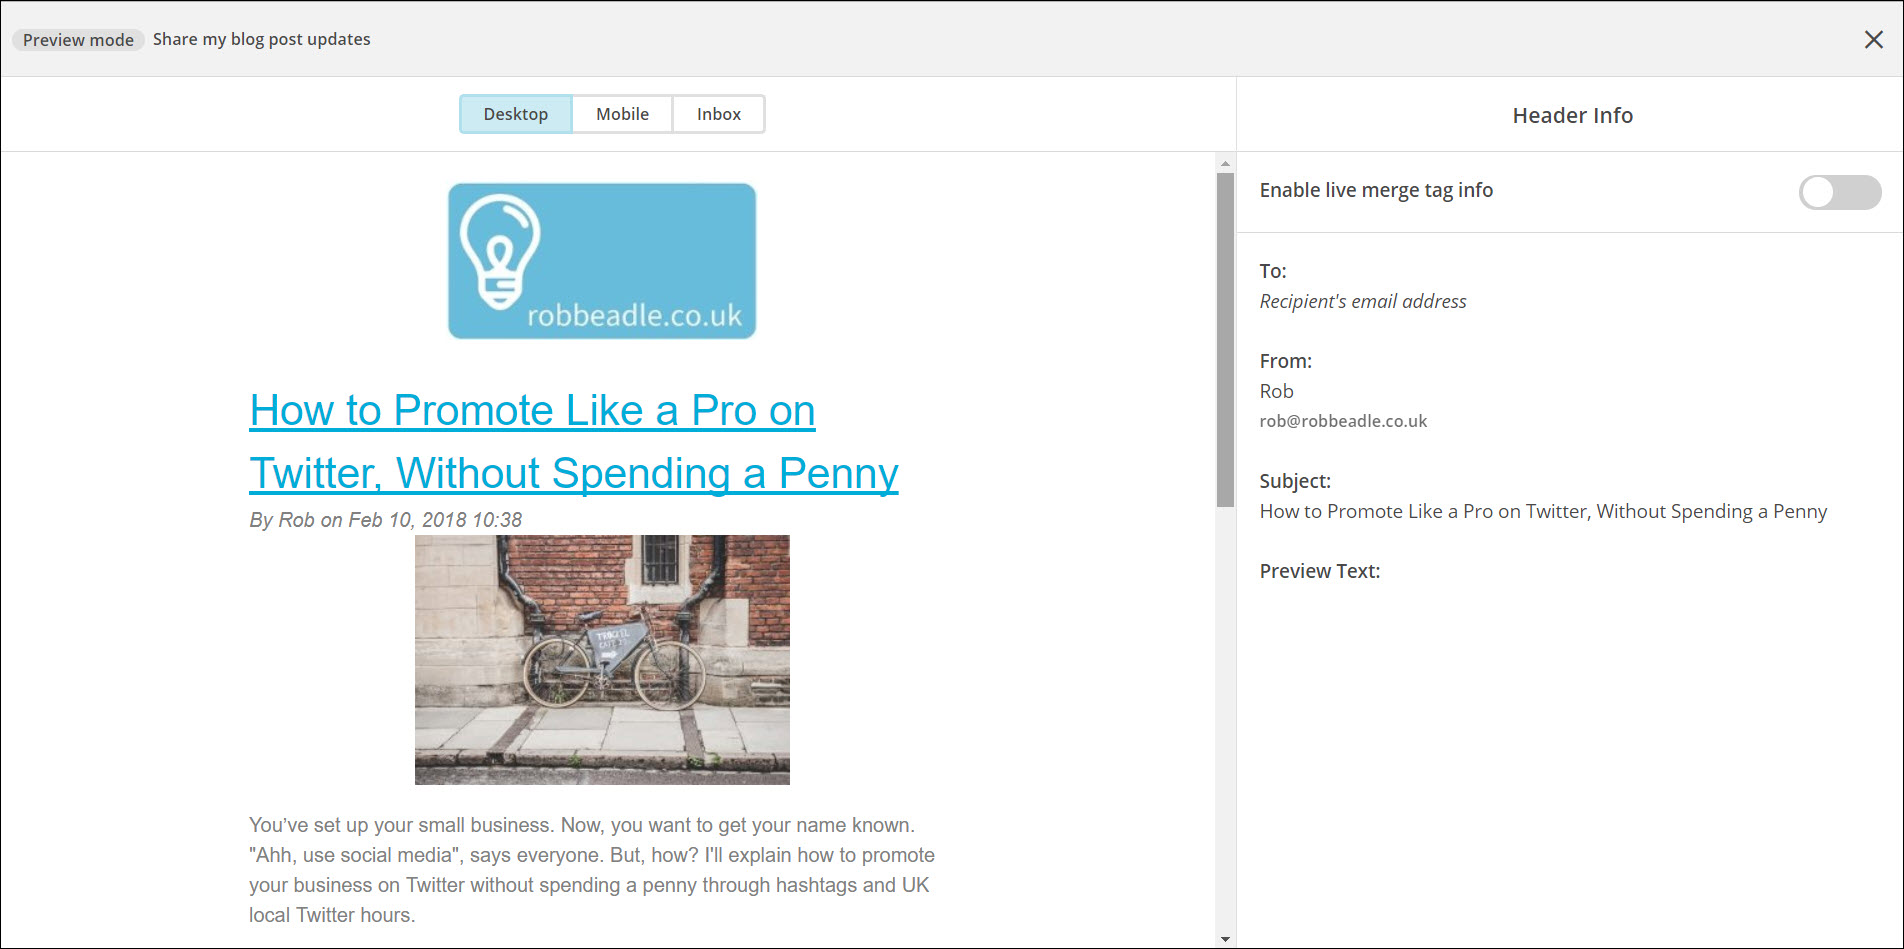
23. Scroll down to see how the rest of the email appears.
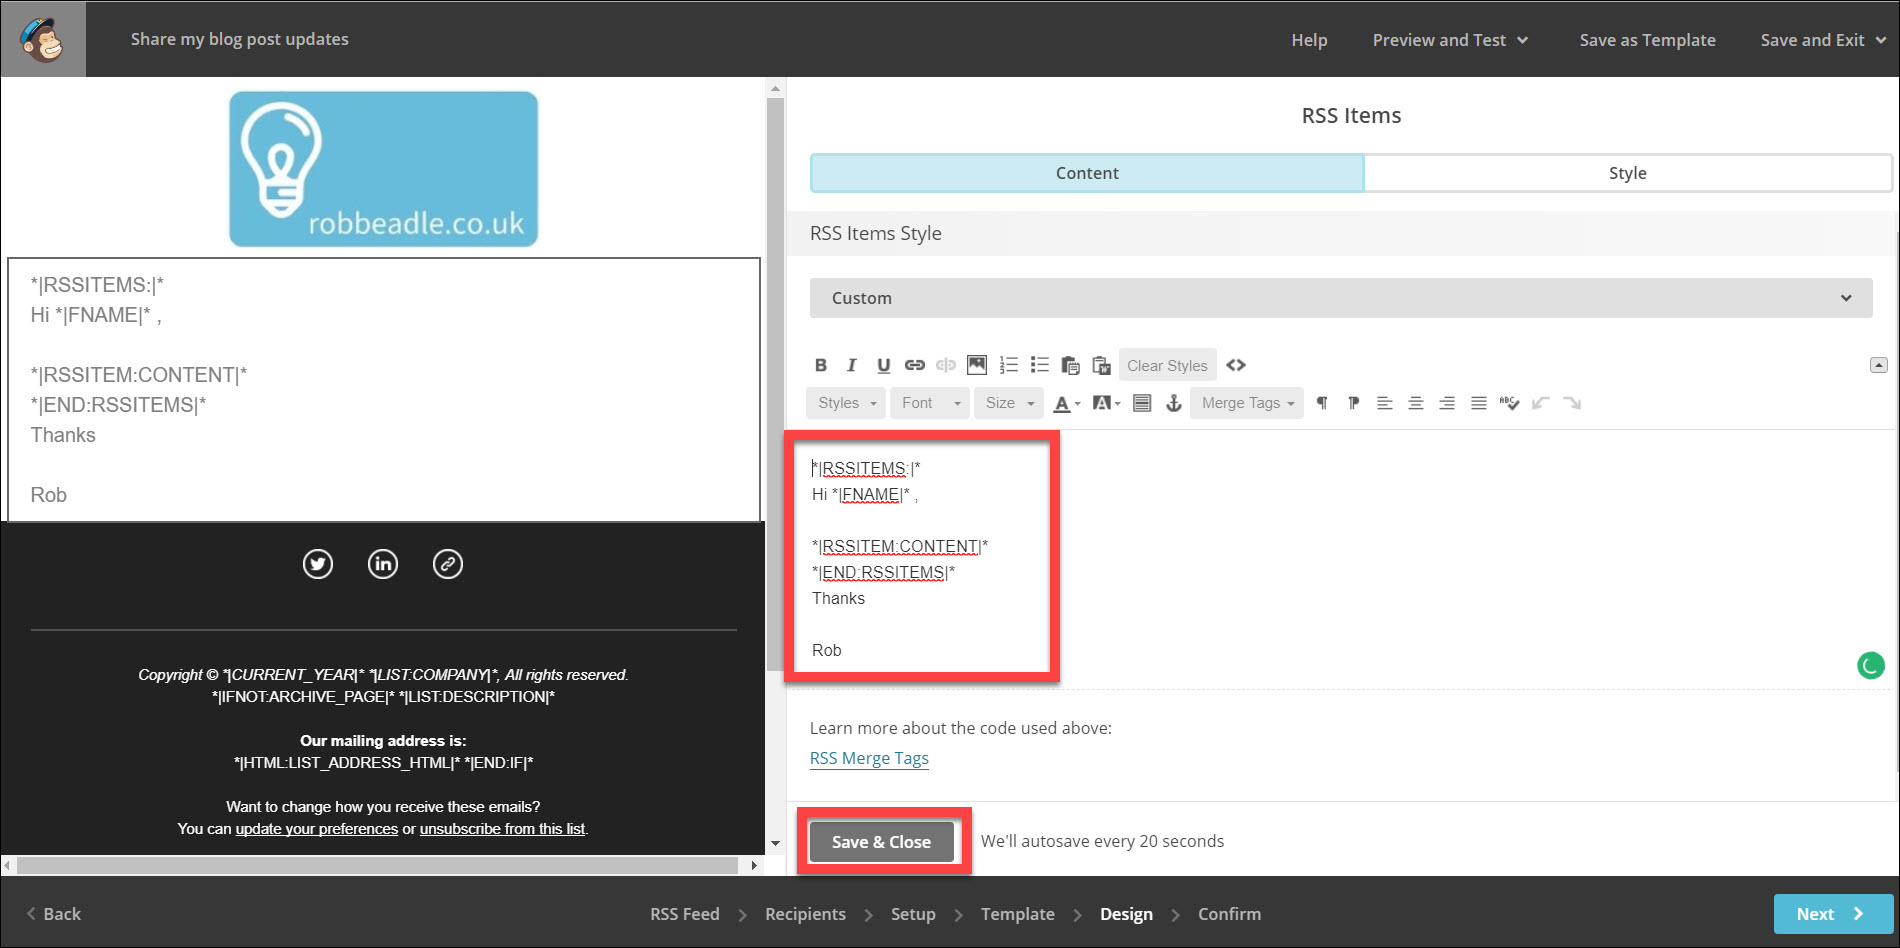
24. For a simpler looking email (that doesn’t include the author name, date etc), change the RSS information to this:
*|RSSITEMS:|*
Hi *|FNAME|* ,
*|RSSITEM:CONTENT|*
*|END:RSSITEMS|*
Click Save & Close.
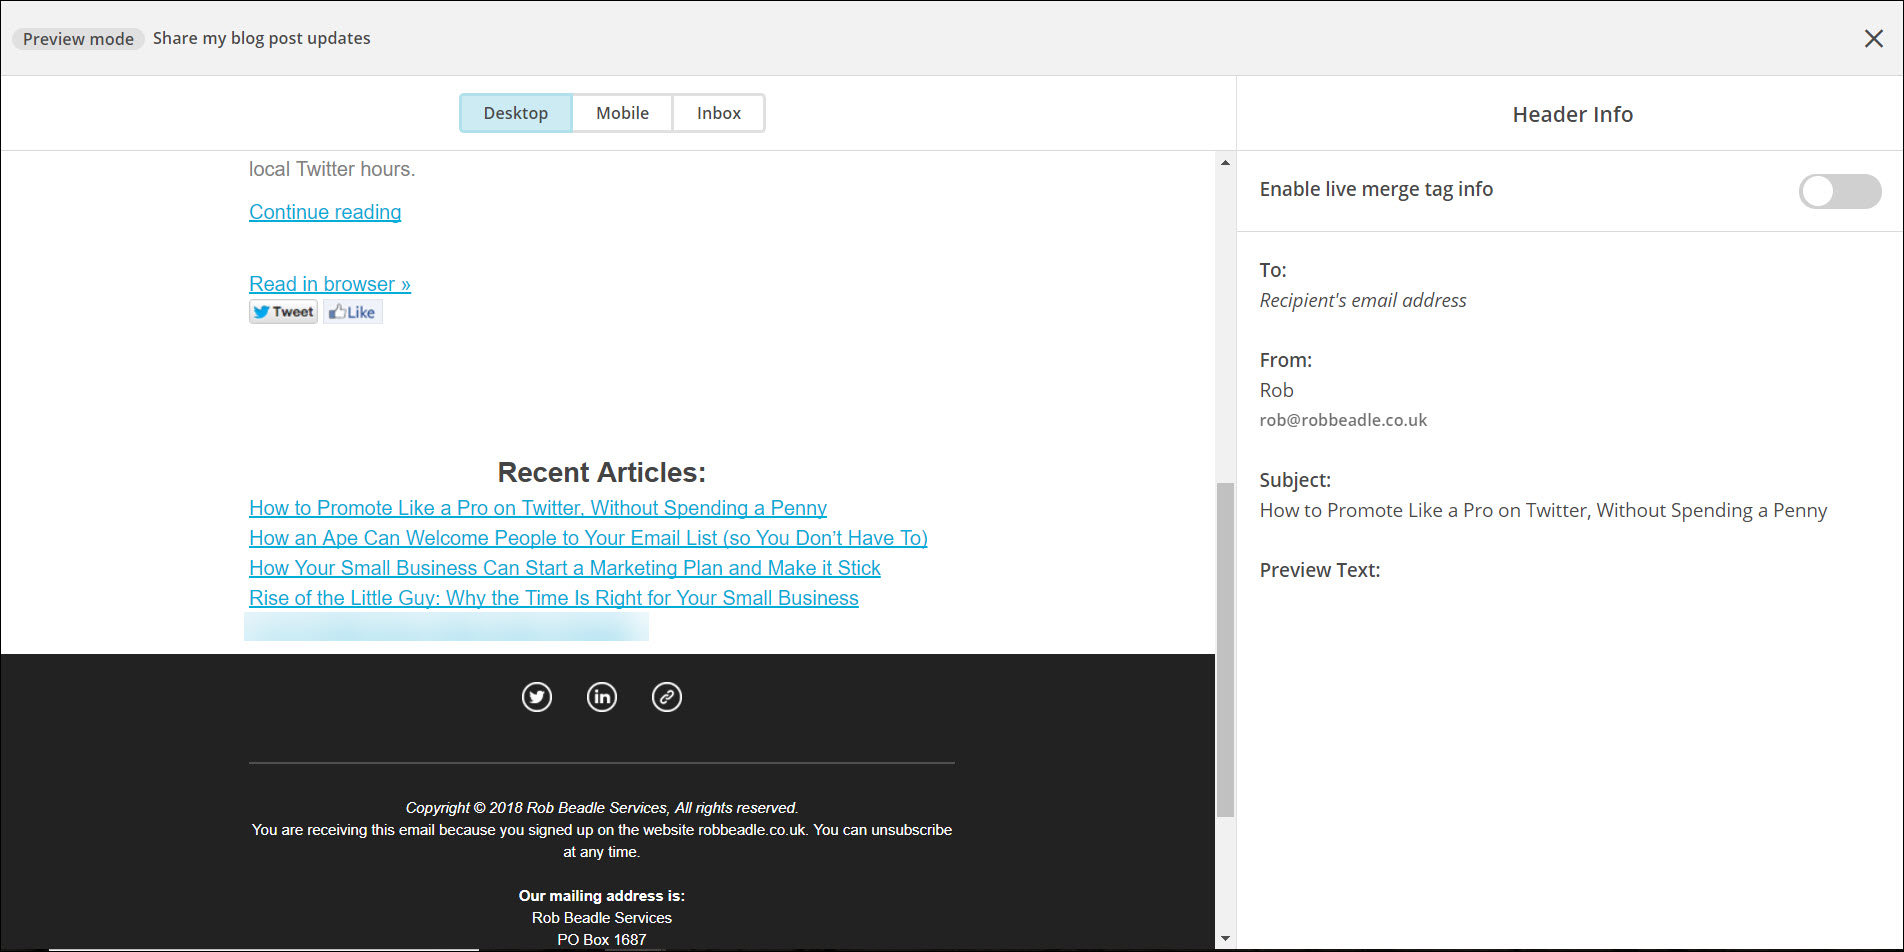
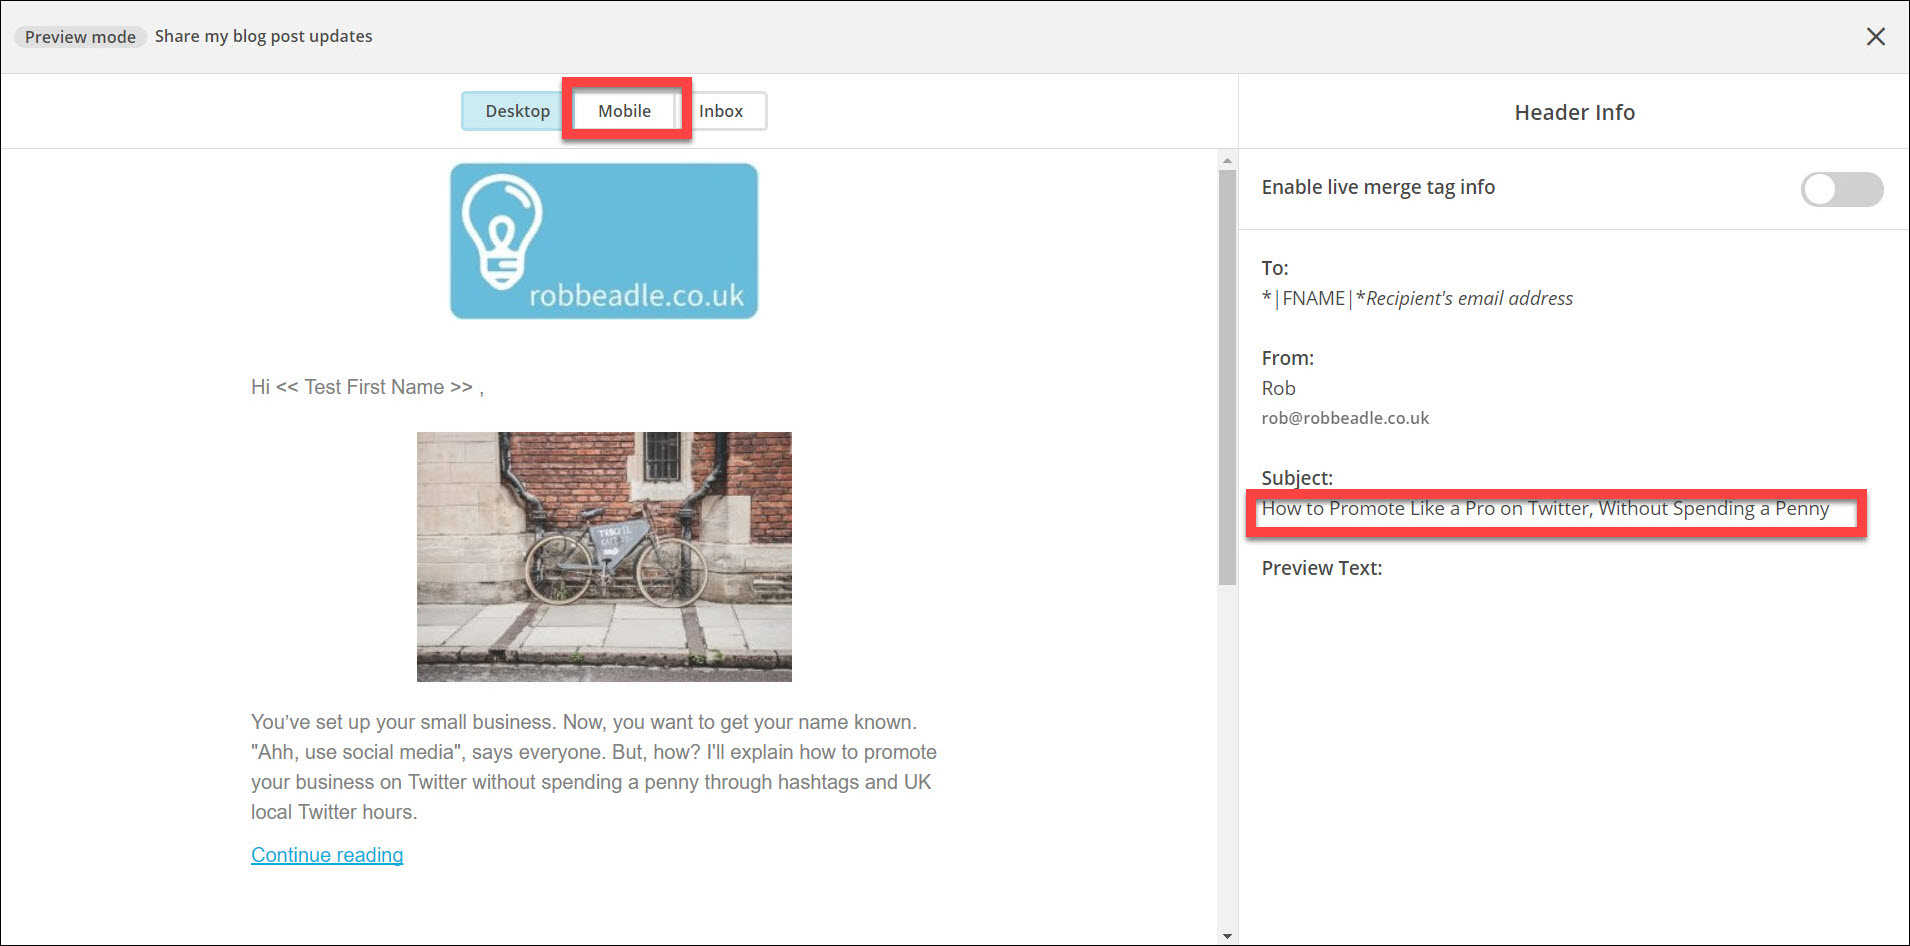
25. Select Enter preview mode.
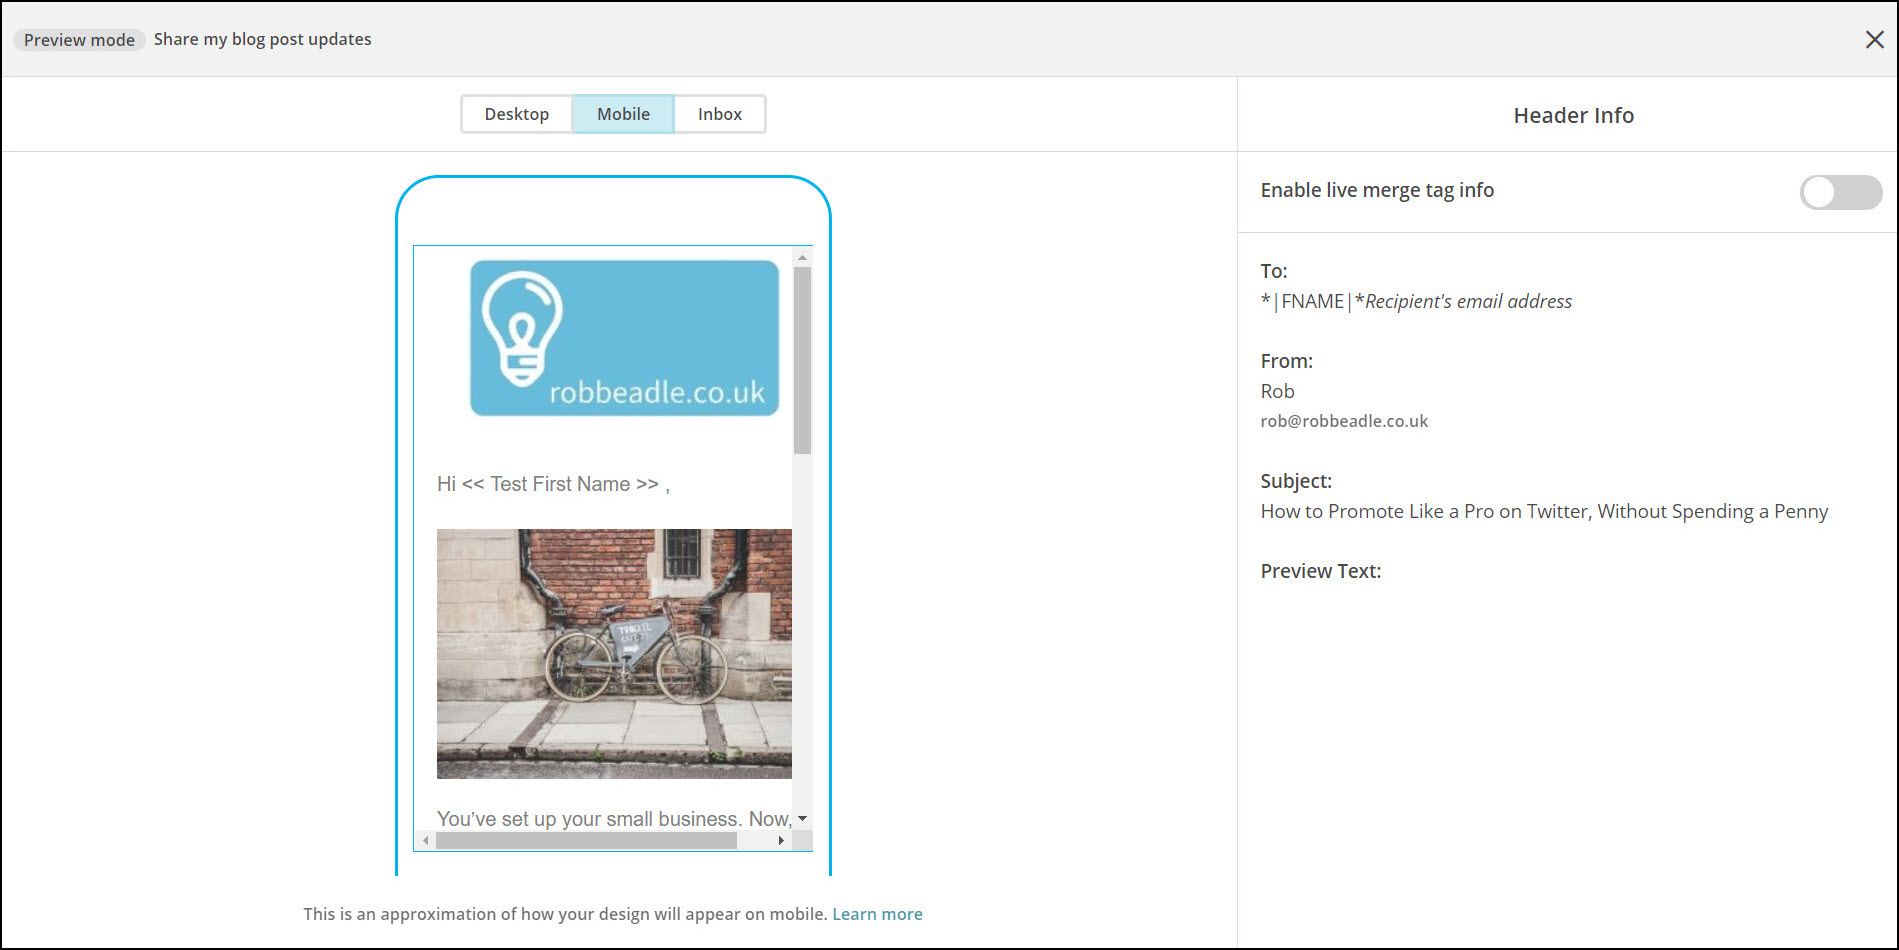
26. This is the preview of your email. Check that the blog post title appears correctly under Subject. Select Mobile to preview how the email will appear on a mobile.
27. Check that you’re happy with the layout of the email. Close the preview window.
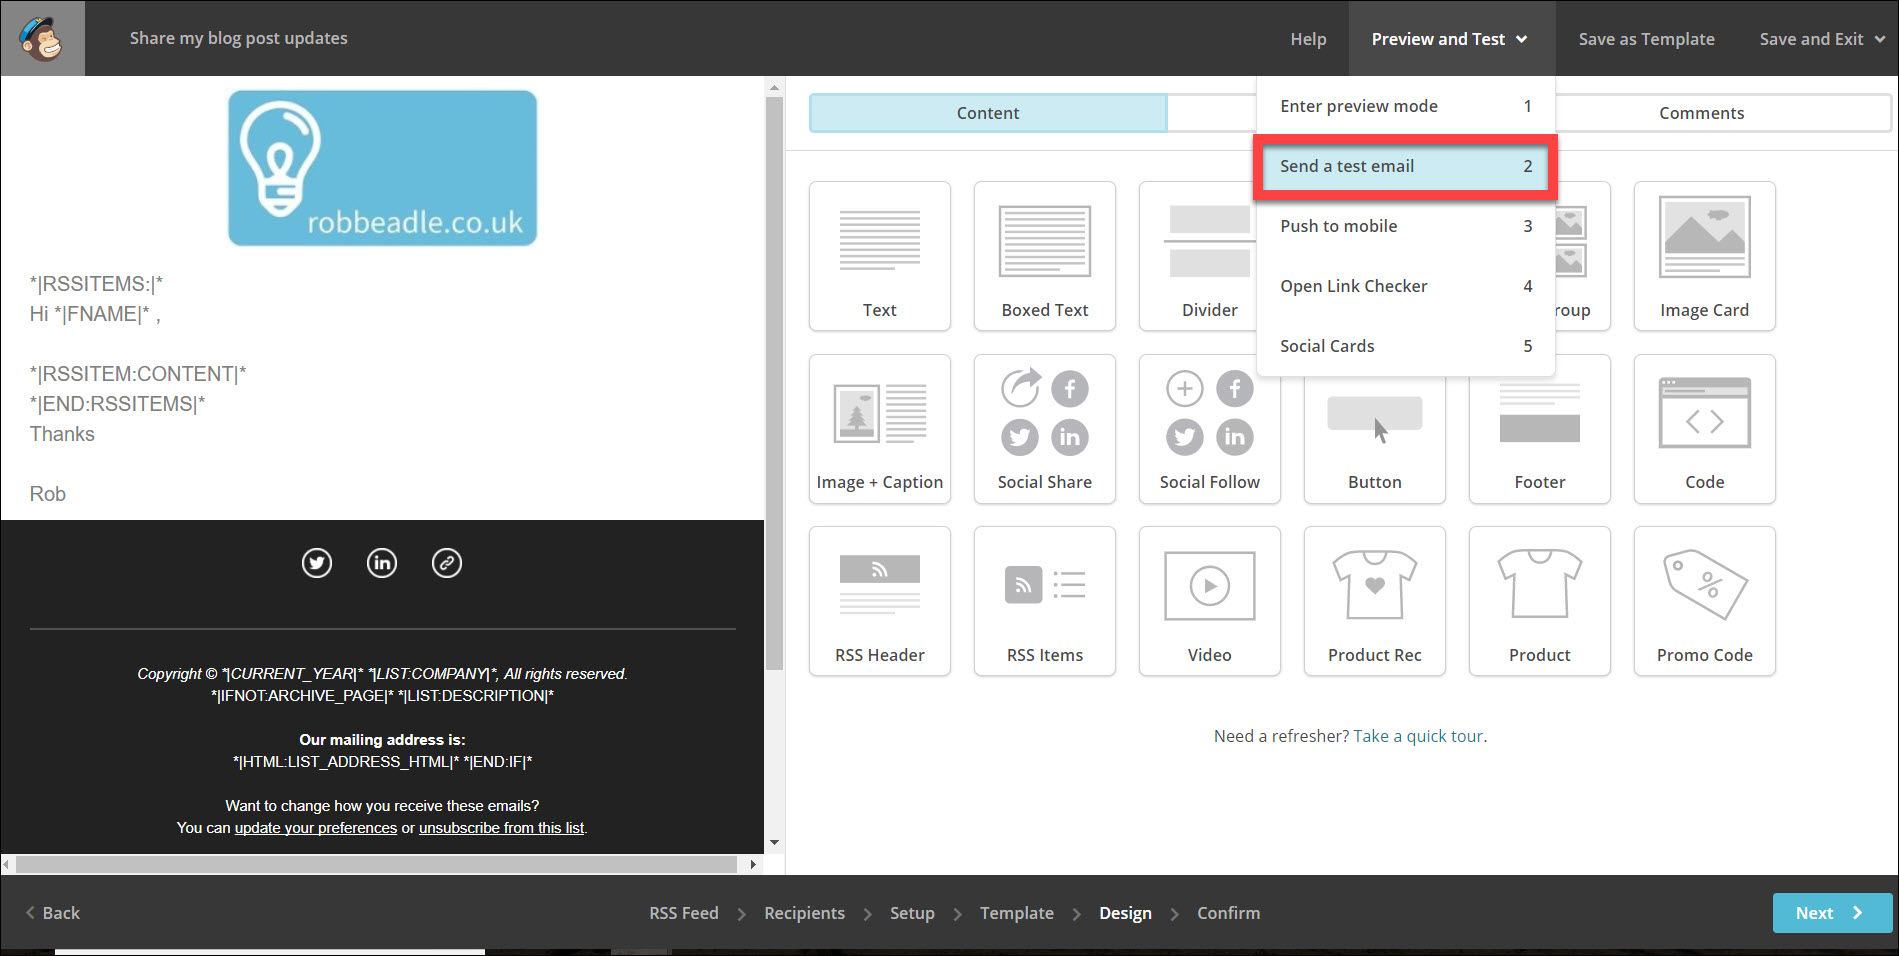
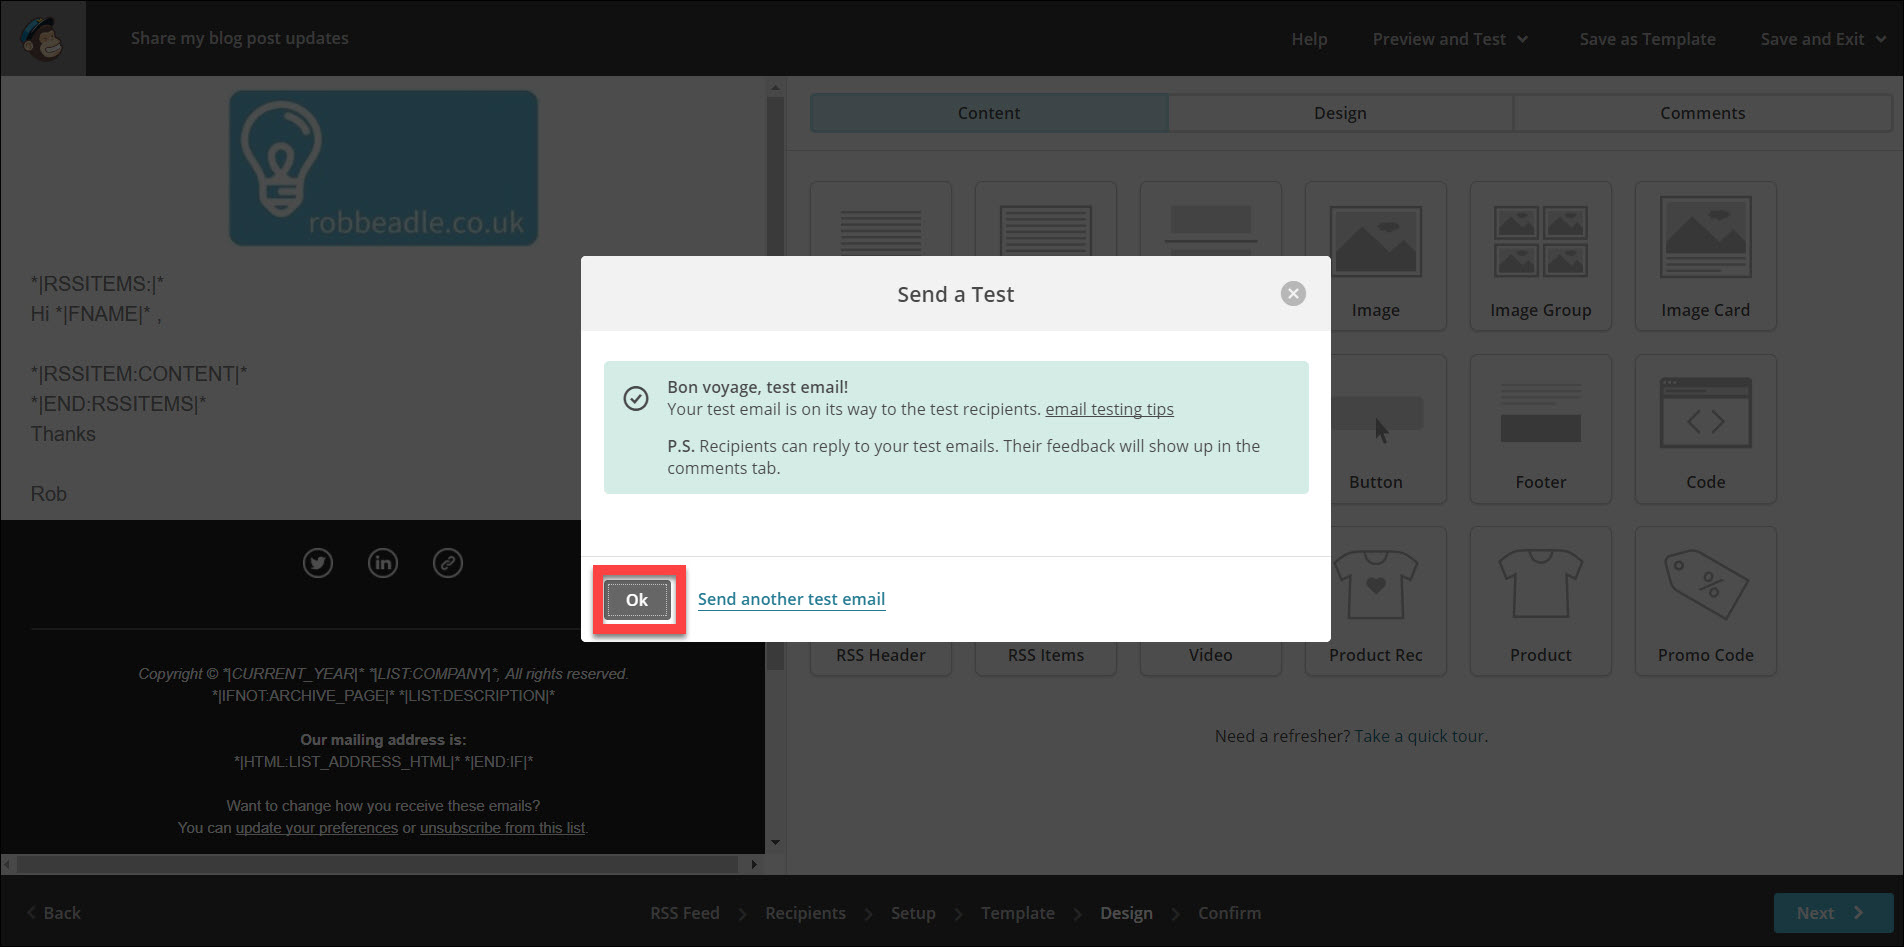
28. Once you’re happy with the previews of your email, select Send a test email for the final check.
29. Once the test email has been sent, click Ok and then check the inbox of your test email address.
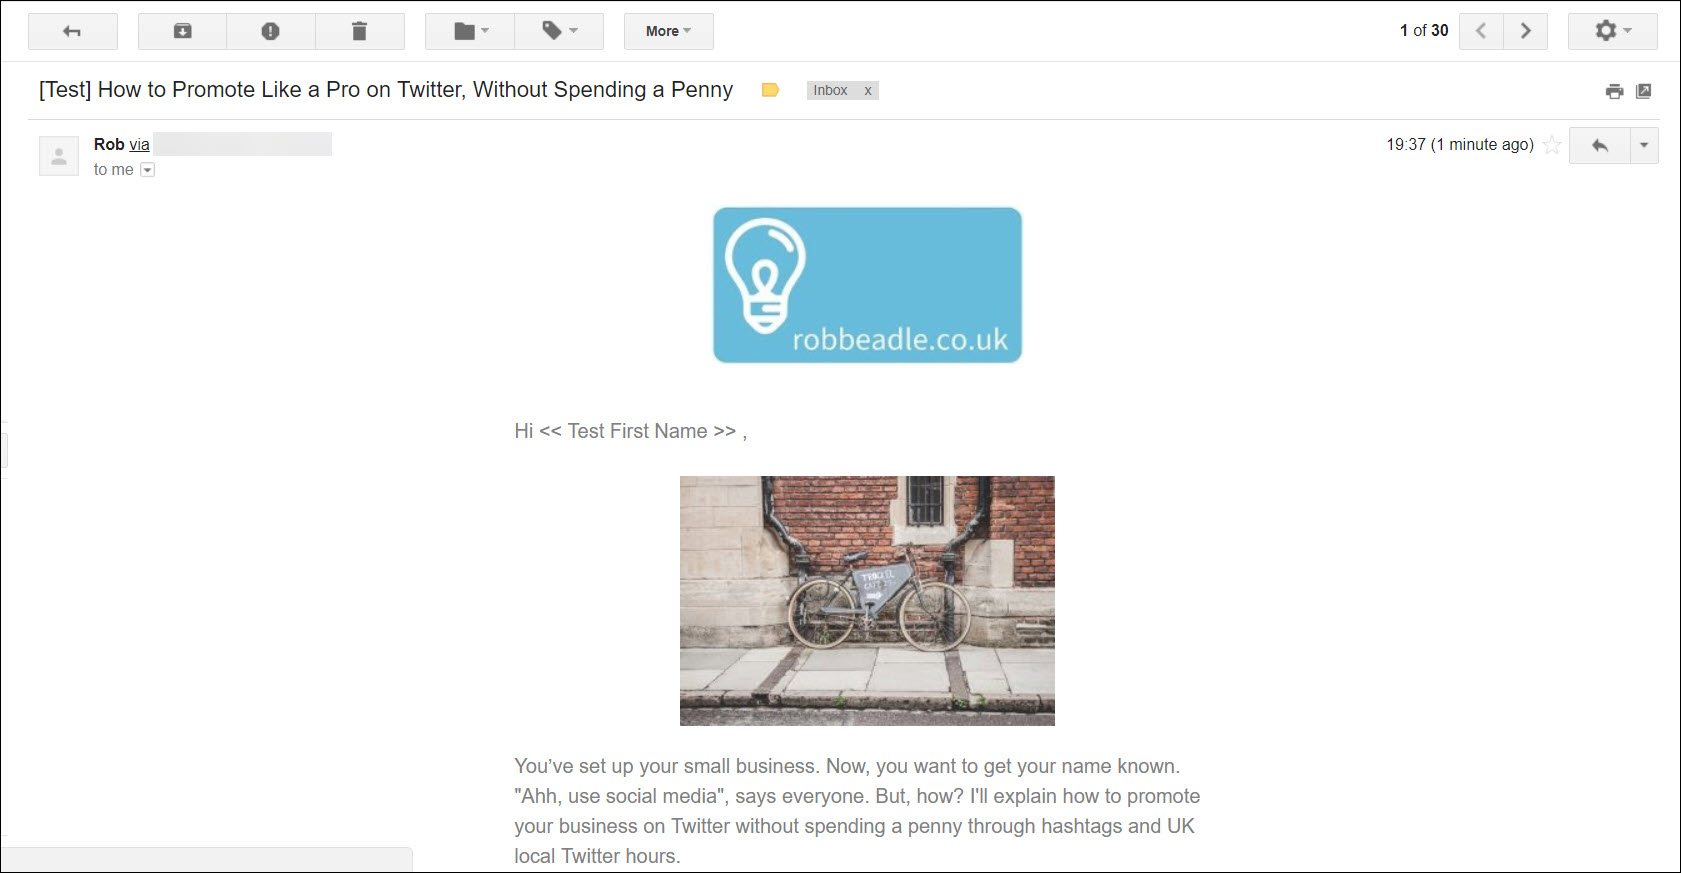
30. Check how the email appears in your email account. Look at the text, links and images.
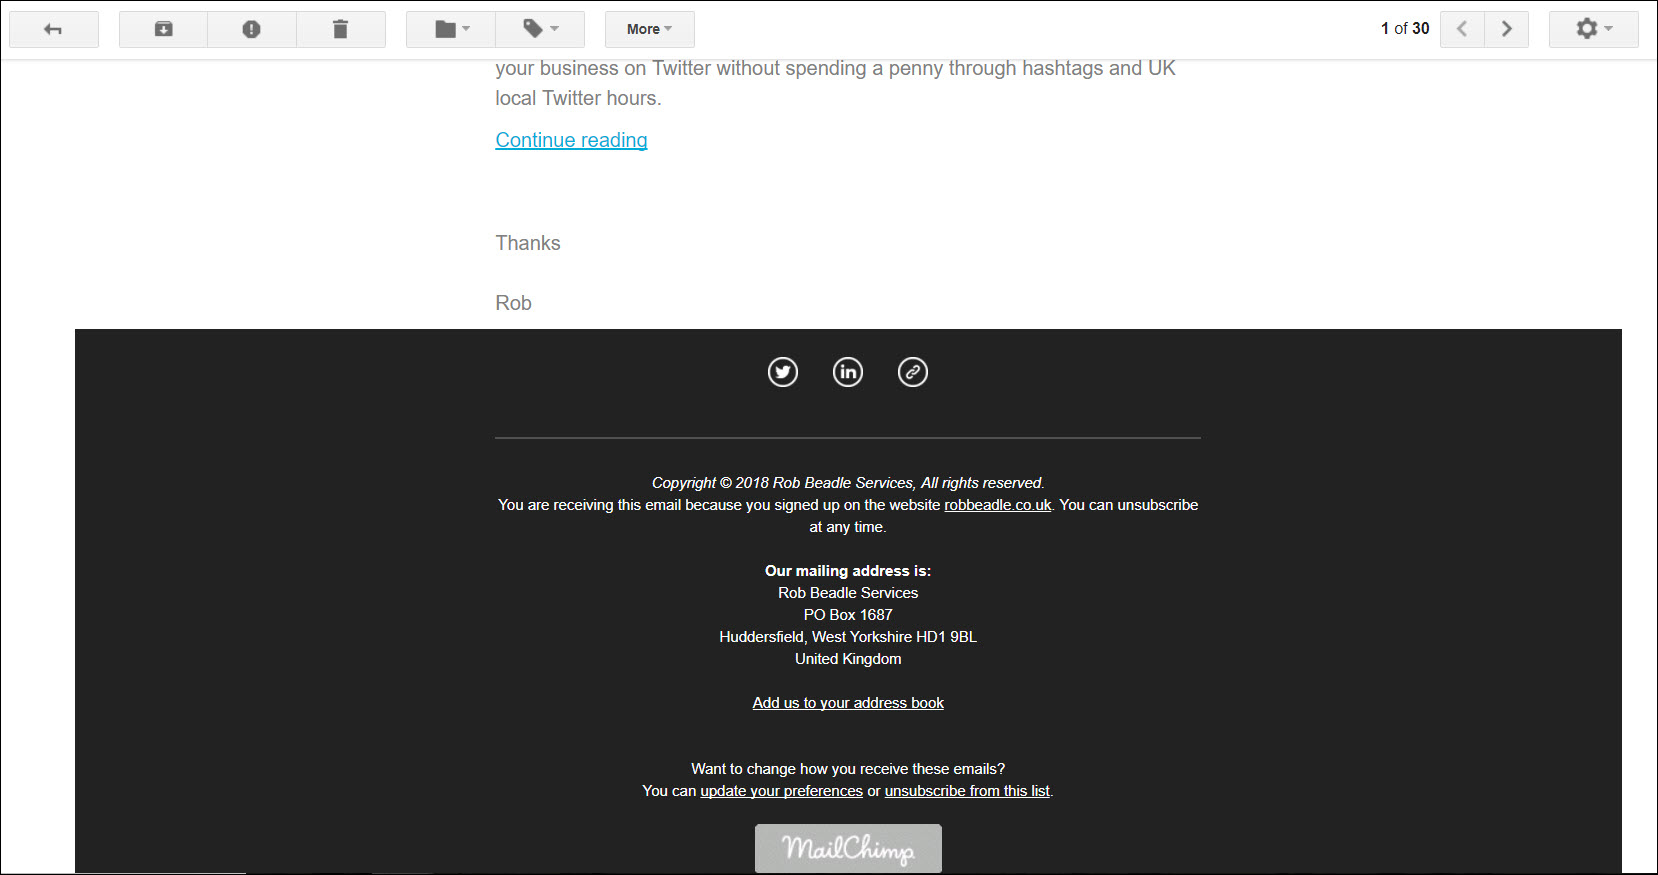
31. Scroll down and check the rest of the email and footer.
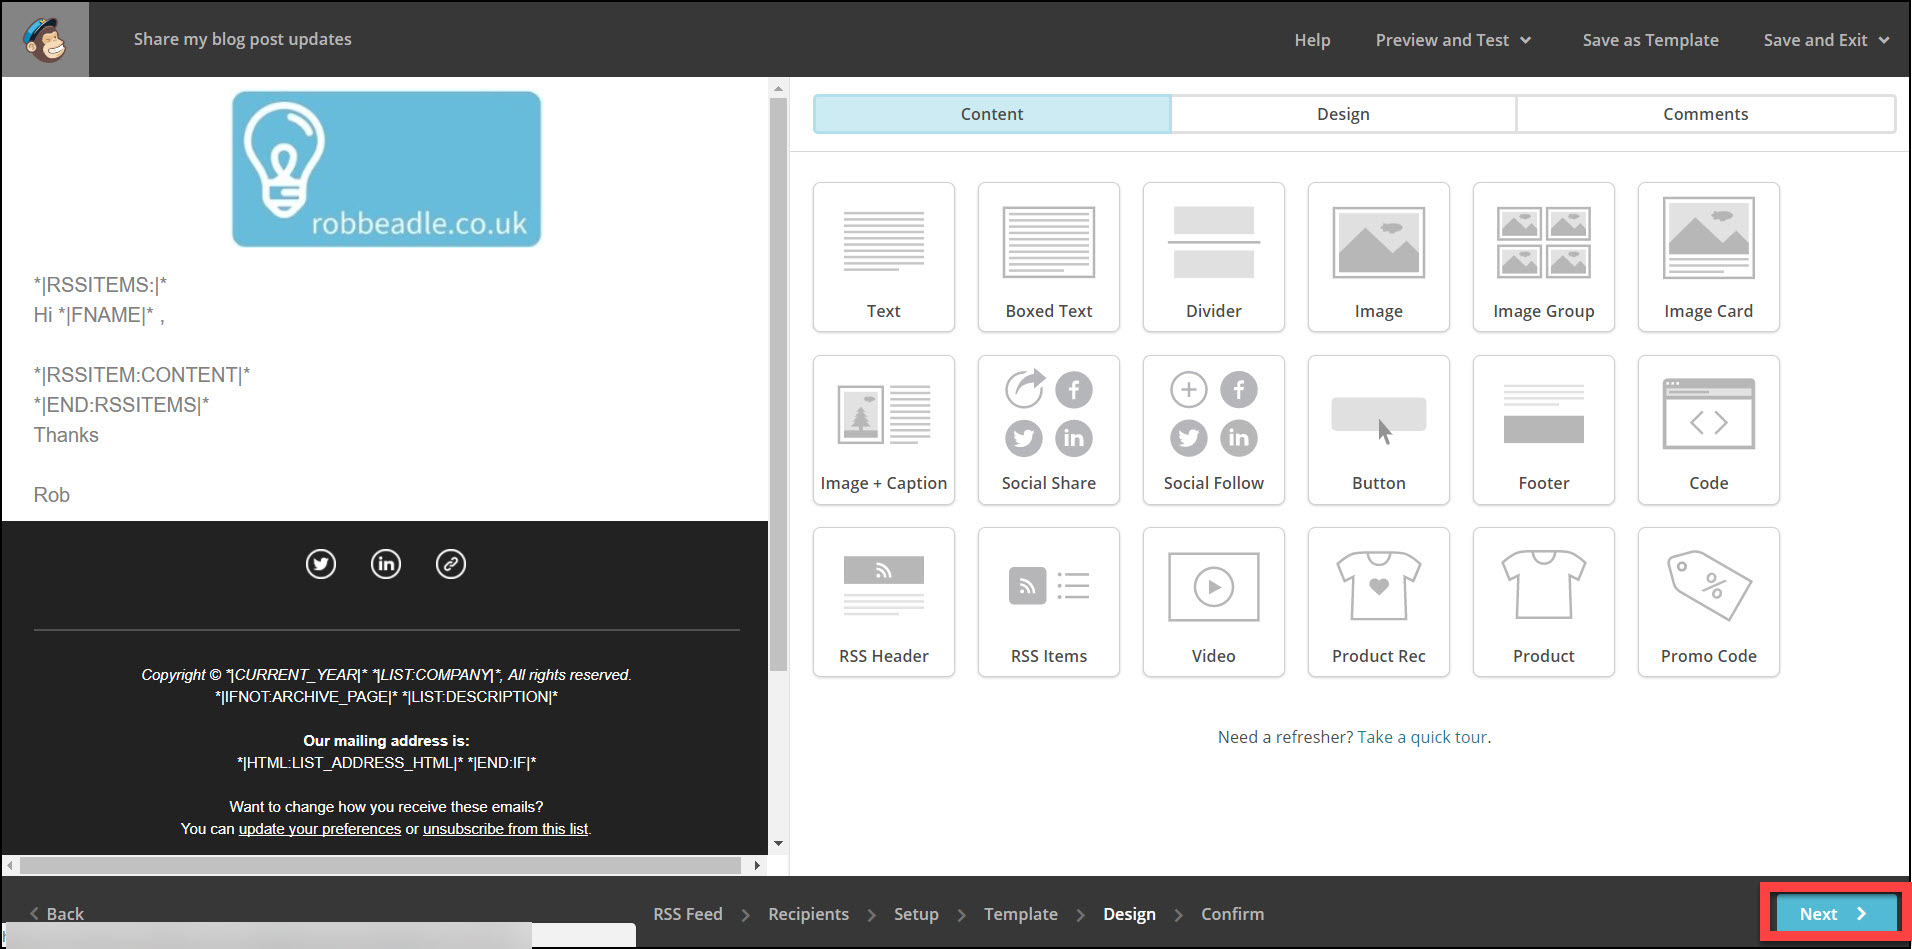
32. Once you’re happy with your test email, return to MailChimp. Select Next to move to the Confirm stage.
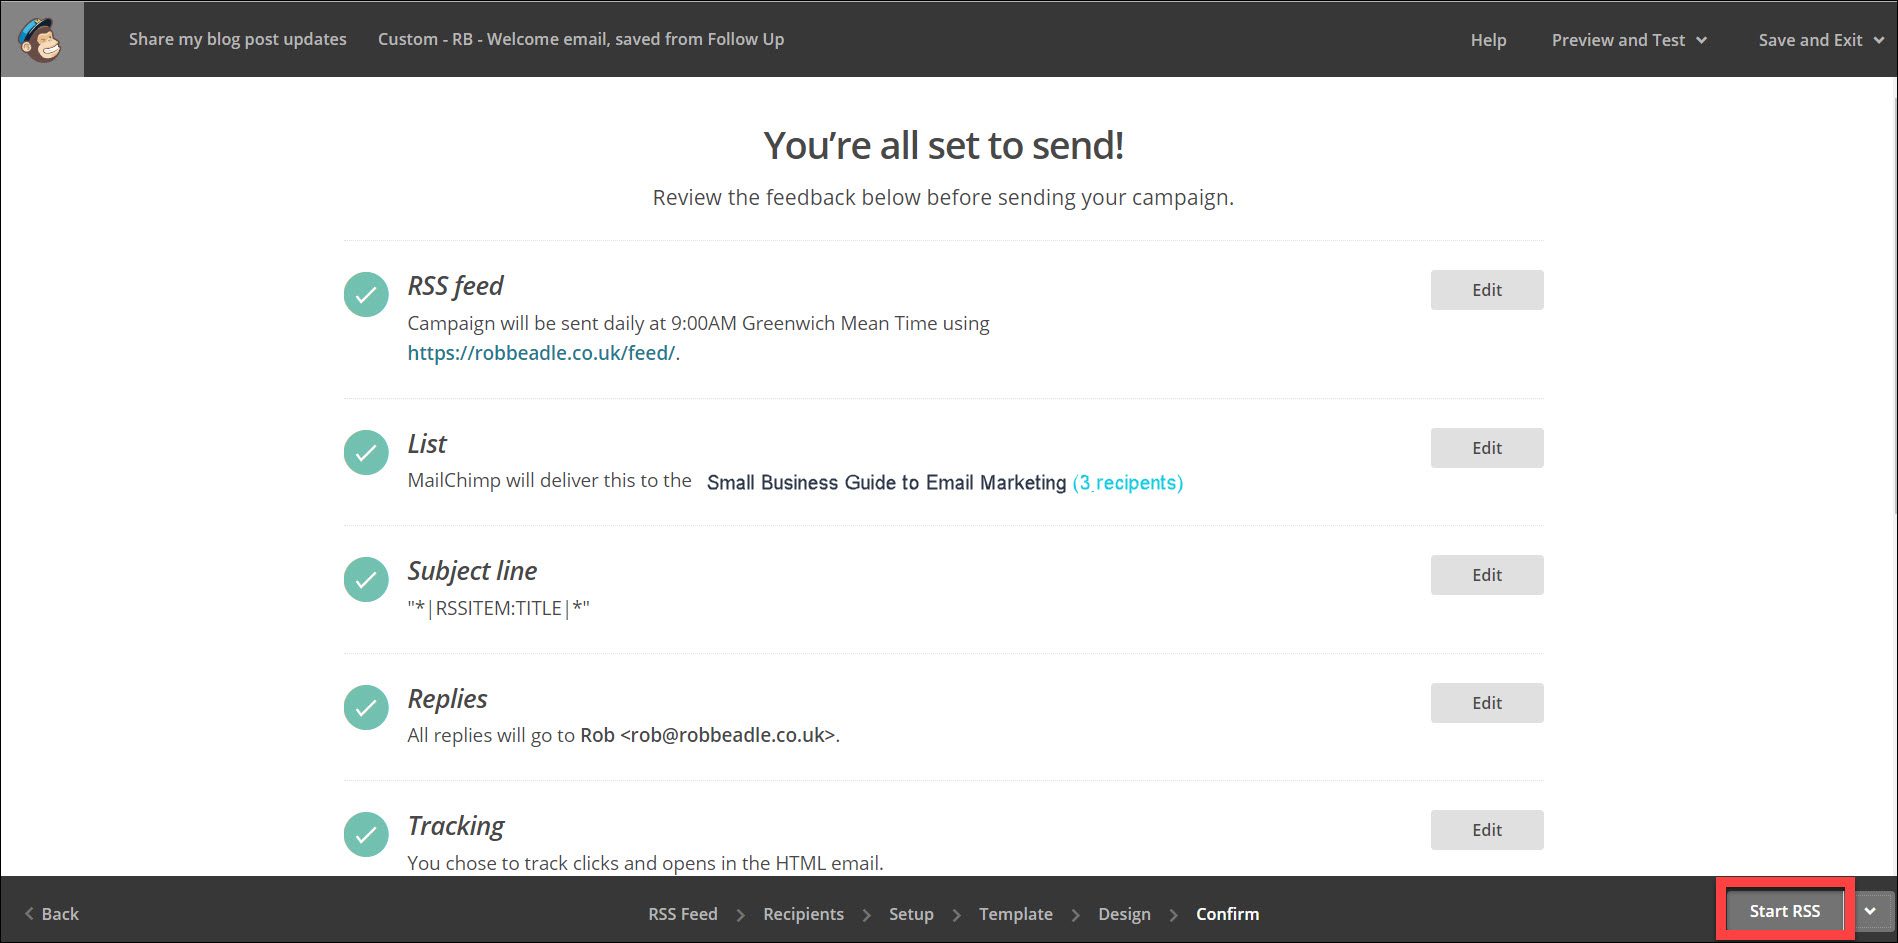
33. Review your settings and make any changes required. Select Start RSS.
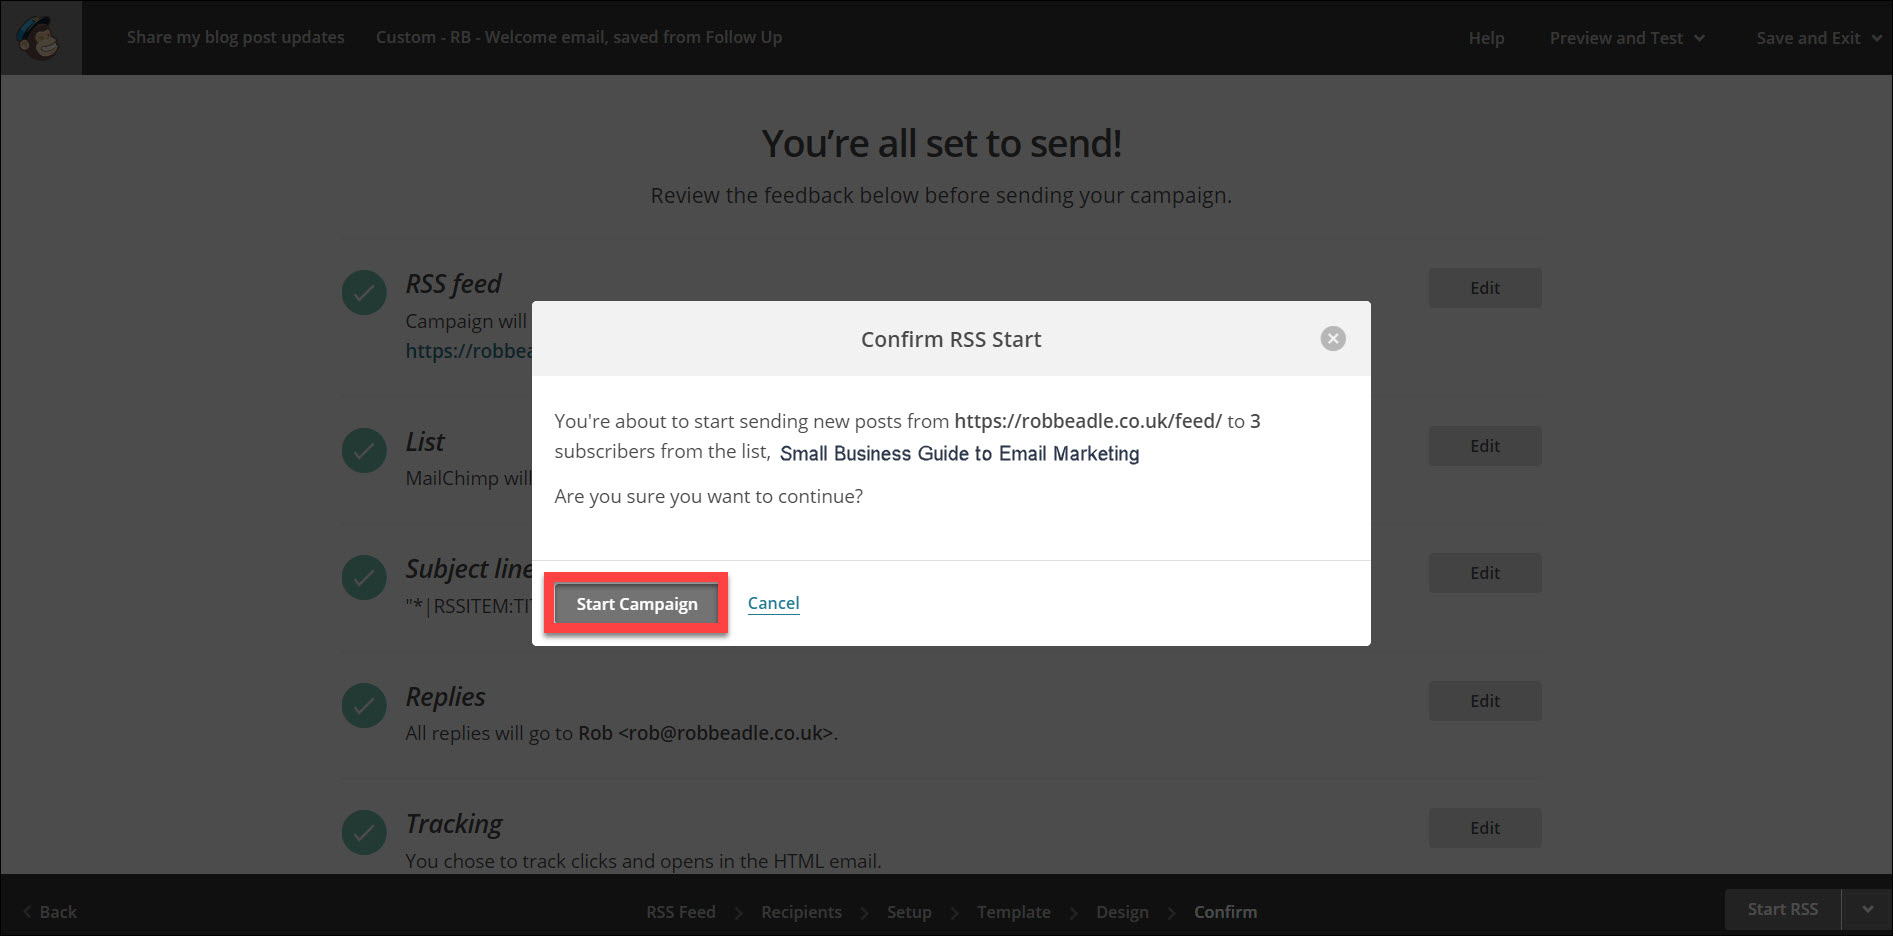
34. Select Start Campaign to launch your Blog Post Email Campaign.
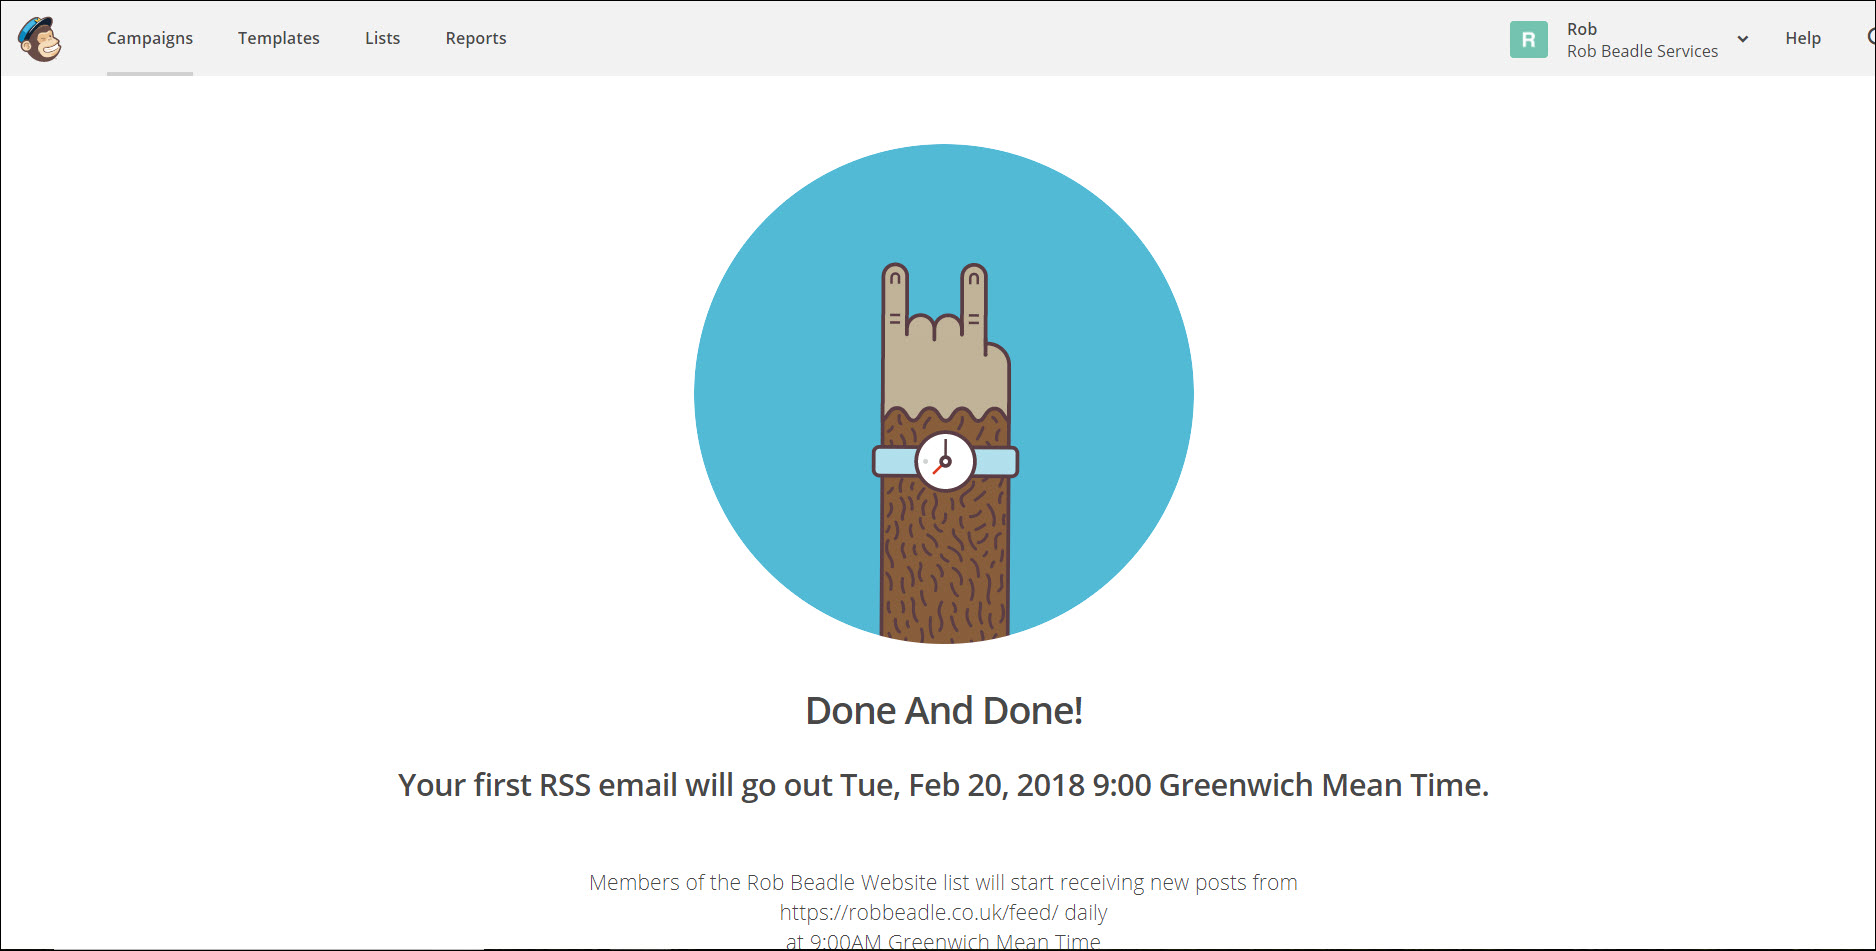
35. Congratulations! Your Blog Post Email Campaign is now launched. Each time you publish a blog post it’ll be automatically emailed to your subscribers.
One Extra Step When You Write Your Blog Posts
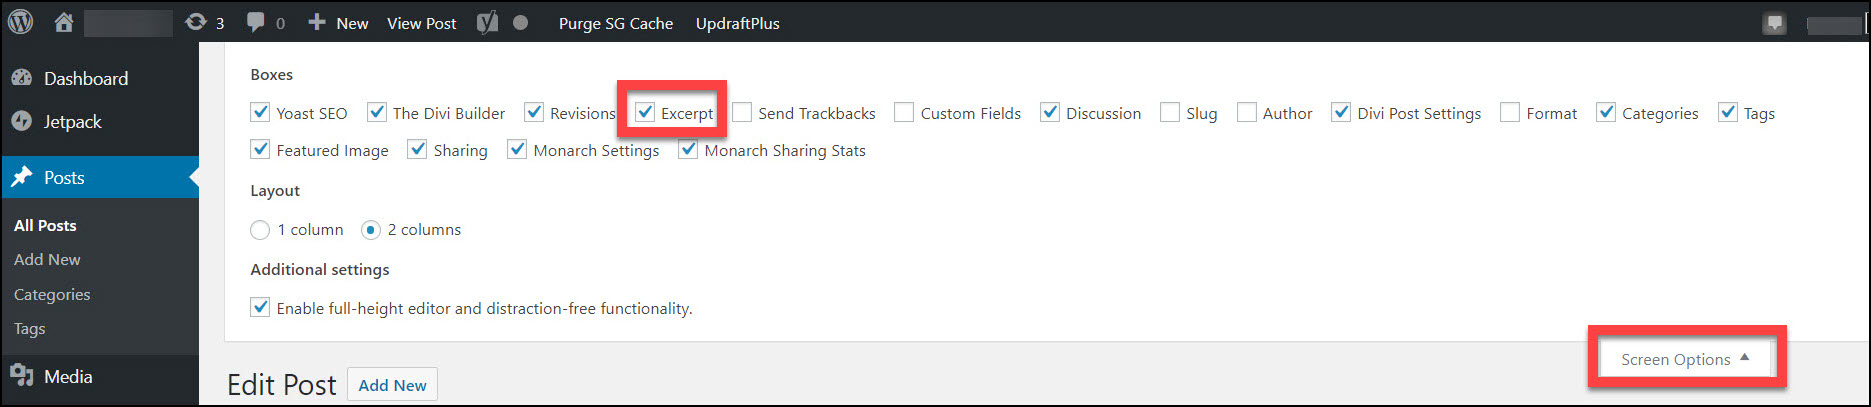
36. When you write your blog posts, you need to ensure you include an ‘Excerpt’ for each post as that’s what will be used in each email. At the top of the Posts screen, select Screen Options and ensure that Excerpt is ticked. This show the Excerpt box under every blog post.
37. Write a short summary of your blog post in the Excerpt box and this will then appear in the emails to your subscribers.

In Summary
Small businesses are given lots of advice.
Much of it boils down to ‘here are some extra things you should do’.
Whilst the advice has the best of intentions, it can become a huge time drag on your business. However, automating some of the basics of your online marketing can clawback precious time for you.
When you turn your blog posts into short emails you save yourself time and help your business.
What’s the first blog post you’re going to turn into an email?
Photo Credit: Jeremy Thomas on Unsplash
FREE Guide - How to attract leads and unlock sales through case studies
0 Comments