How an Ape Can Welcome People to Your Email List (so You Don’t Have To)

In The Planet of the Apes series, apes are the dominant race on earth.
The politicians are apes. The soldiers are apes. The scientists are apes.
Their intelligence is far superior to humans.
Science fiction, right?
Actually, this can be a reality for your business.
How would you like a smart ape to help run your small business?
Saving you hours of your time.
The ape’s name is MailChimp.
You may have heard of him. You may already be using him – because he’s free!
But, do you know just how much he can help you?
With the free version of MailChimp, you can now create emails that are automatically sent to your contacts, customers or anyone on your list.
At any time of day or night. Without you even knowing it.
- Do you want to welcome people as soon as they sign-up?
- Thank them when they buy from your online shop?
- Or check that they still want to be on your list when they don’t read your emails?
All of these ideas are possible – along with many more.
How an Ape can Welcome People to Your Email List (so You Don’t Have to)
In this post, I’m going to show you how to use MailChimp to create your own automated welcome emails.
As soon as someone joins your email list, that’s the perfect time to contact them. You’ve already got their attention.
MailChimp offers you a helping ape hand to email them immediately.
Once you set this up, you can forget about it and let the ape do the work.
MailChimp is almost as intelligent as Caesar.
Please note: I’m not affiliated with MailChimp and have received no payment for writing this post. But I do use MailChimp myself as a small business owner and think it does a great job. Other email packages offer similar features but I’ve focused on MailChimp because of how many small businesses use it. And so I can mention a great film, Planet of the Apes.
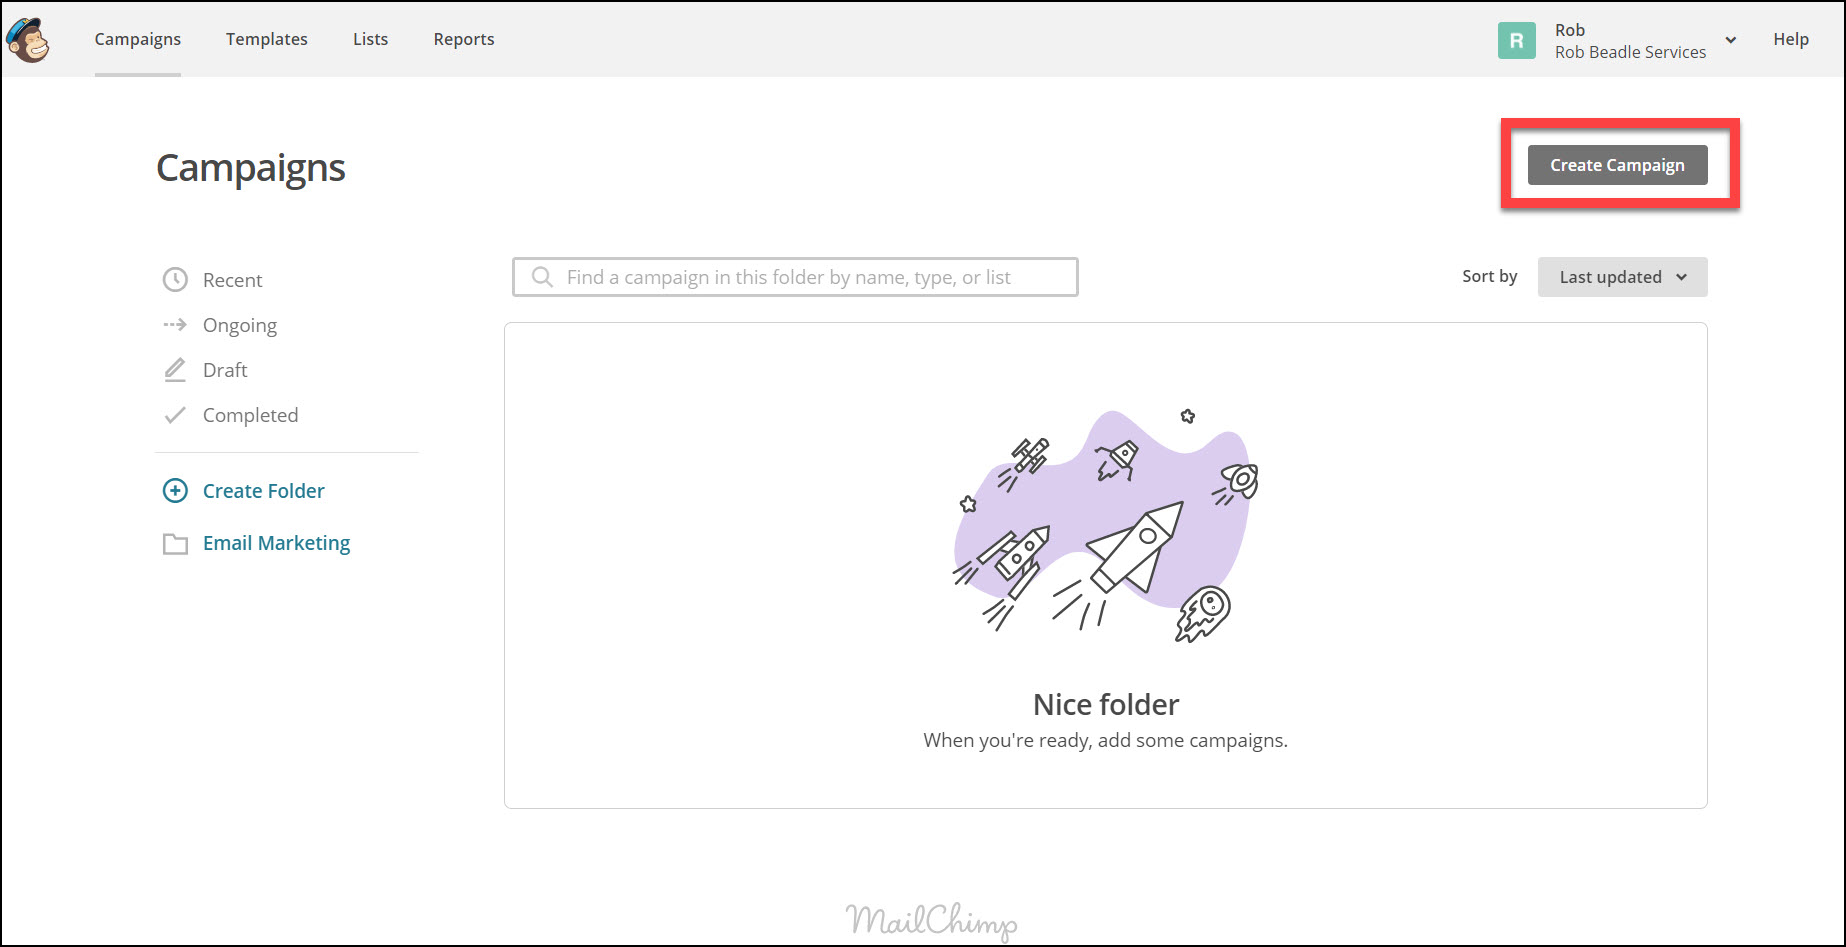
1. Enter the Campaigns menu and select Create Campaign.
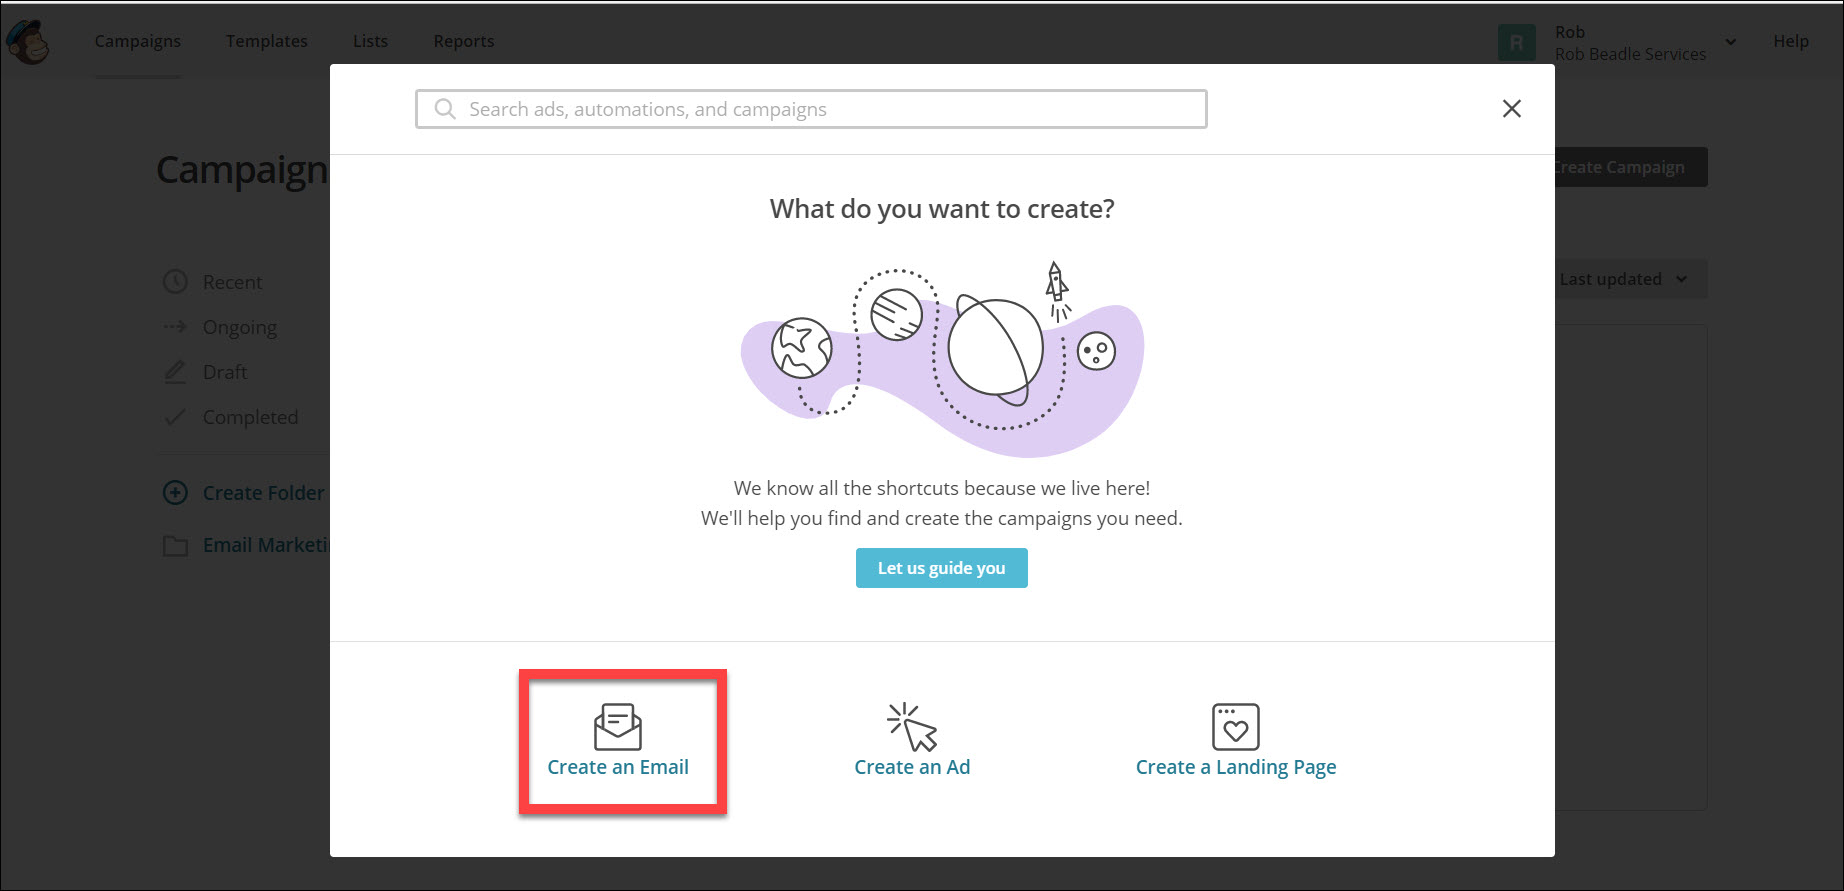
2. Select Create an Email.
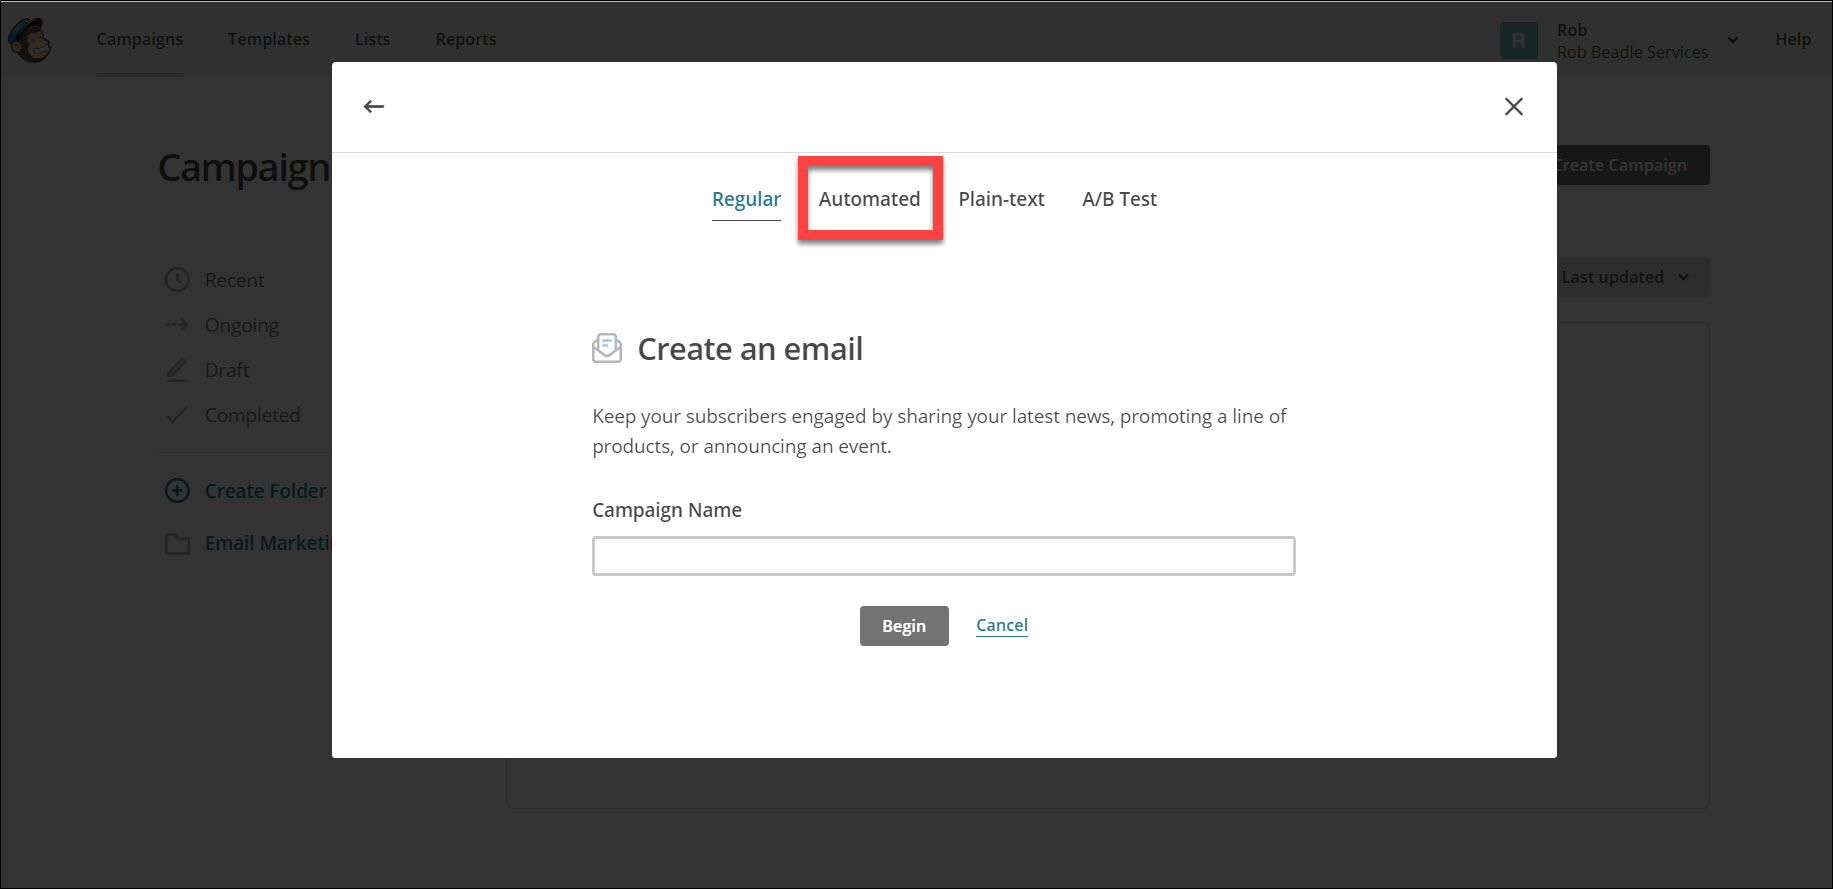
3. Select Automated campaign.
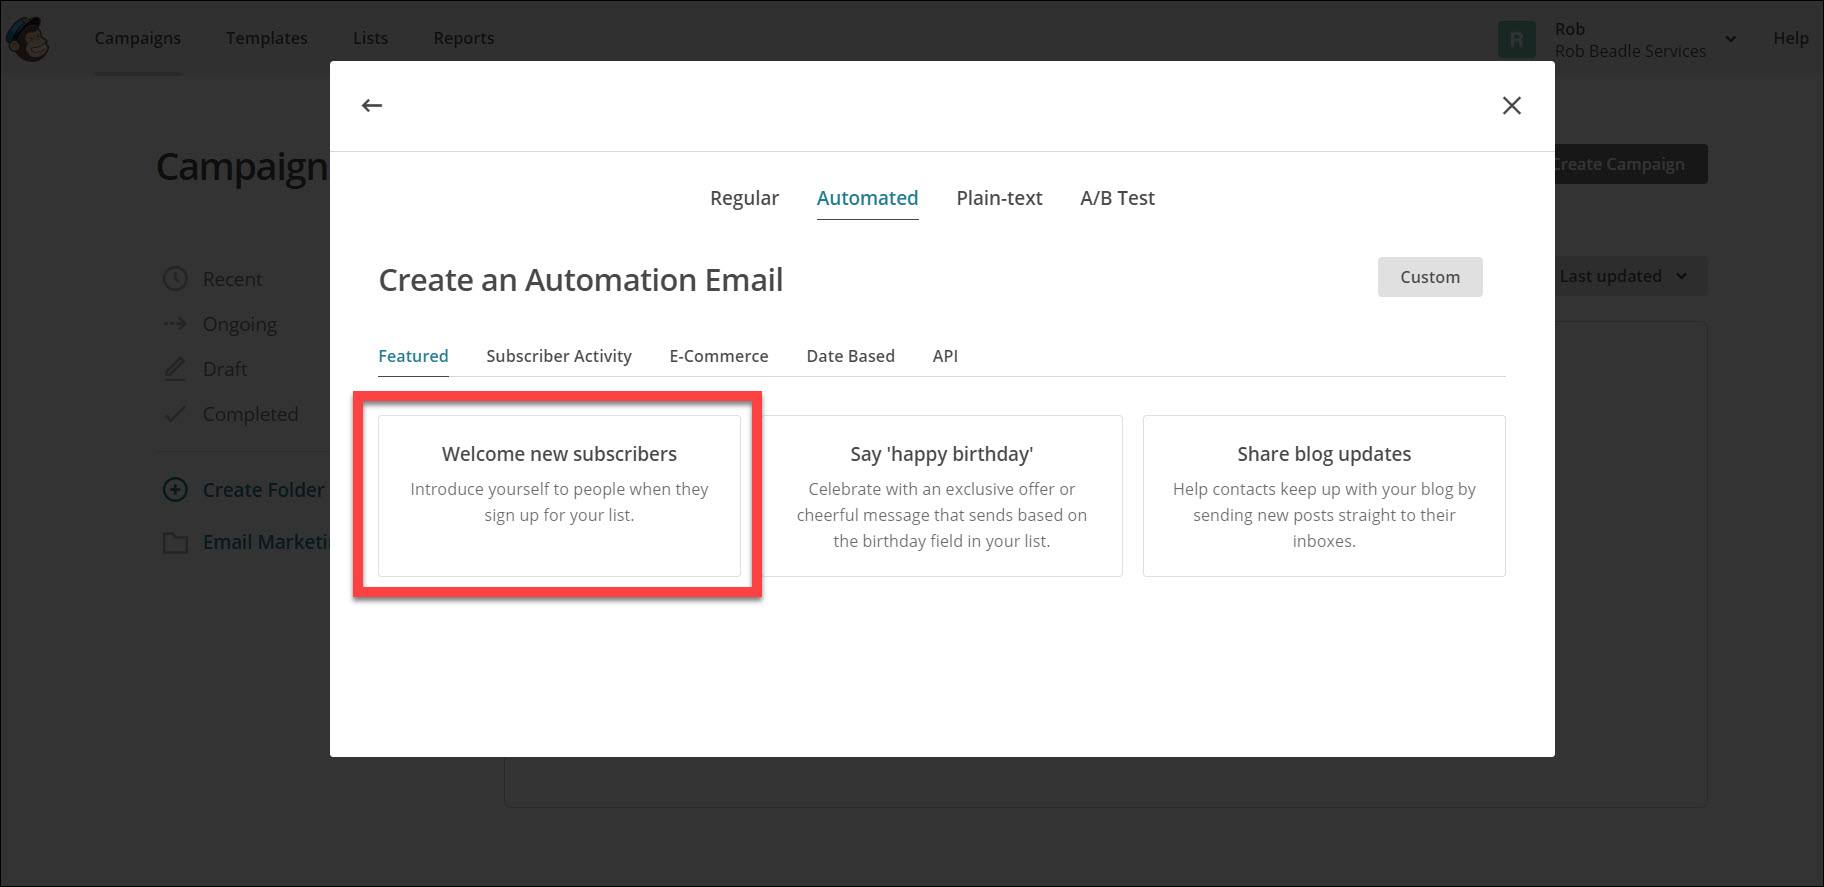
4. Select Welcome new subscribers.
5. Select Onboarding series.
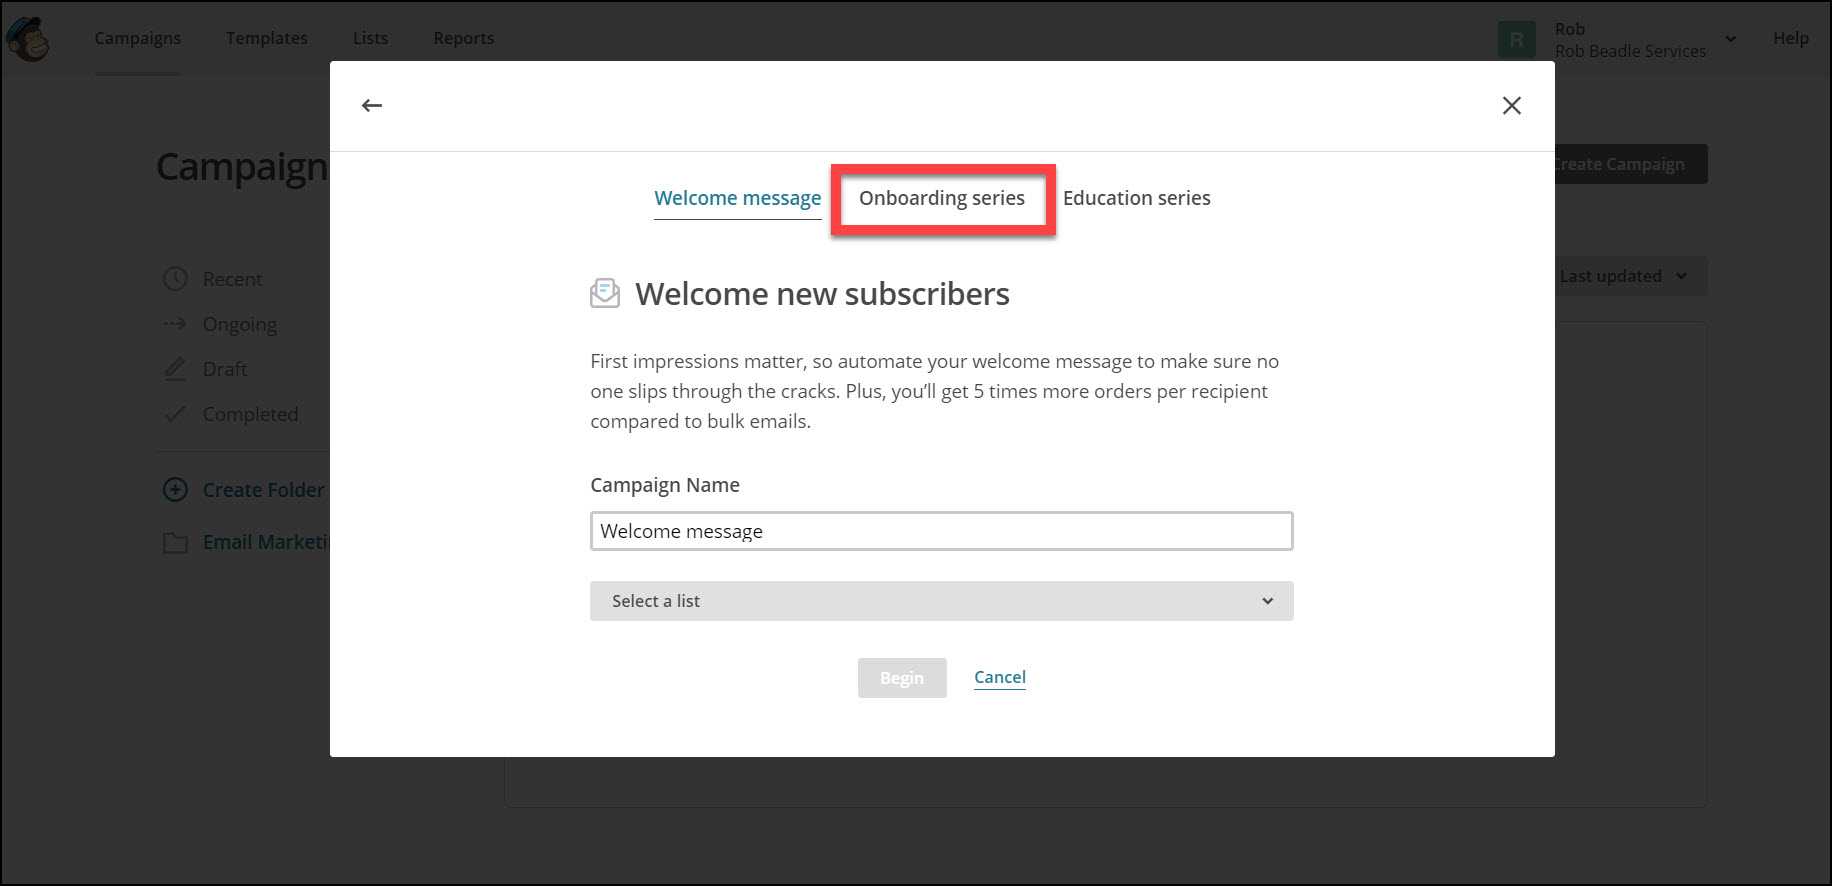
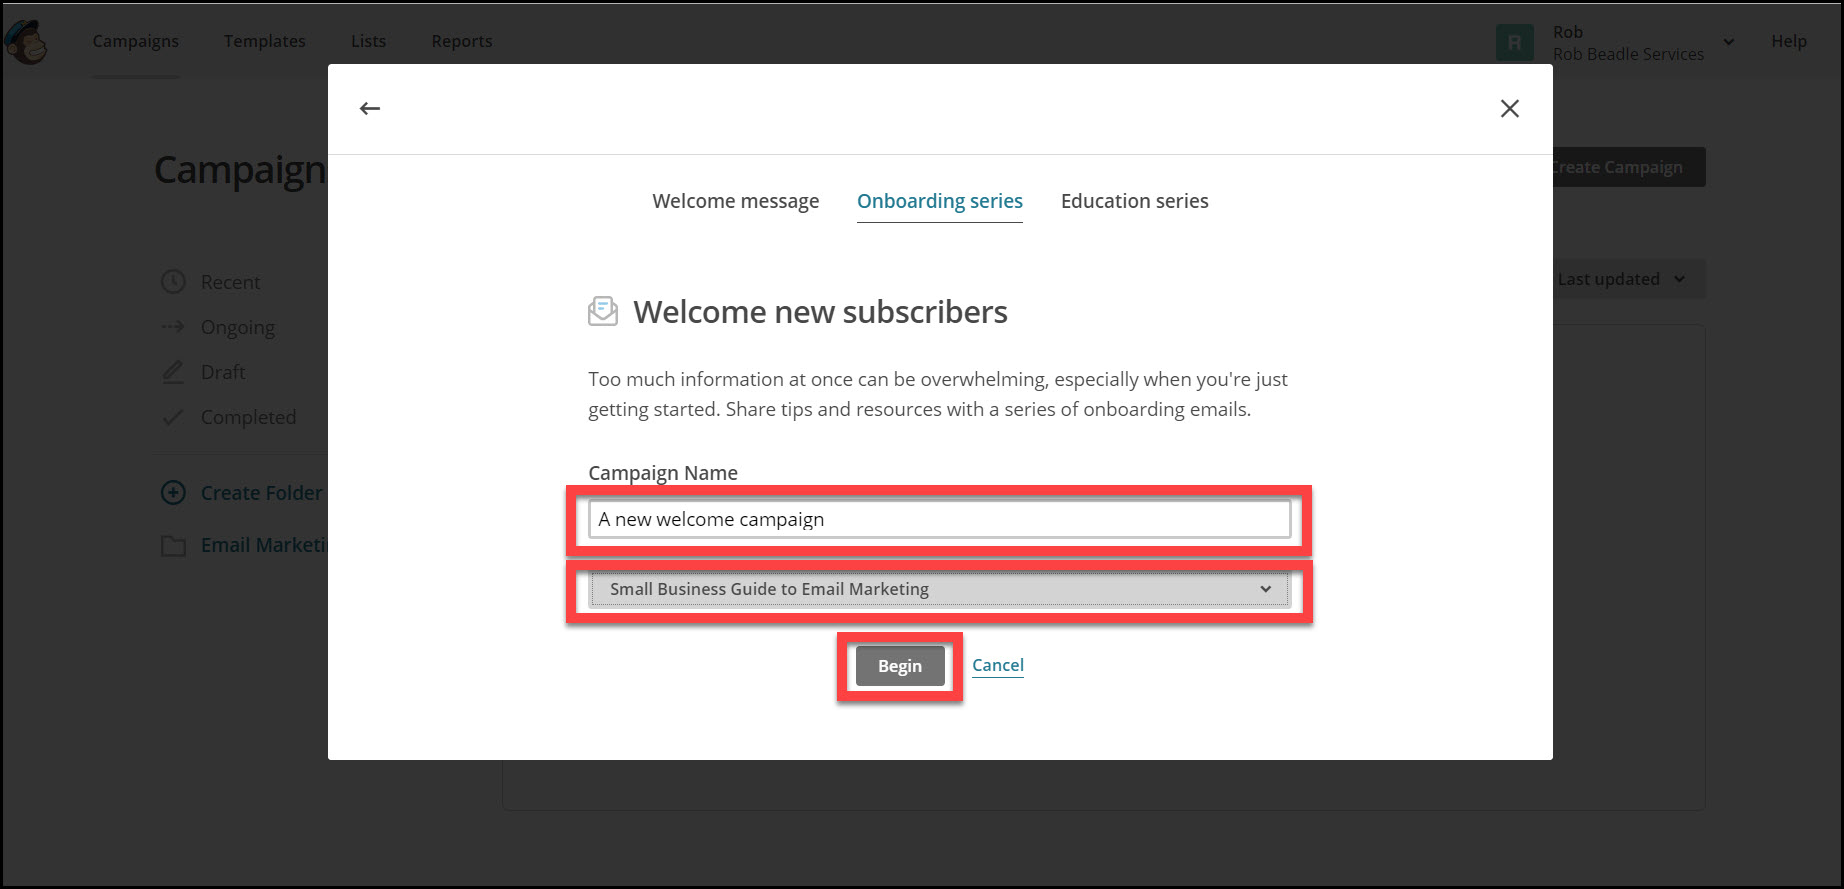
6. Enter the name of your campaign in Campaign Name – this will only be visible to you. Choose the list you want to run the campaign for. Select Begin.
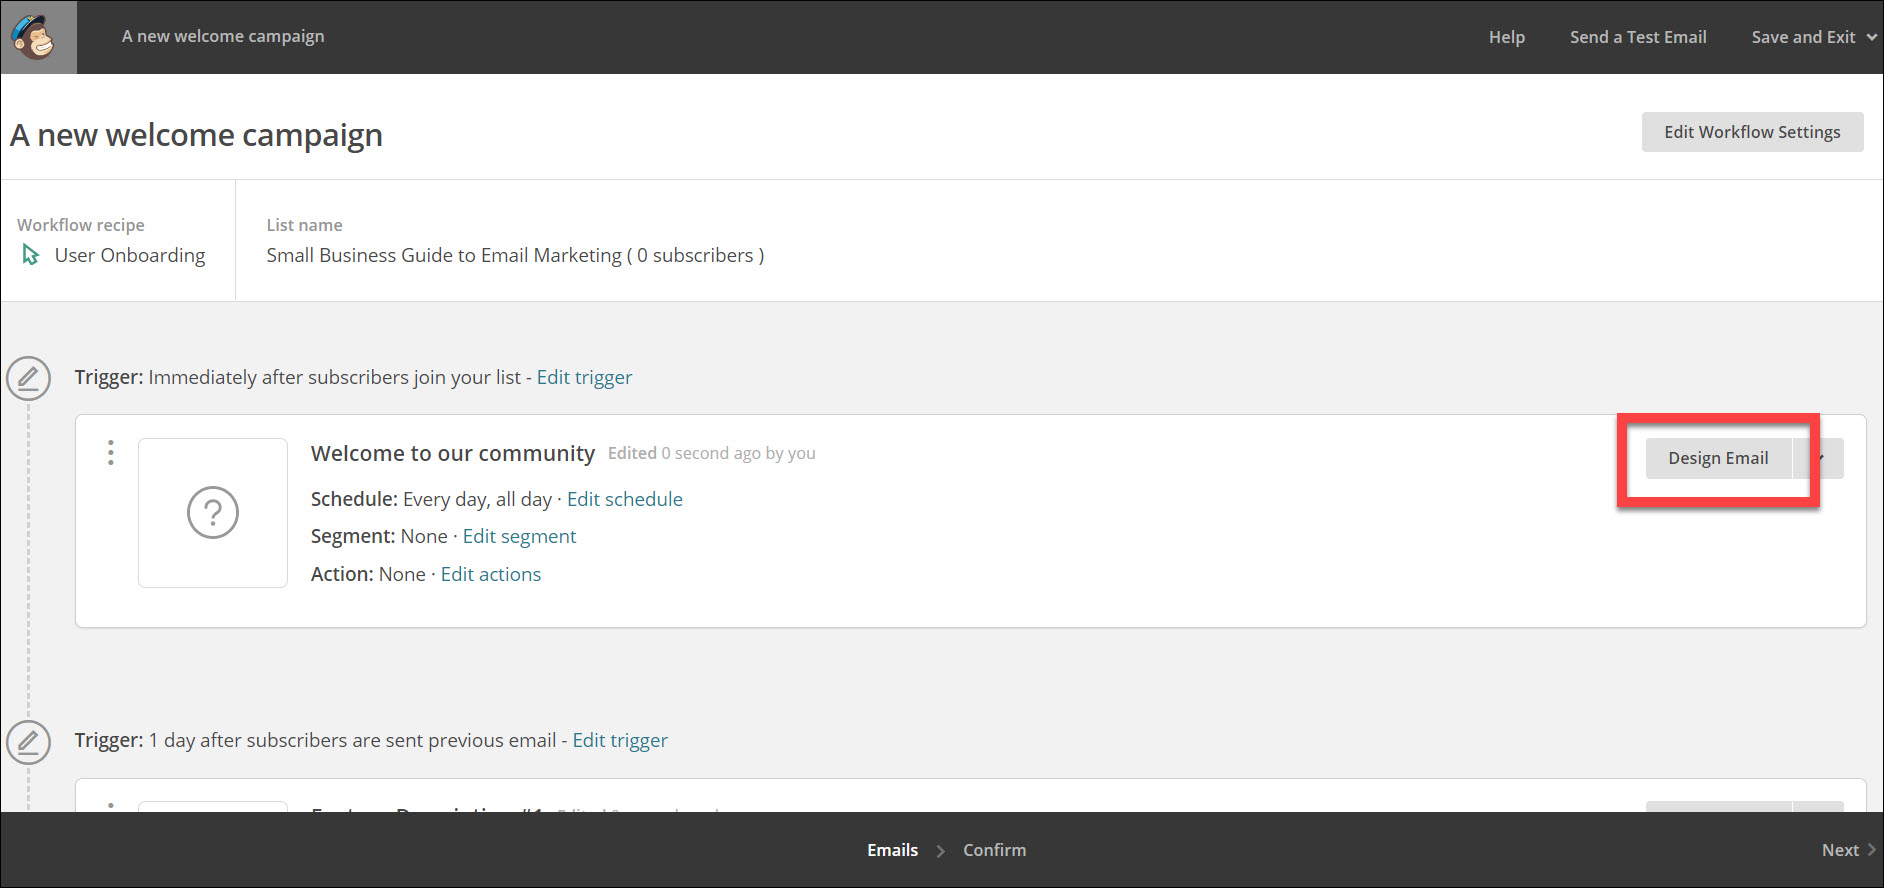
7. To create the first email that your subscribers will receive when they join your email list, select Design Email.
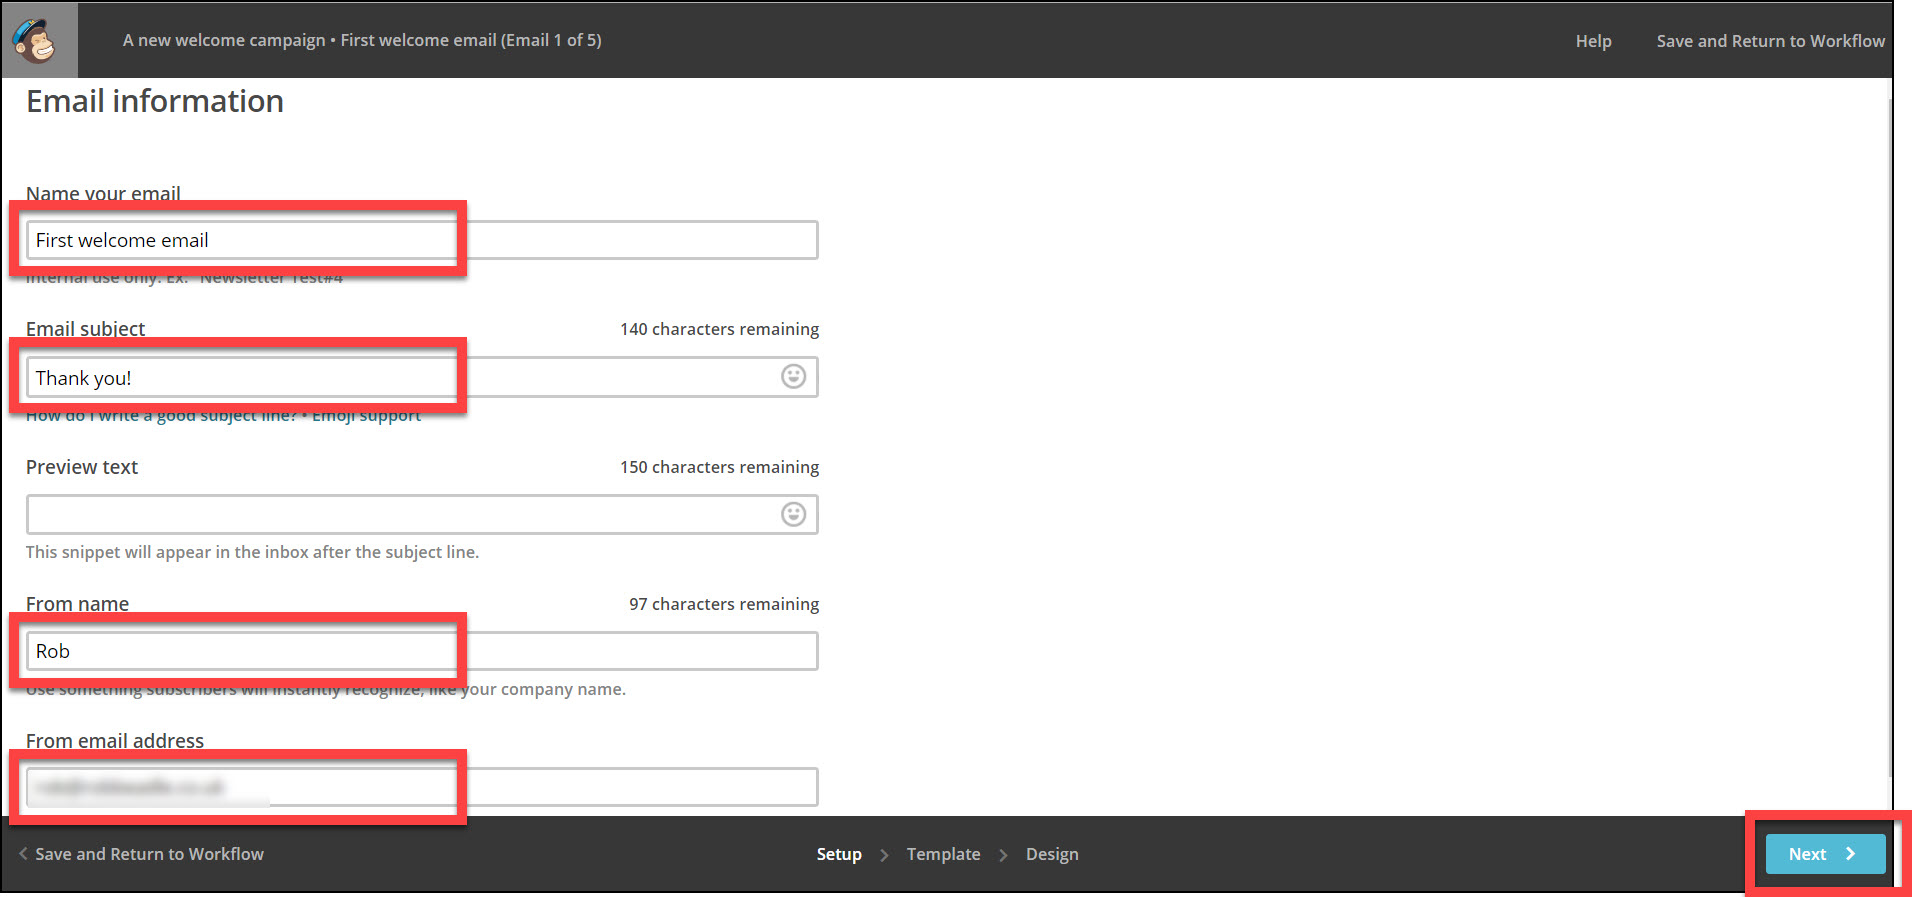
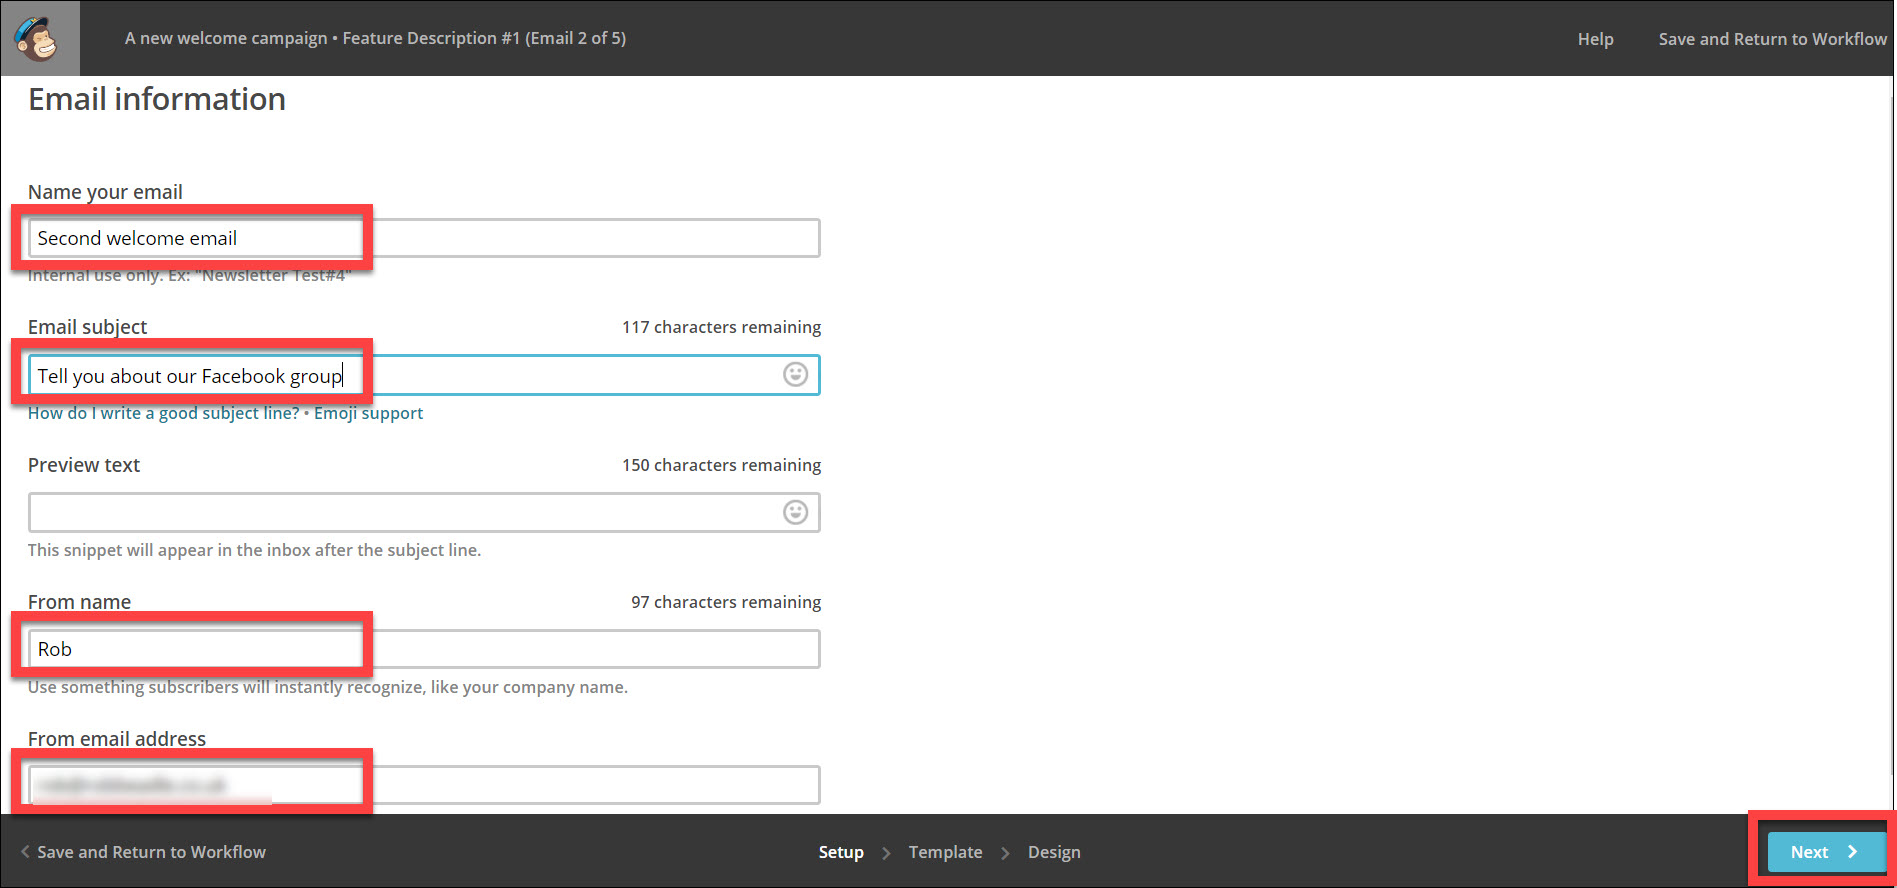
8. Enter the Name of your email (this will only be seen by you) and the Email subject (this will be the subject line of this email). Add the From name and From email address which will appear on the email. Select Next.
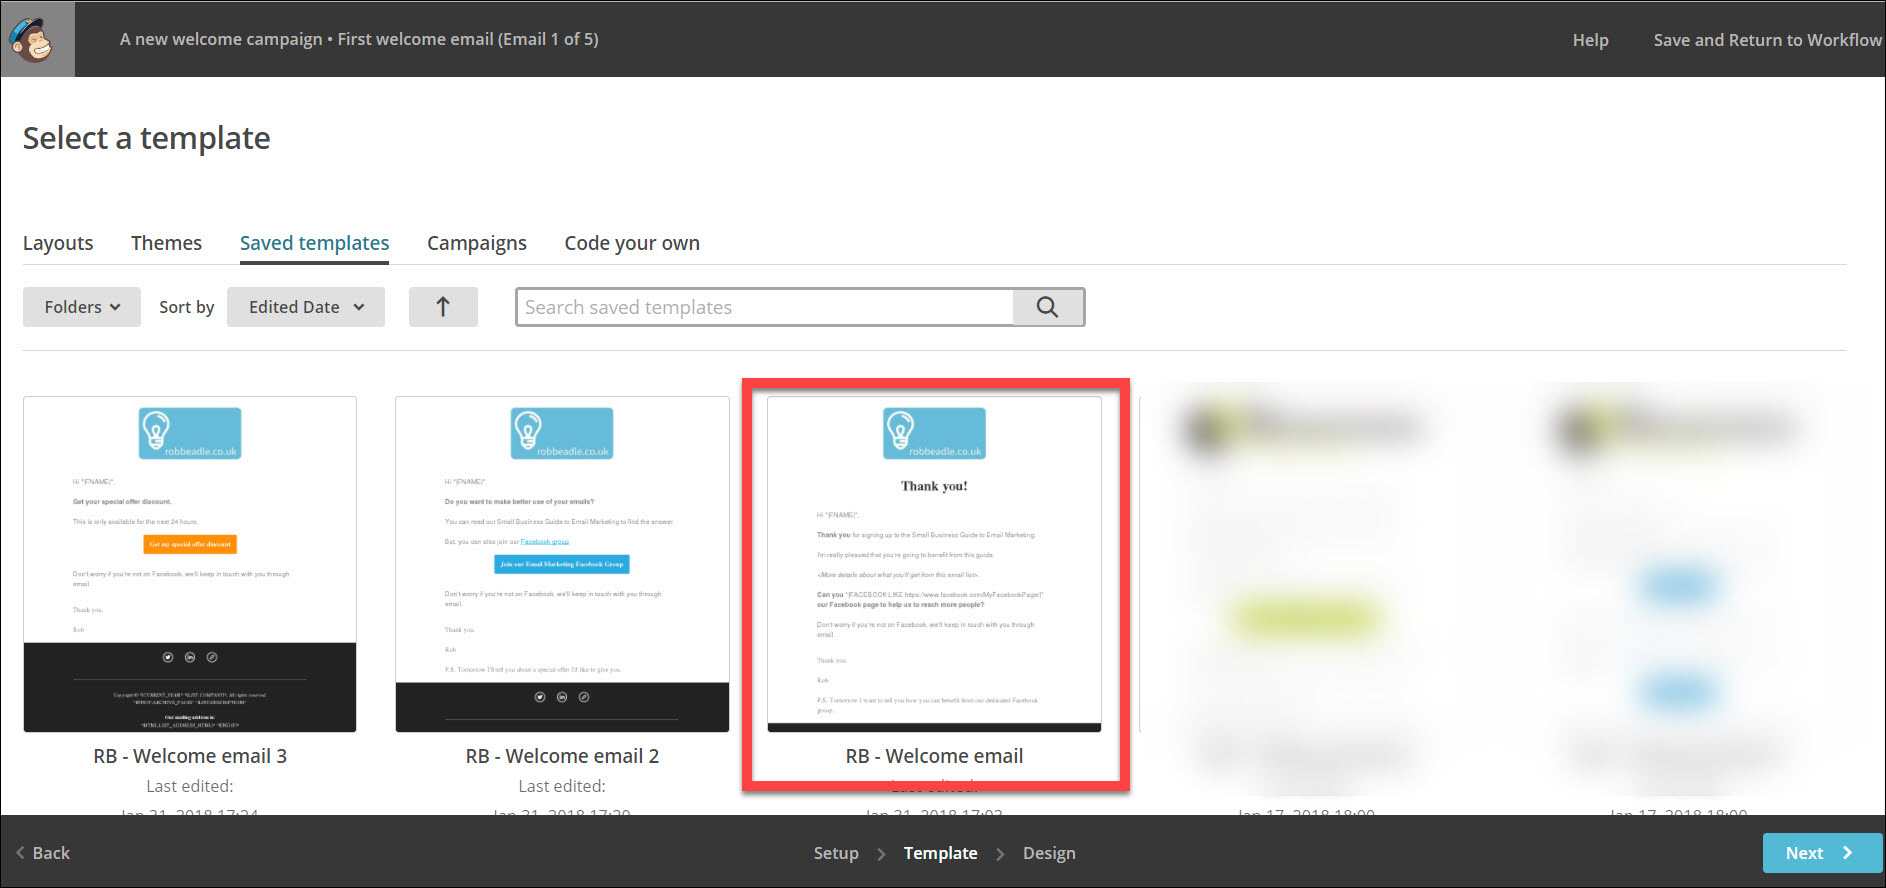
9. Enter the Saved templates menu.
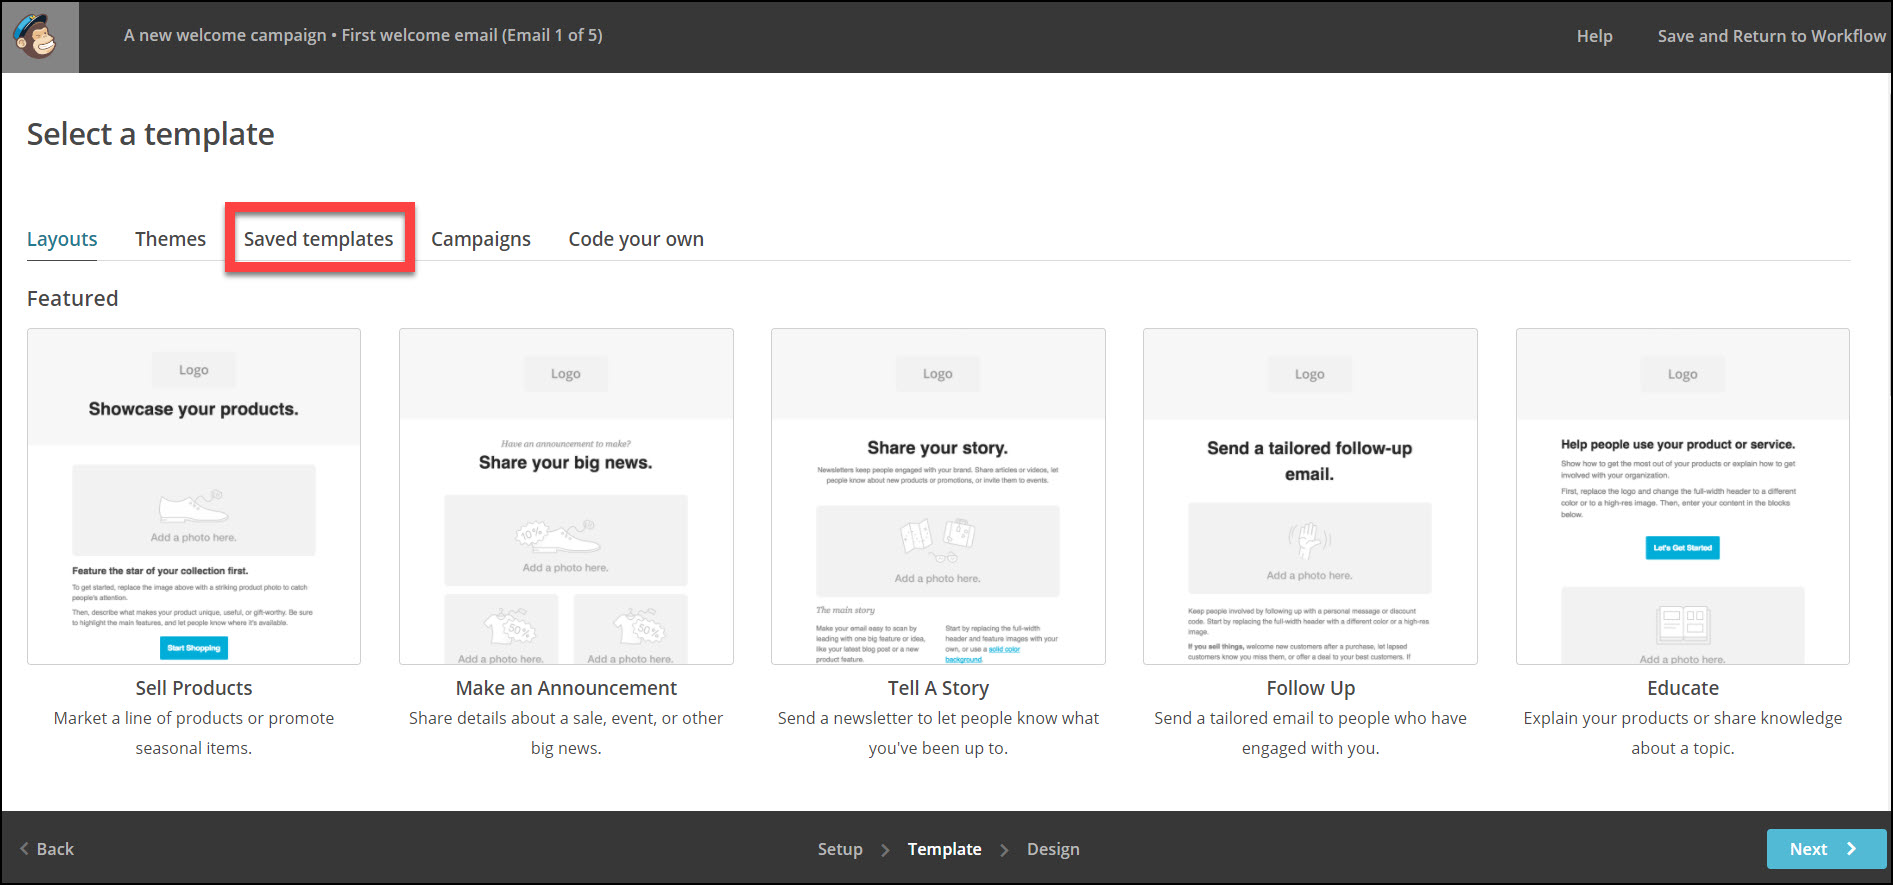
10. Select the template to use for your first email.
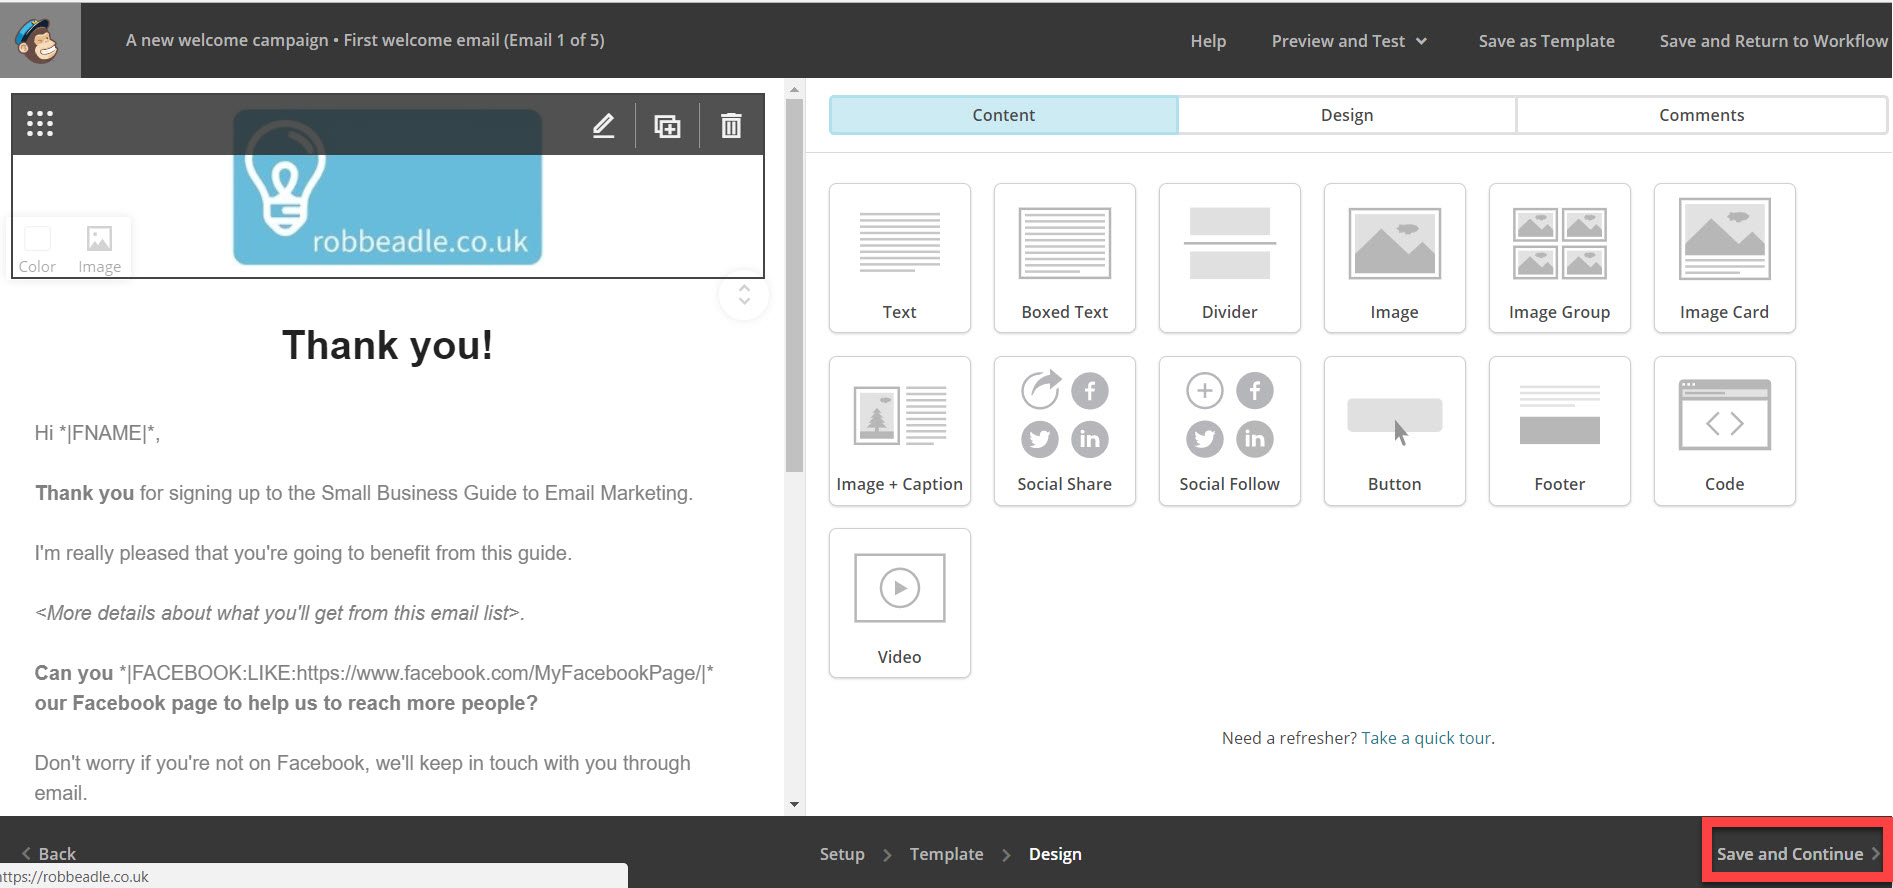
11. Edit the design until you are happy with it. Click Save and Continue.
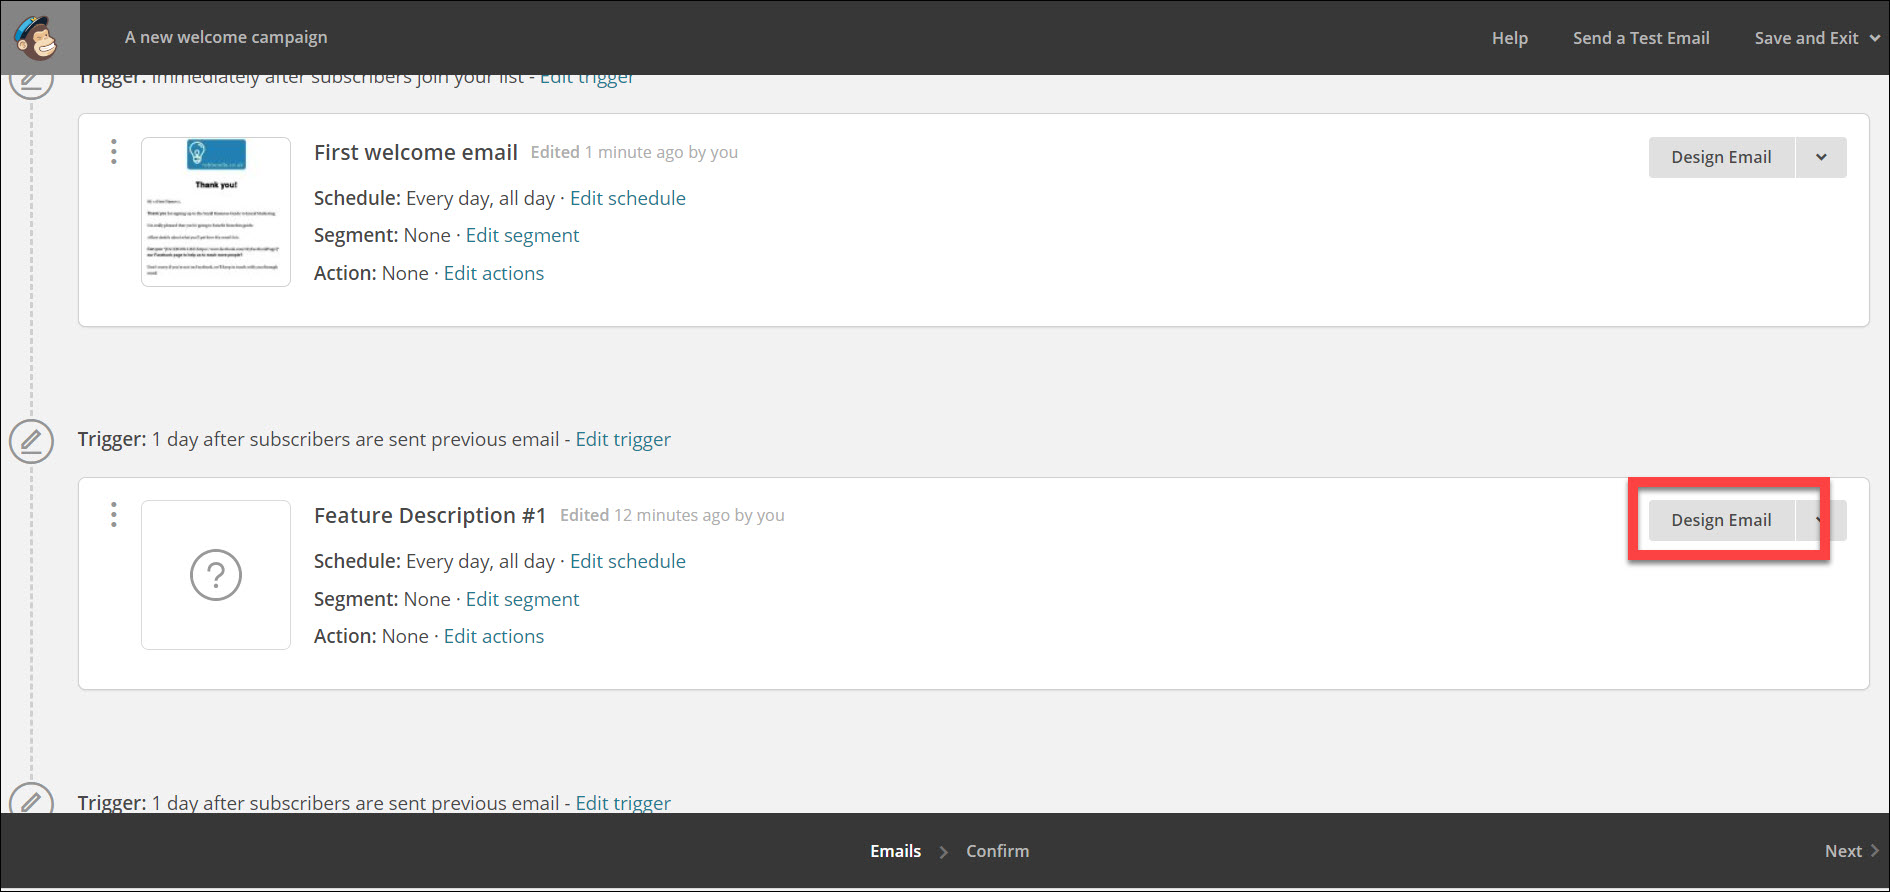
12. To create the second email that your subscribers will receive when they join your email list, select Design Email.
13. Enter the Name of your email (this will only be seen by you) and the Email subject (this will be the subject line of this email). Add the From name and From email address which will appear on the email. Select Next.
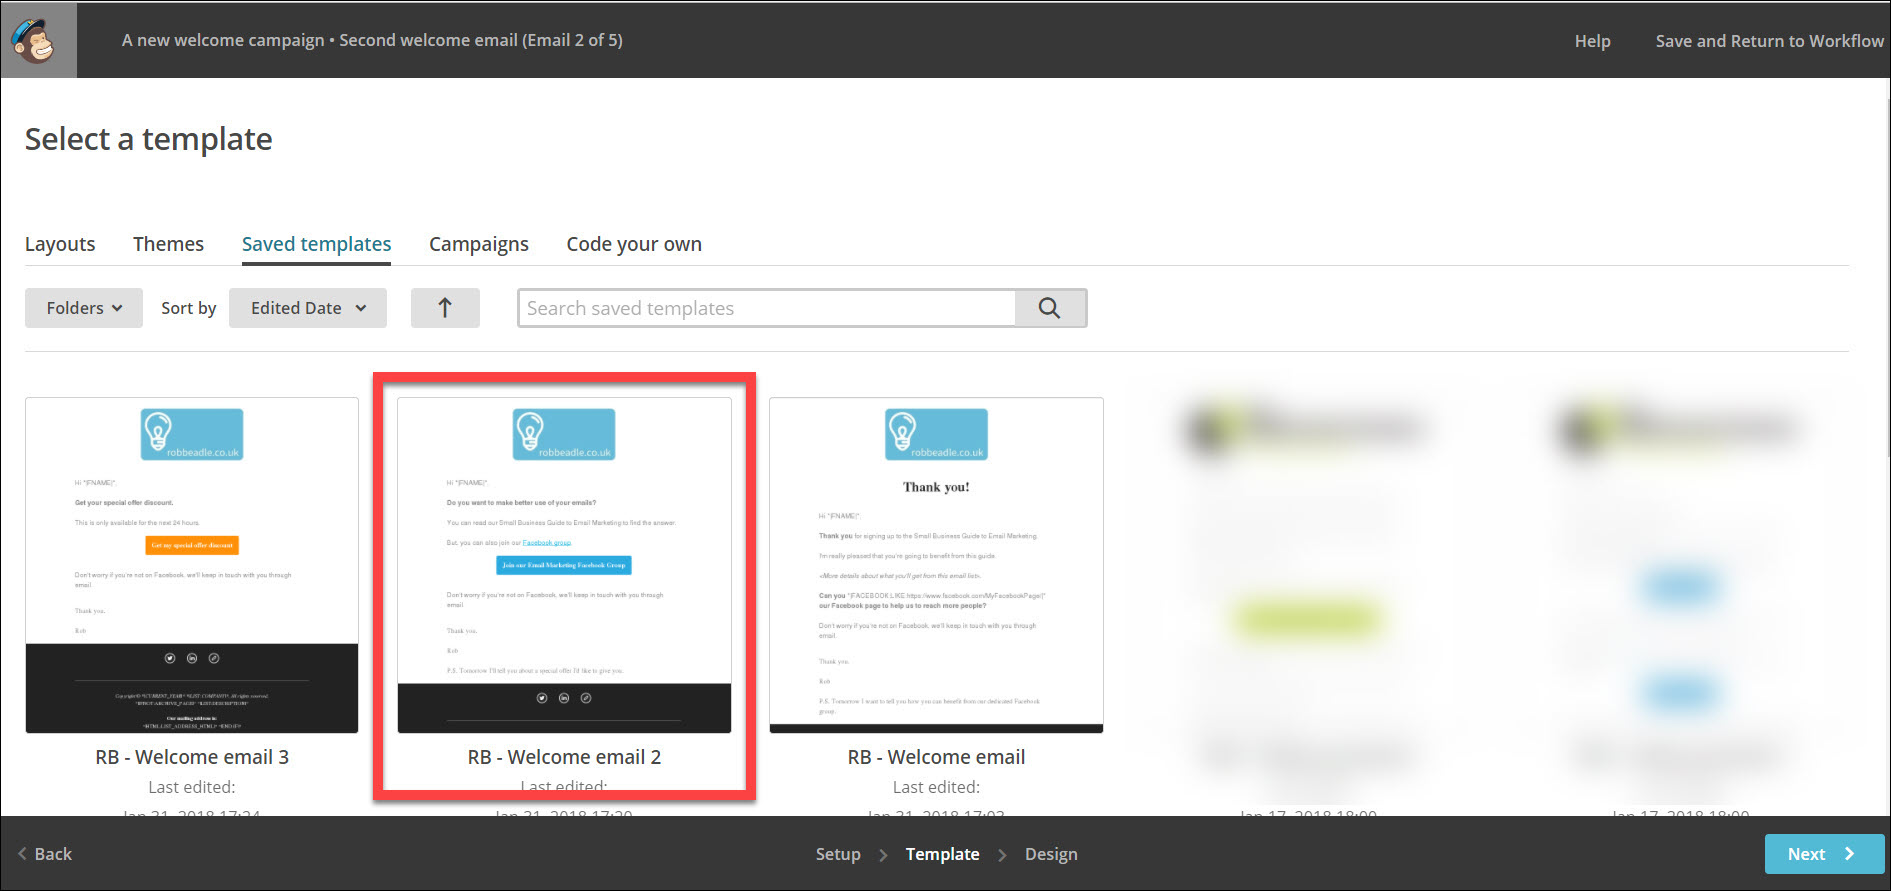
14. Enter the Saved templates menu.

15. Select the template to use for your second email.
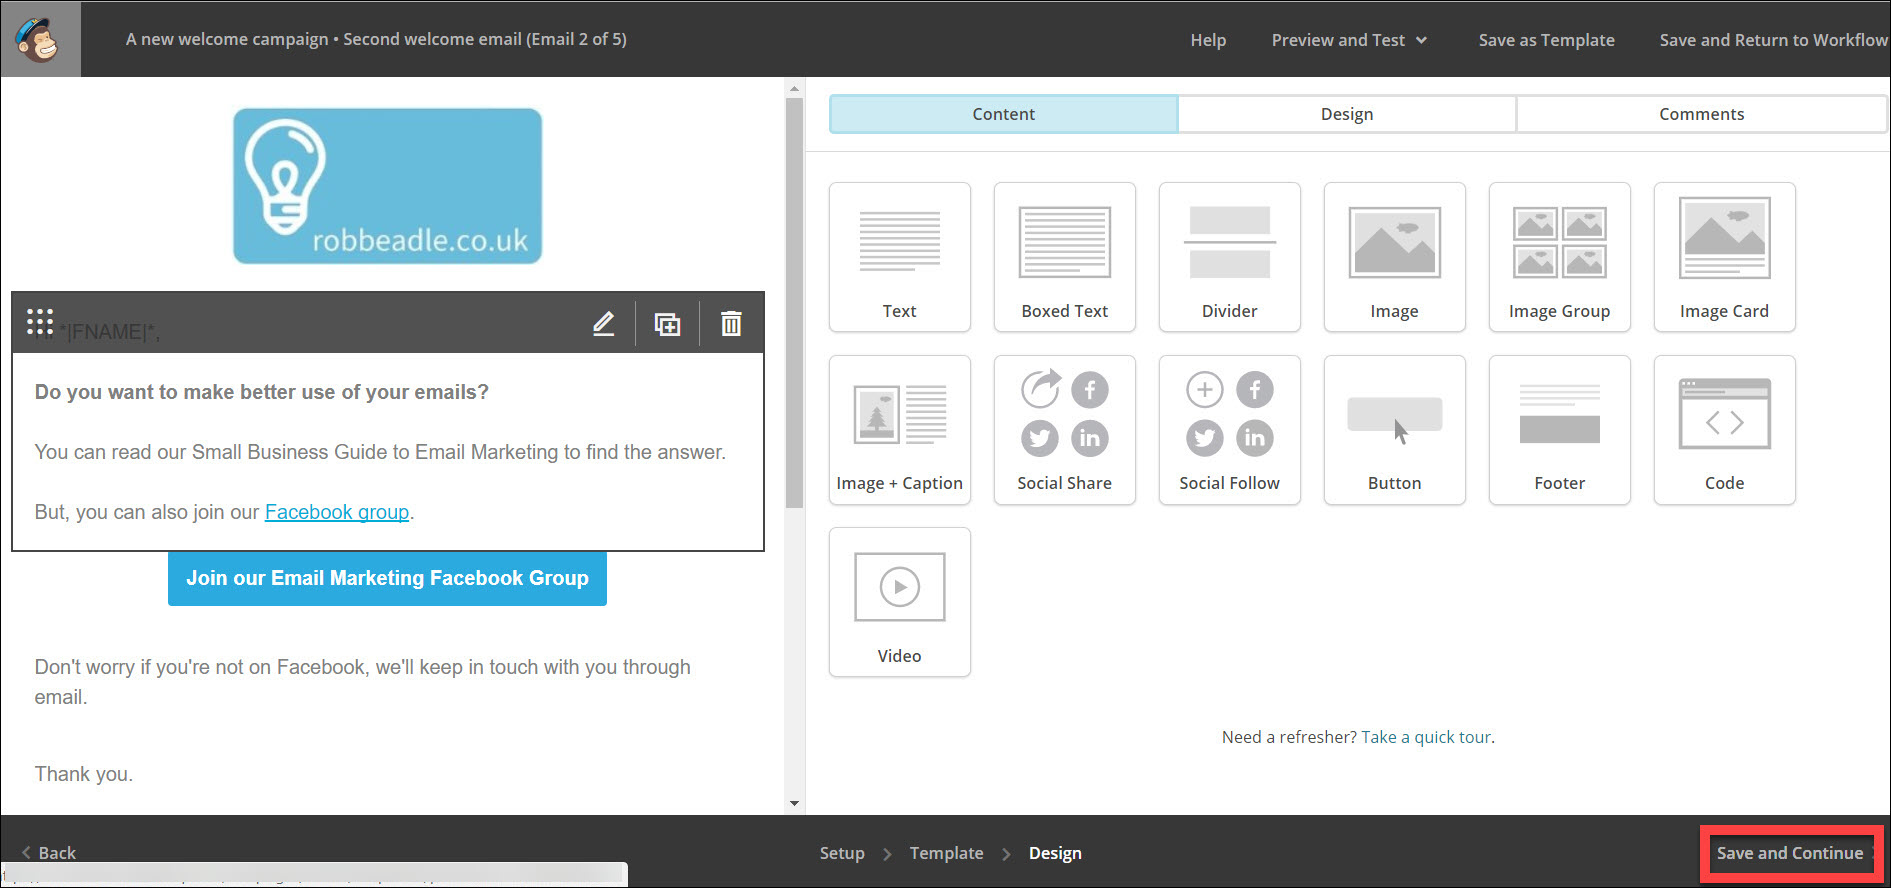
16. Edit the design until you are happy with it. Click Save and Continue.
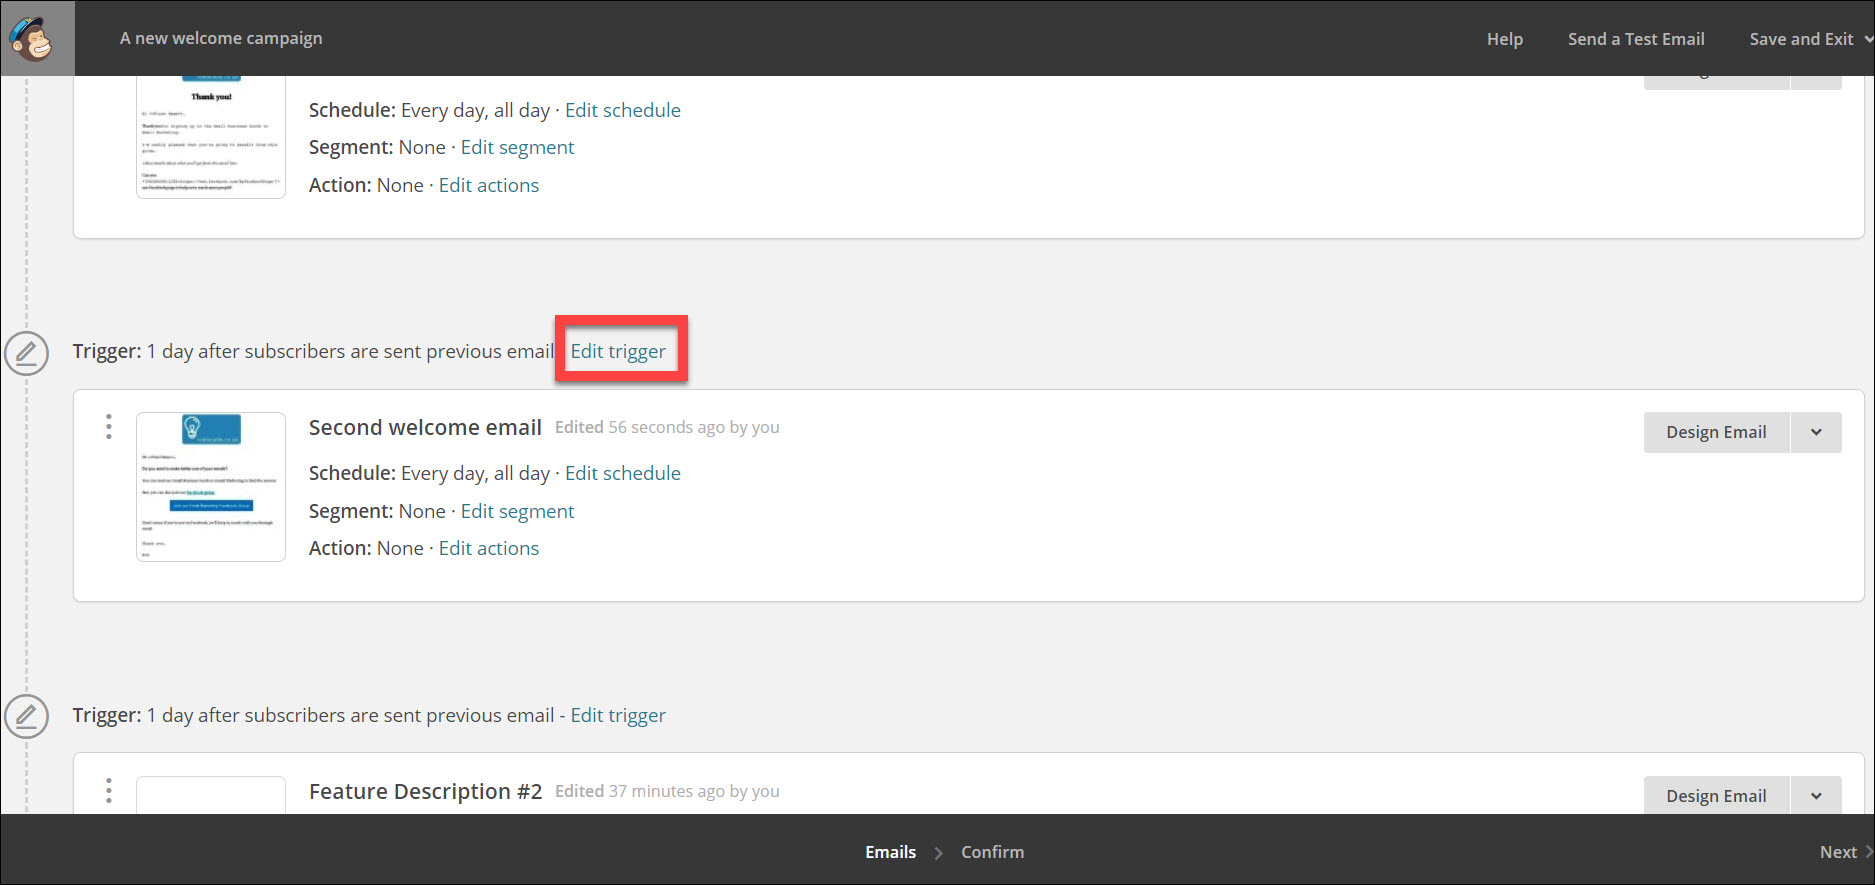
17. This email will automatically be sent 1 day after the previous email. If you want to change this select Edit trigger, otherwise no change is required.
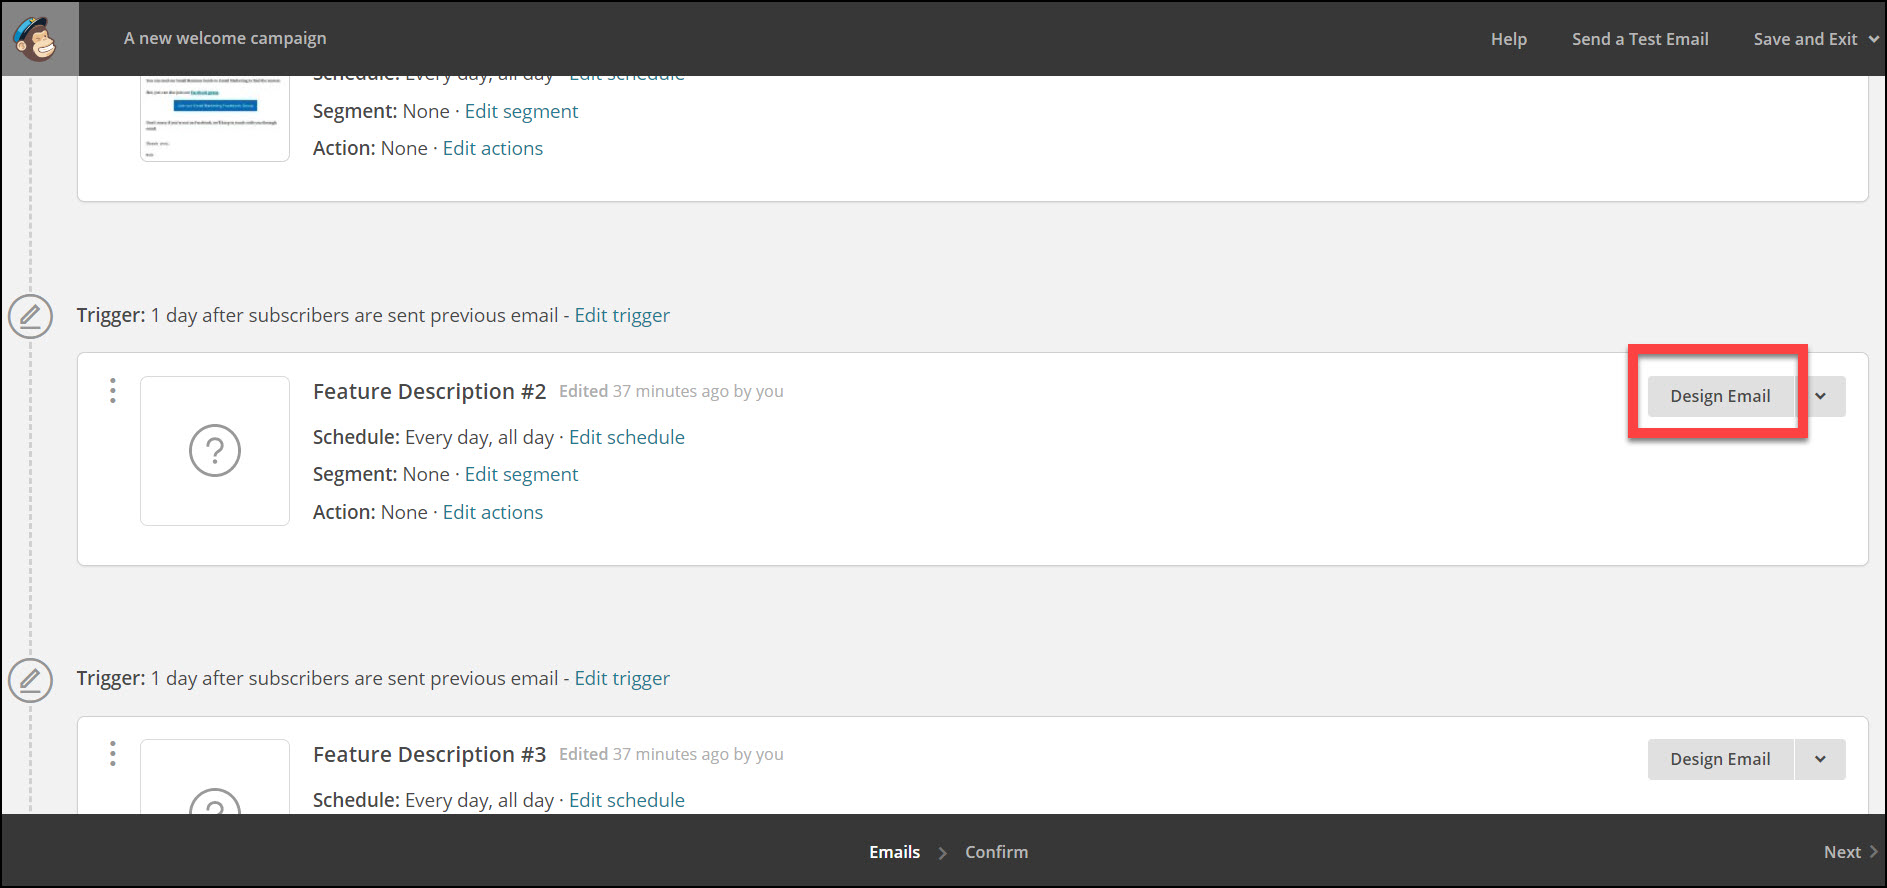
18. To create the third email that your subscribers will receive when they join your email list, select Design Email.
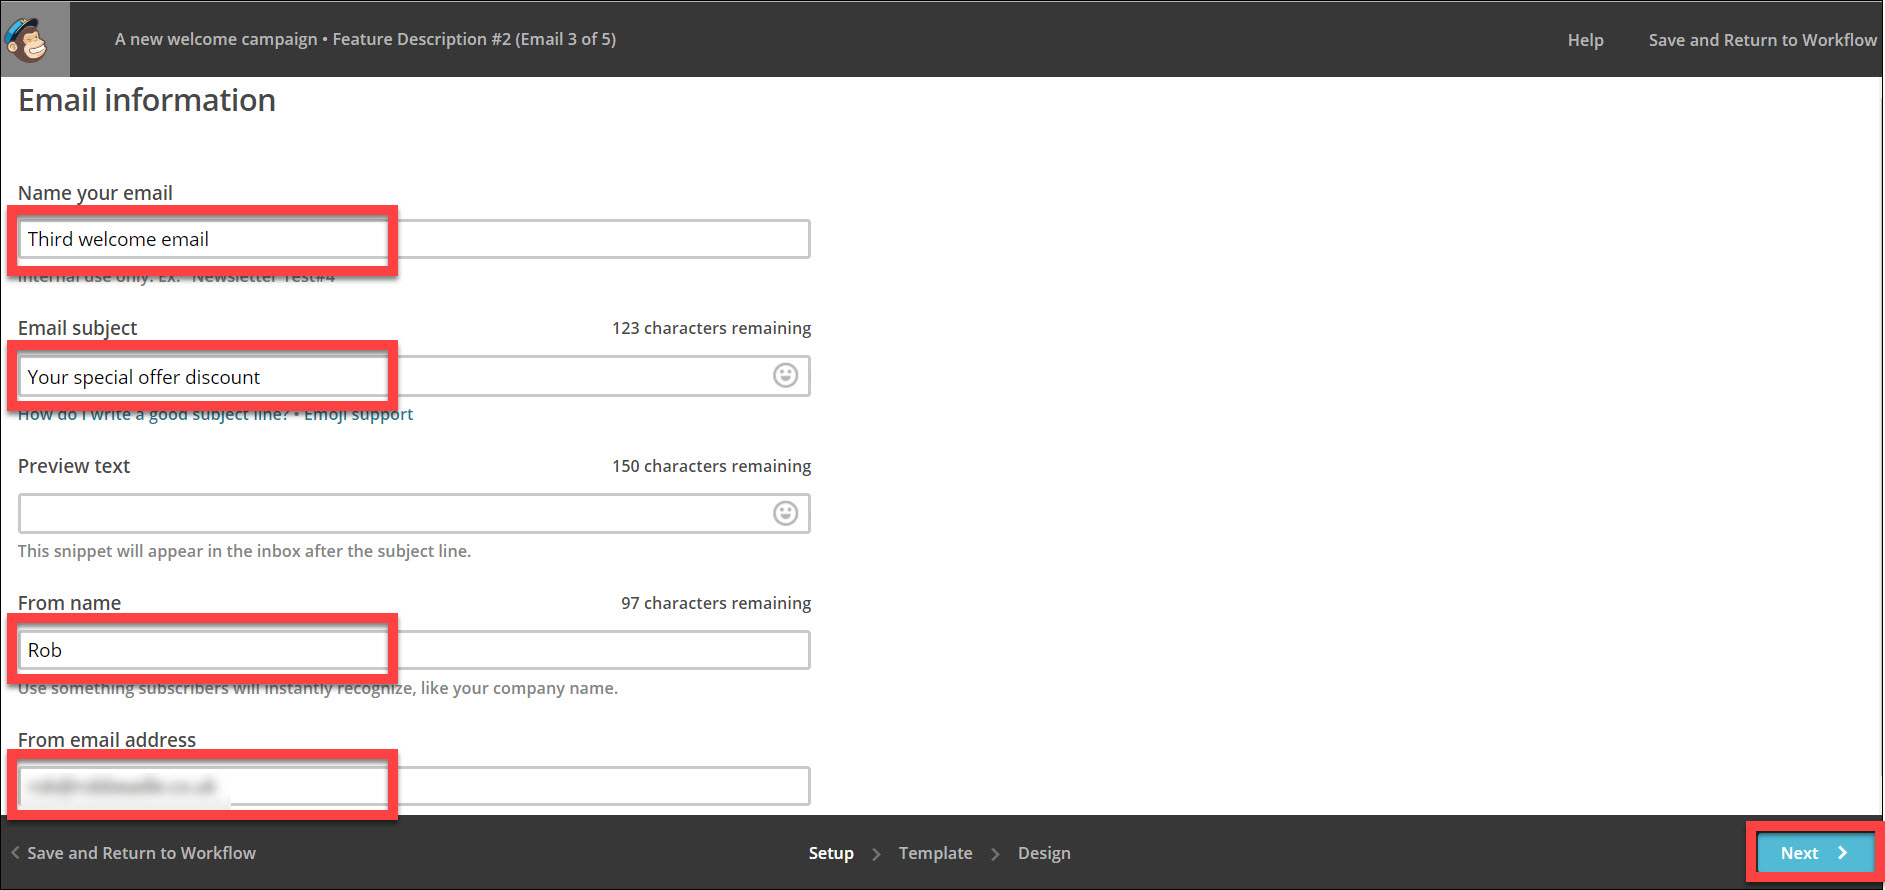
19. Enter the Name of your email (this will only be seen by you) and the Email subject (this will be the subject line of this email). Add the From name and From email address which will appear on the email. Select Next.
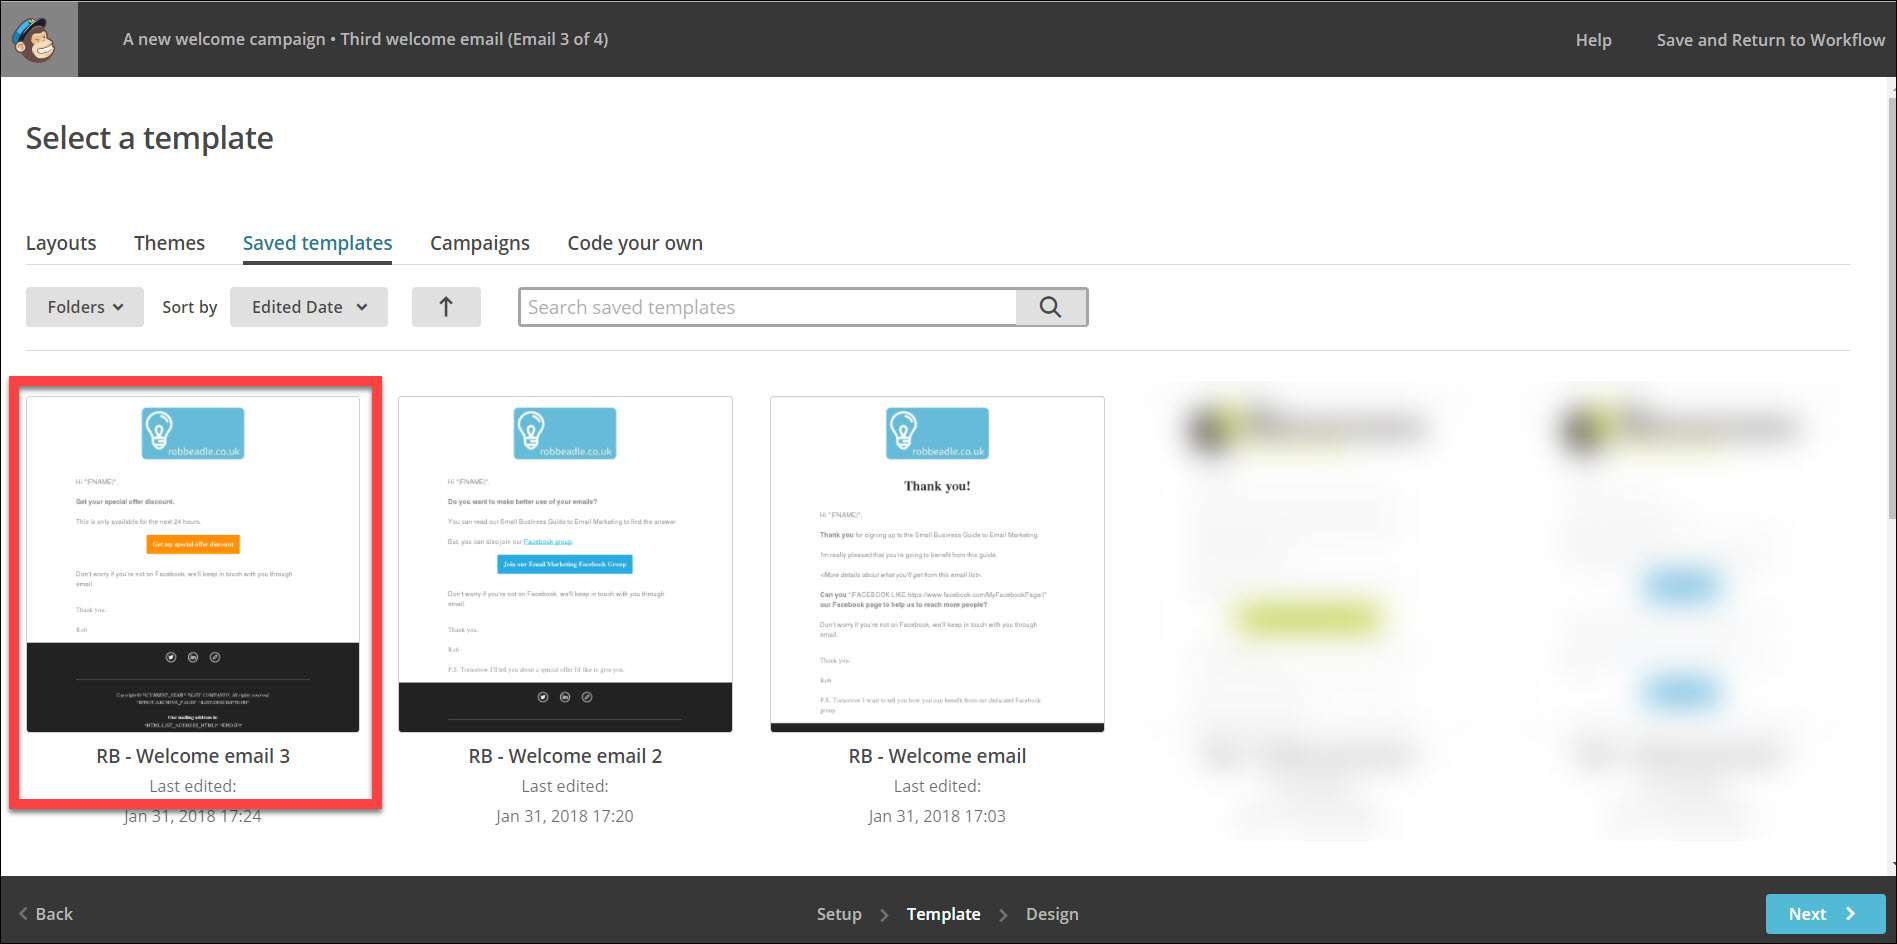
20. Enter the Saved templates menu.
21. Select the template to use for your third email.
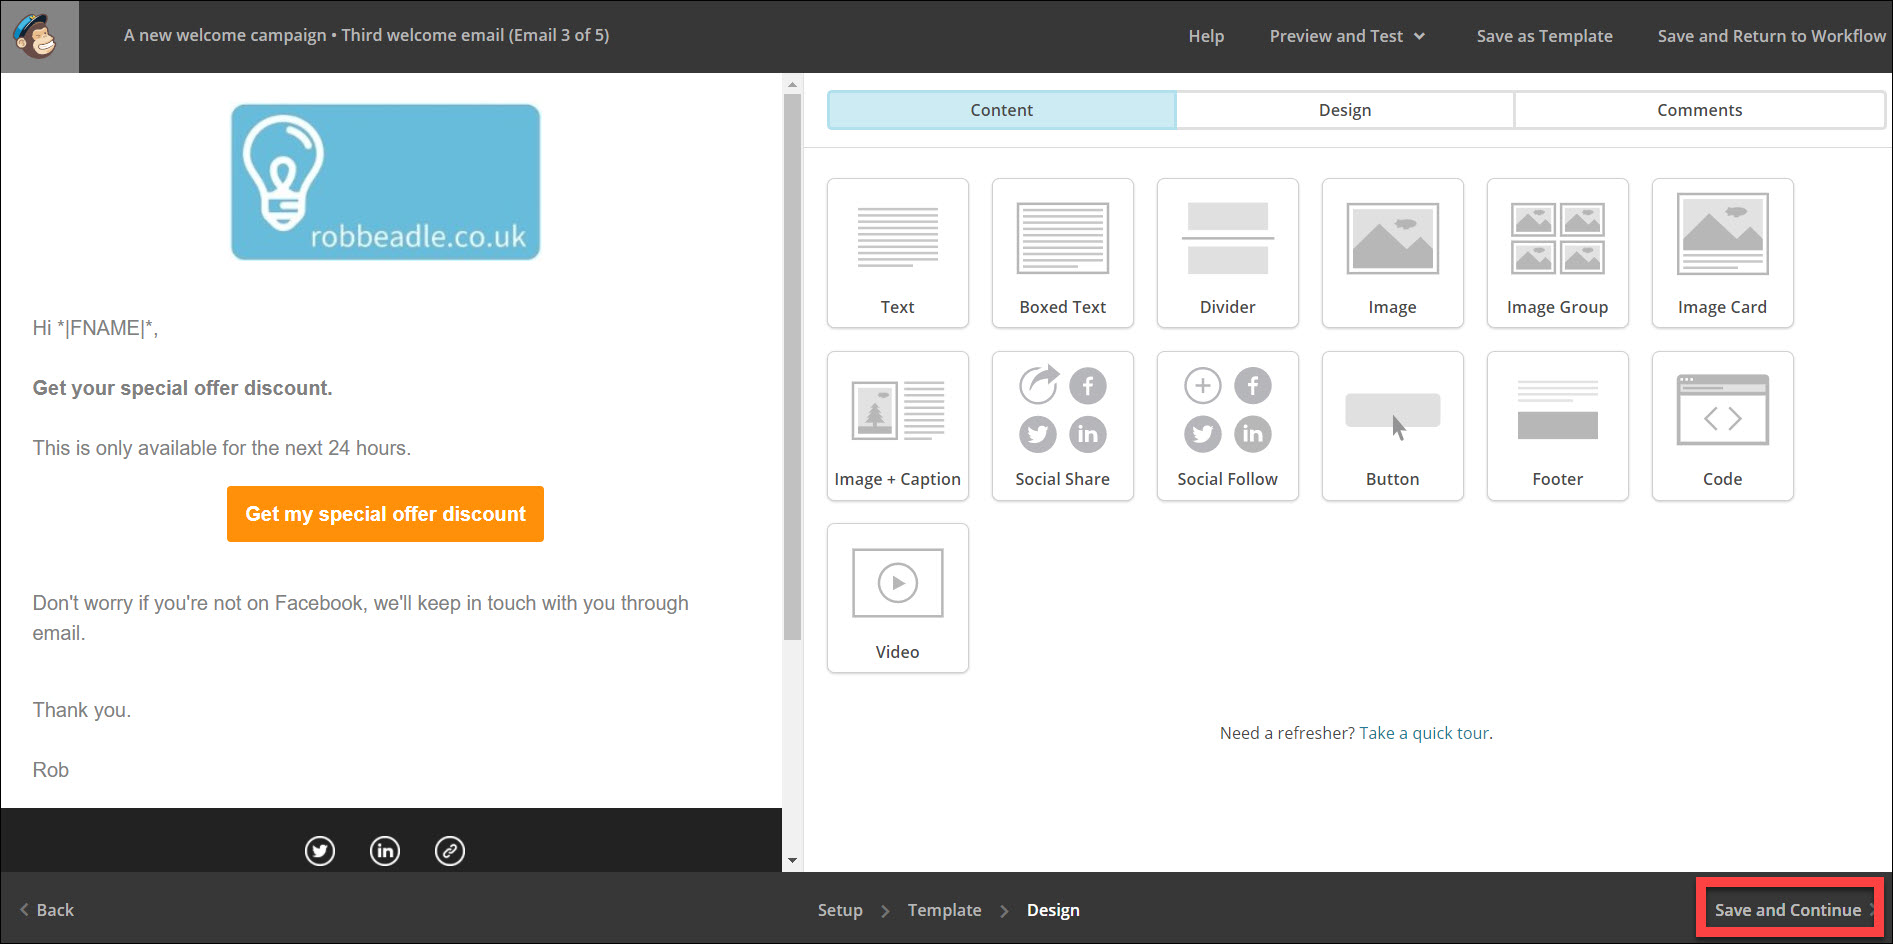
22. Edit the design until you are happy with it. Click Save and Continue.
23. Your third email will automatically be sent 1 day after your second email. If you want to change this select Edit trigger, otherwise no change is required.
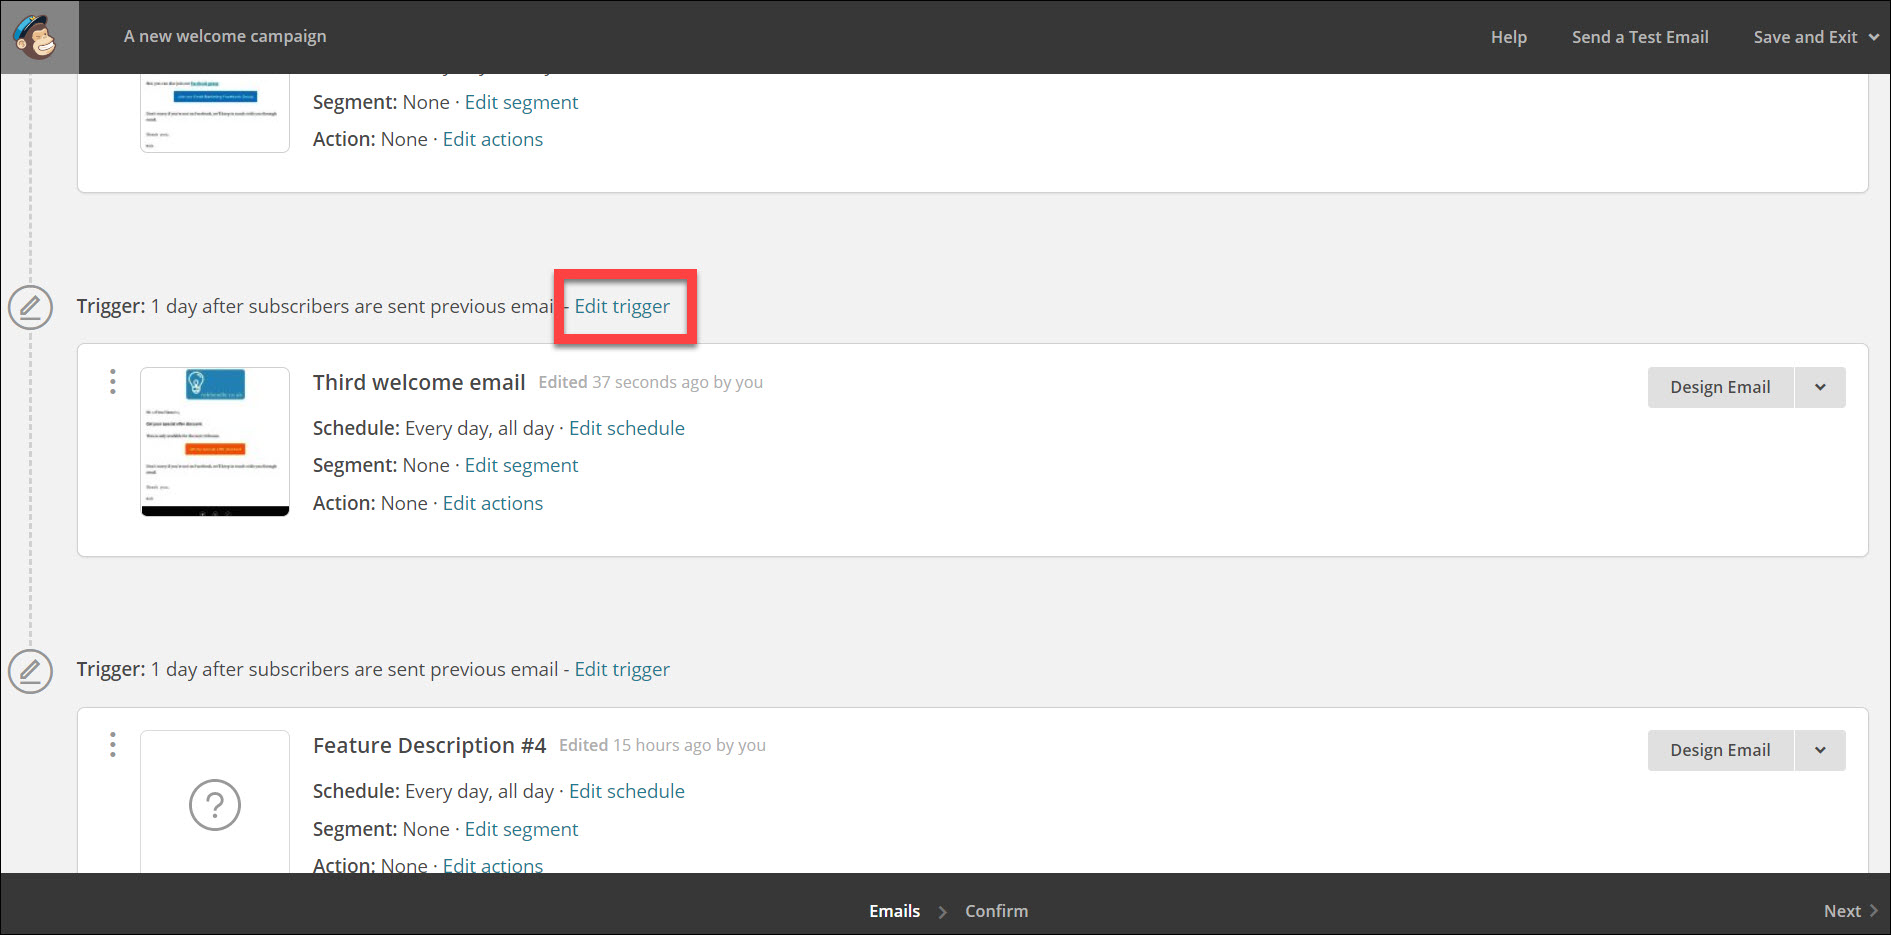
24. Delete any further emails which were in the onboarding series that are not required.
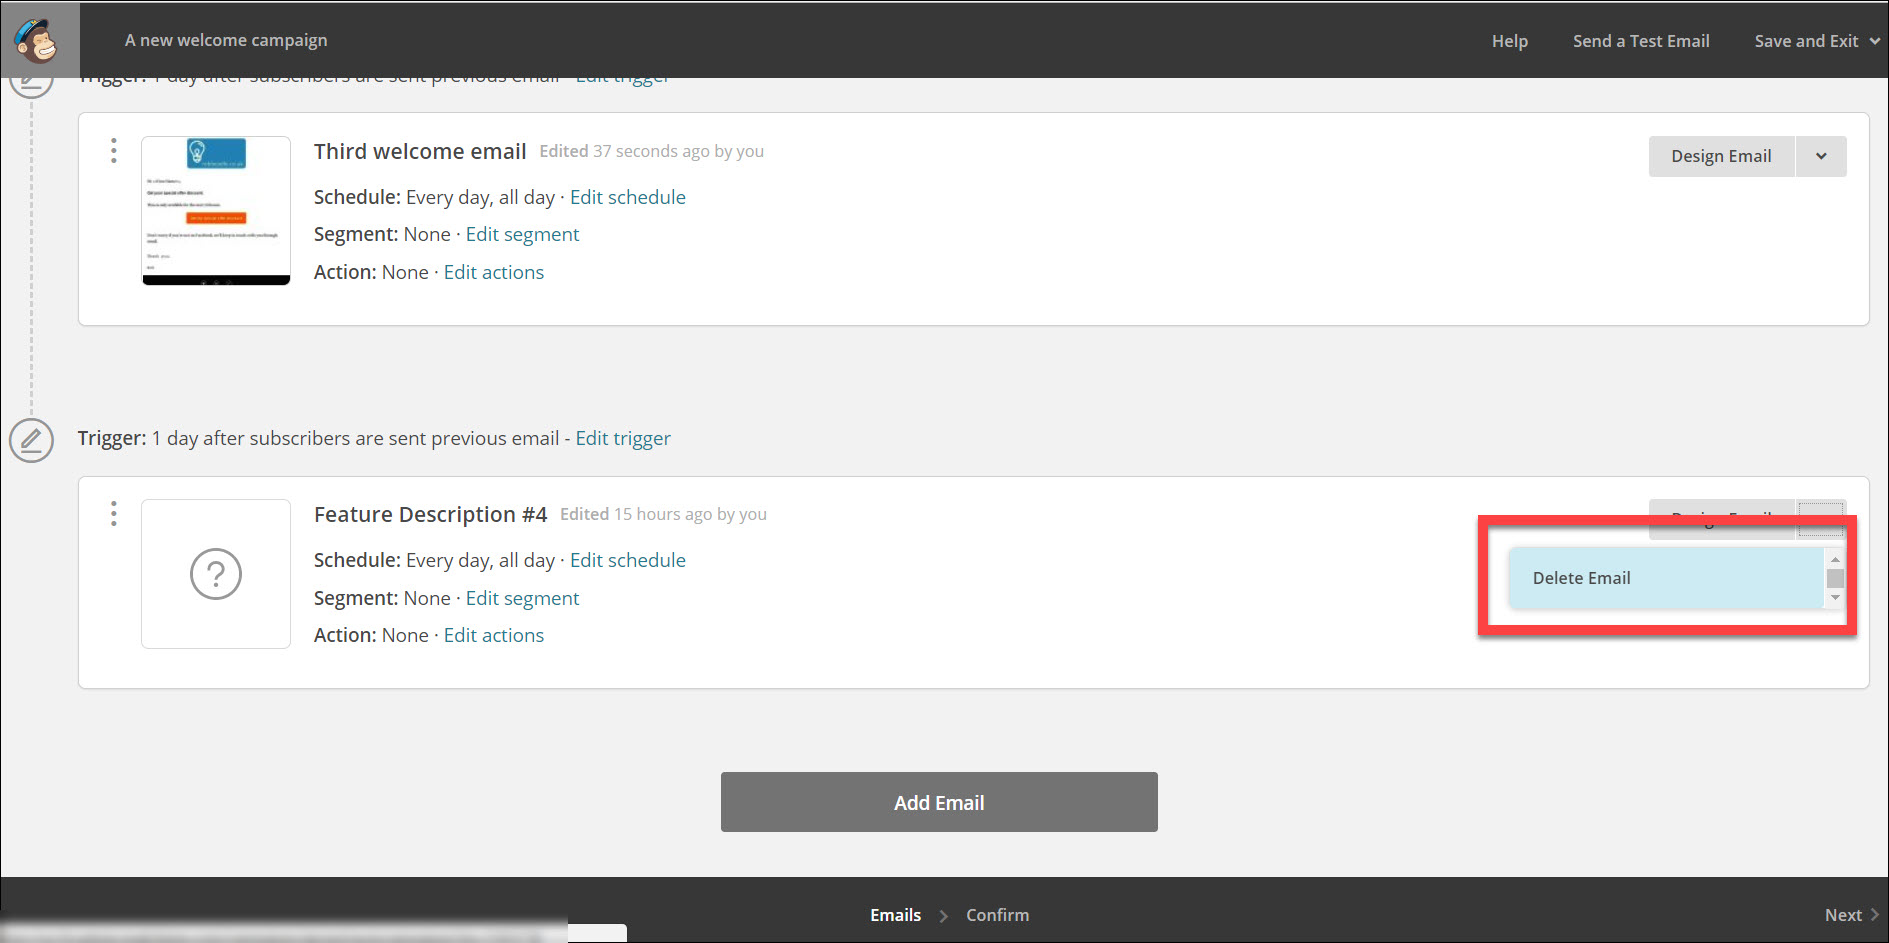
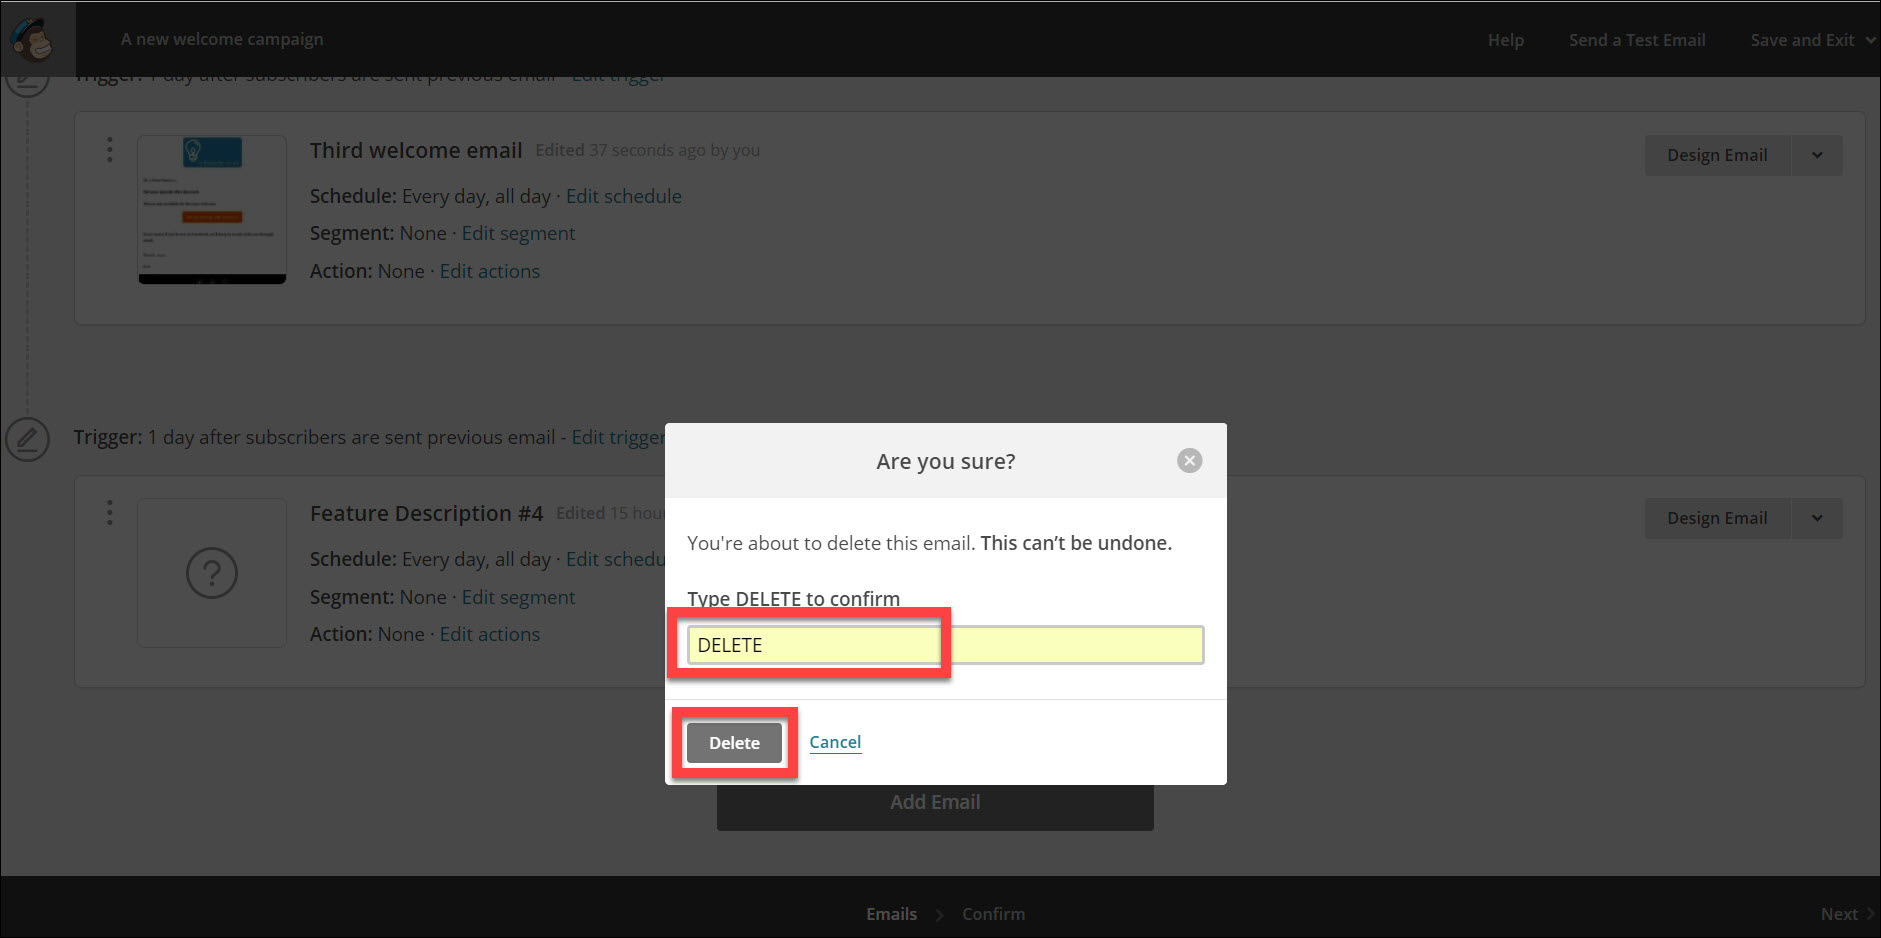
25. Enter DELETE to confirm that you wish to delete this email. Select Delete.
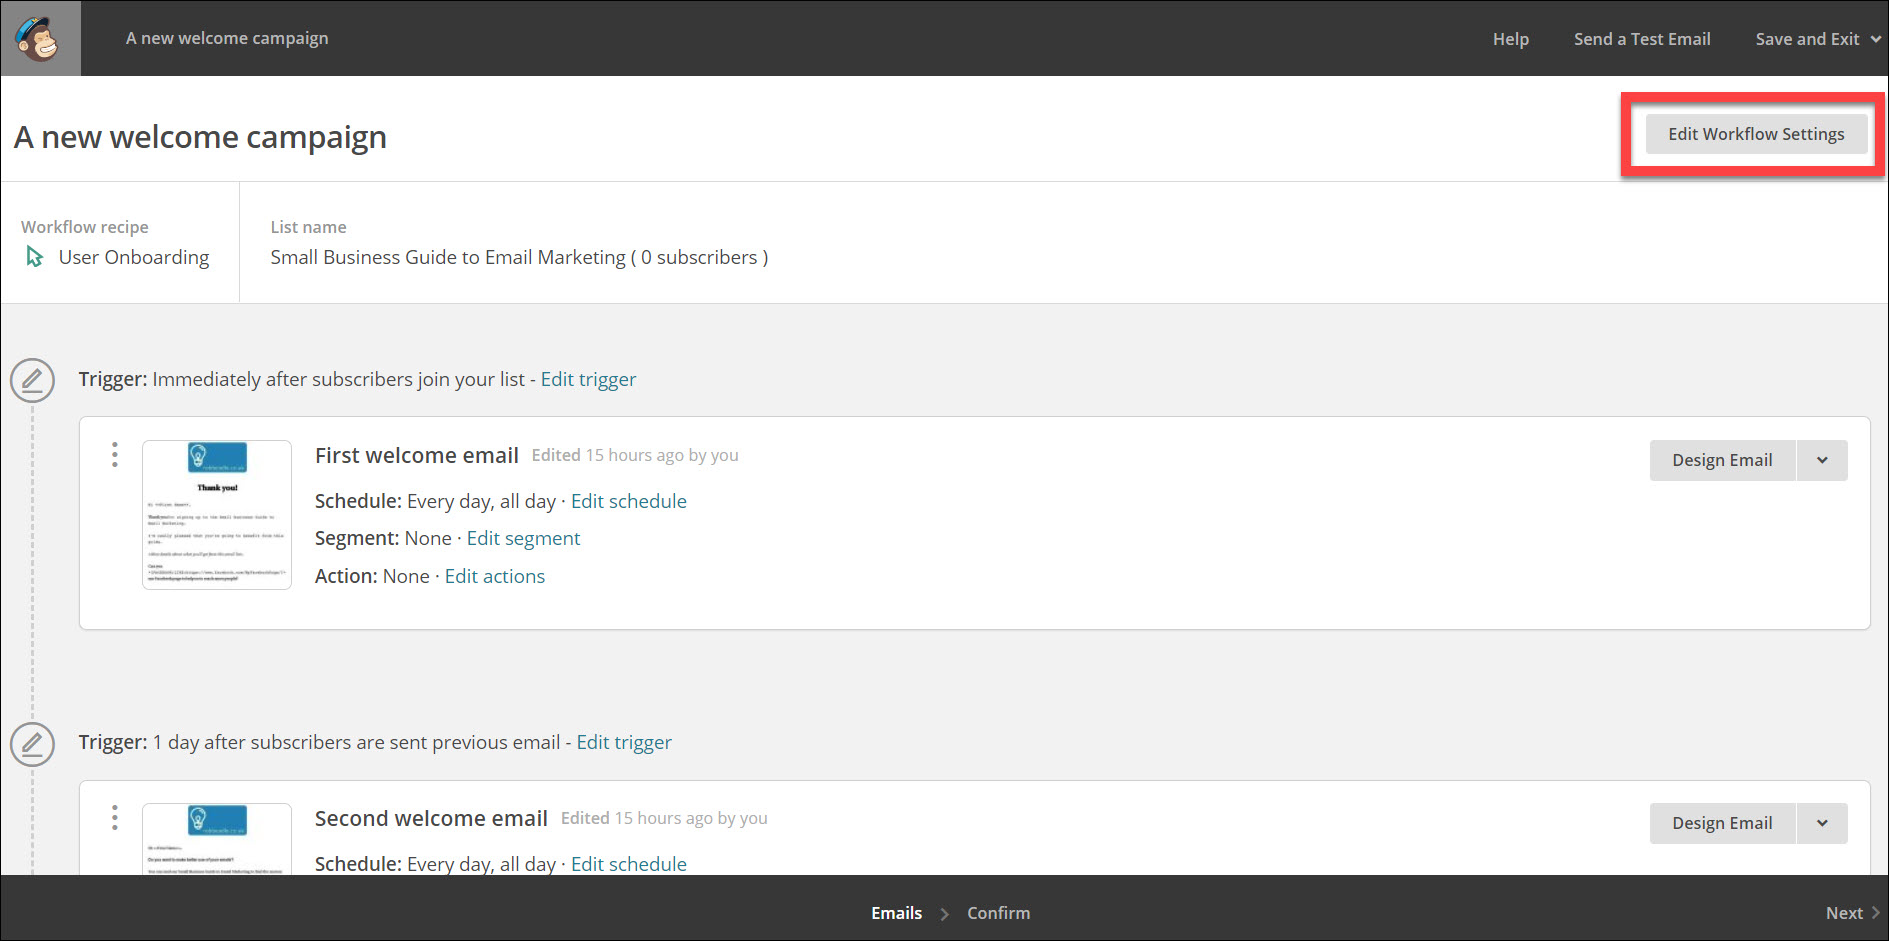
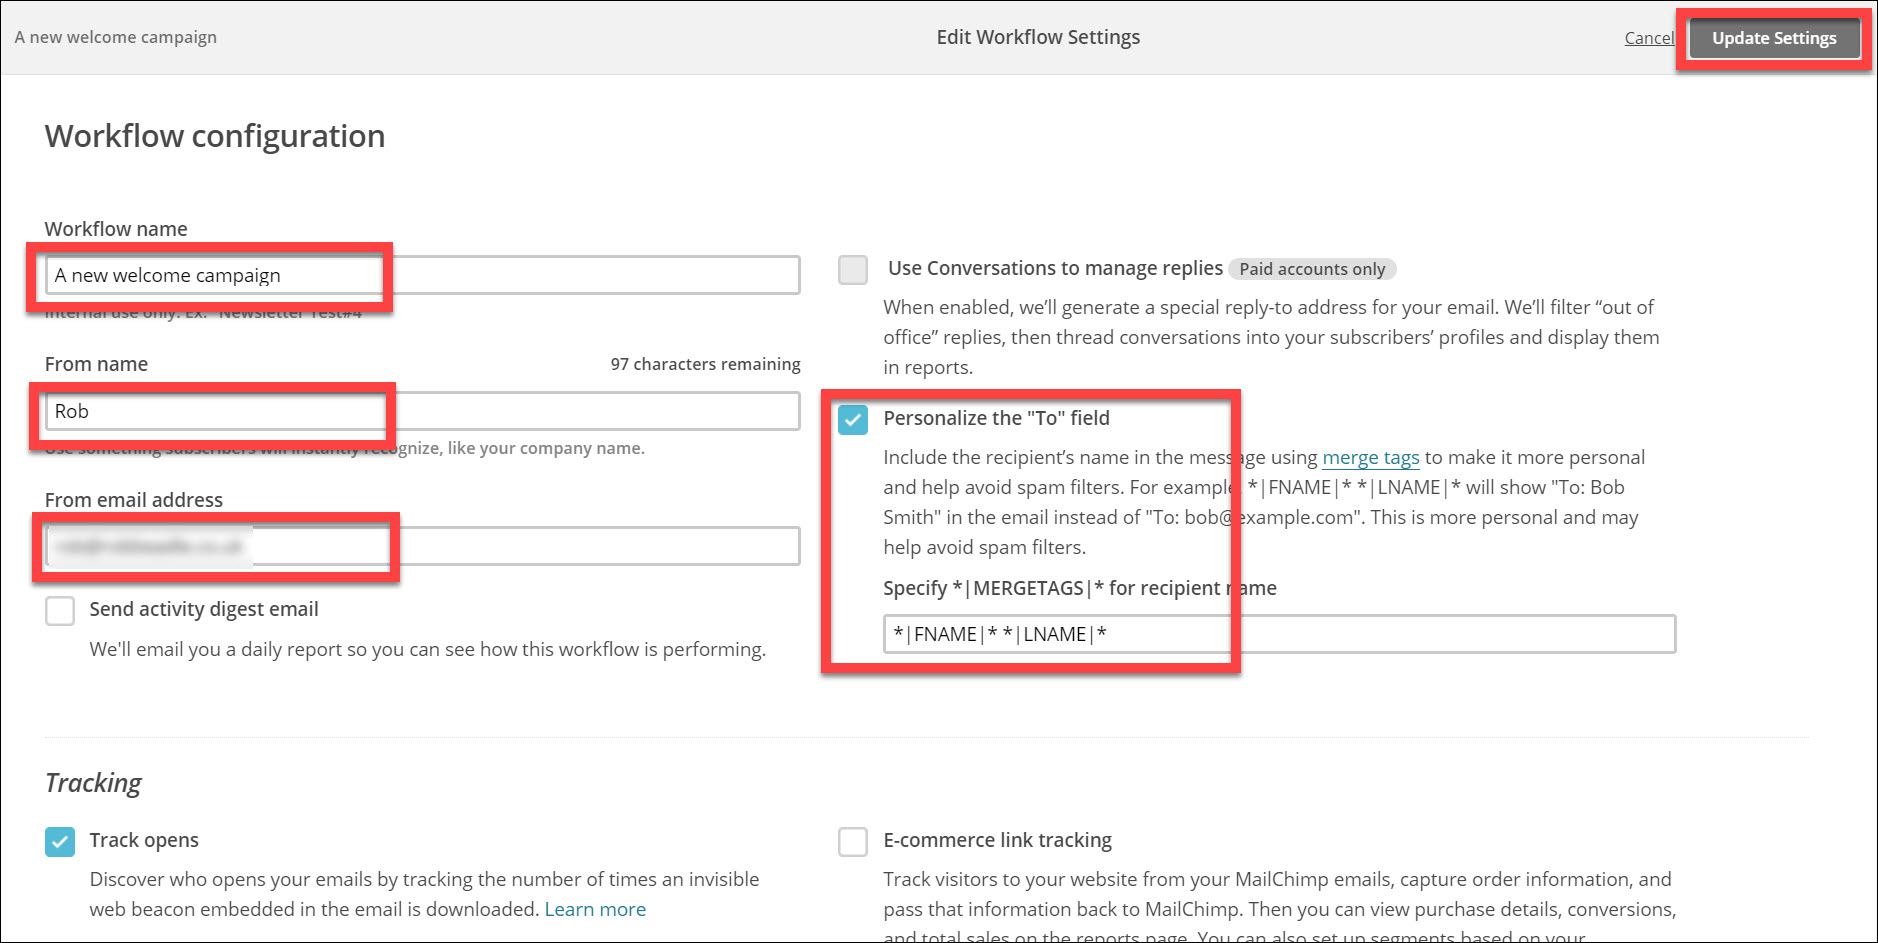
26. Your Automated Welcome Email campaign is almost ready. Select Edit Workflow Settings to check if any last changes are required.
27. Check and update the Workflow name, From name and From email address if required. If you wish to include subscribers’ names in the To field, add the merge tags under Personalize the “To field. Select Update Settings.
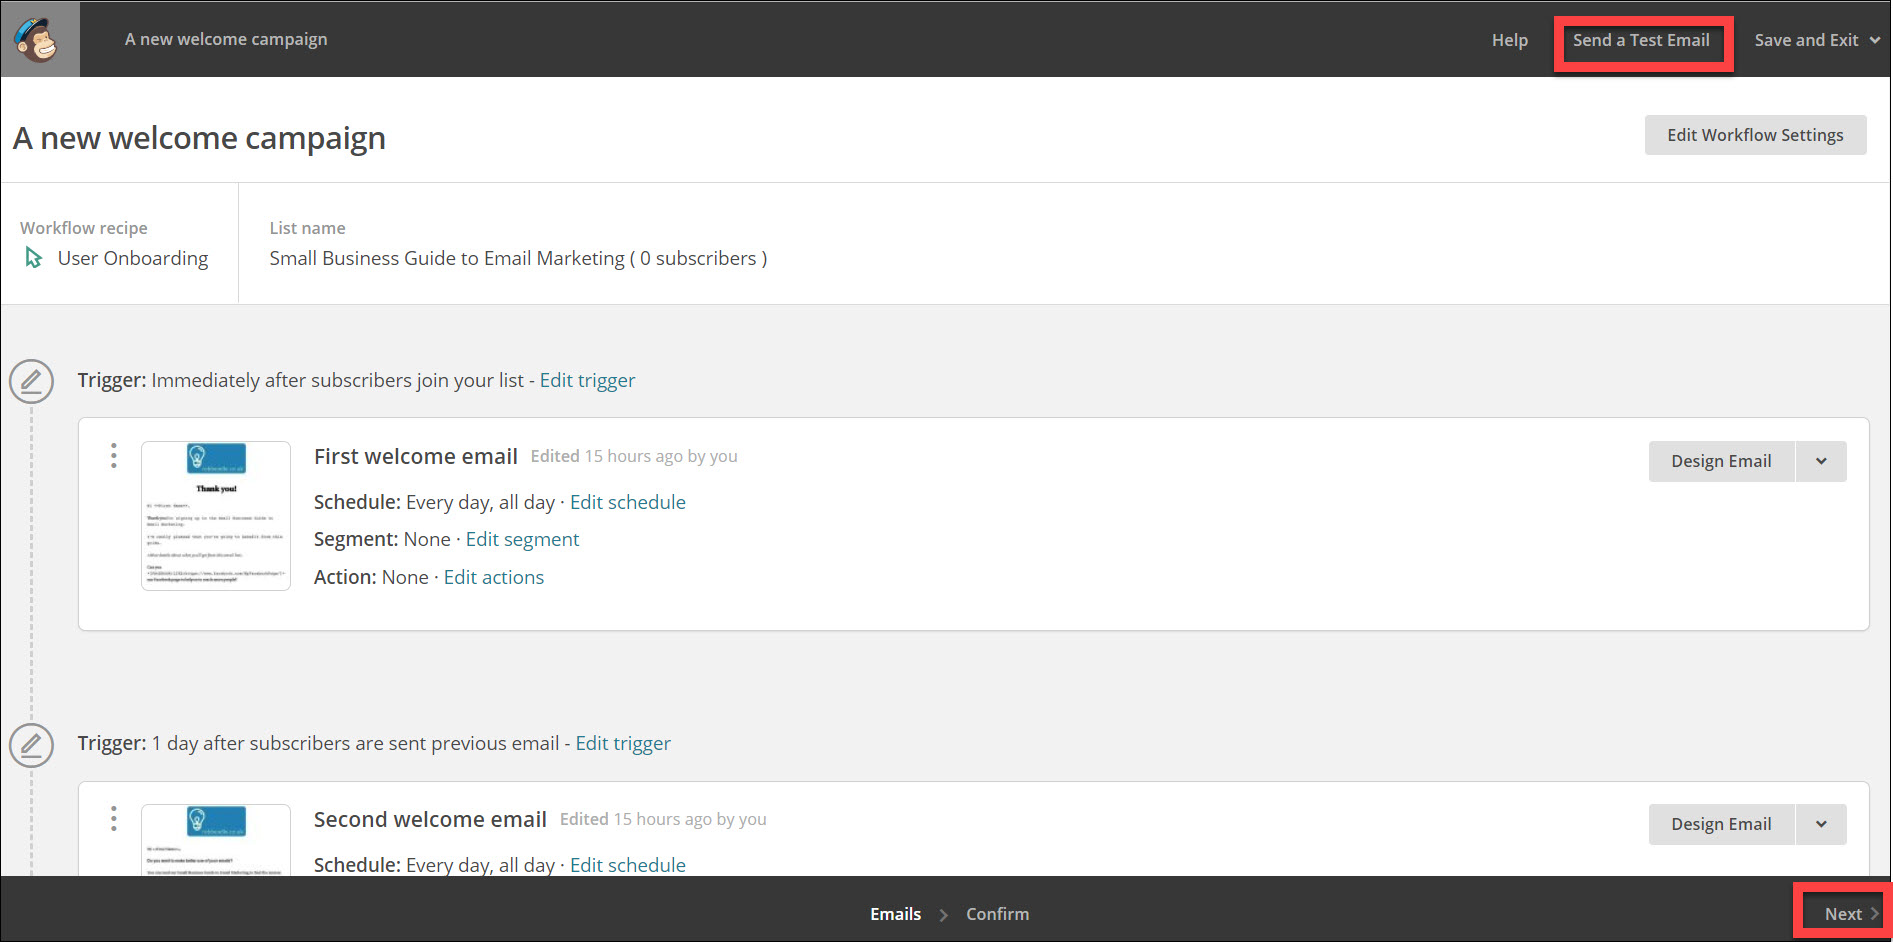
28. If you want to run a test, select Send a Test Email. Otherwise, select Next.
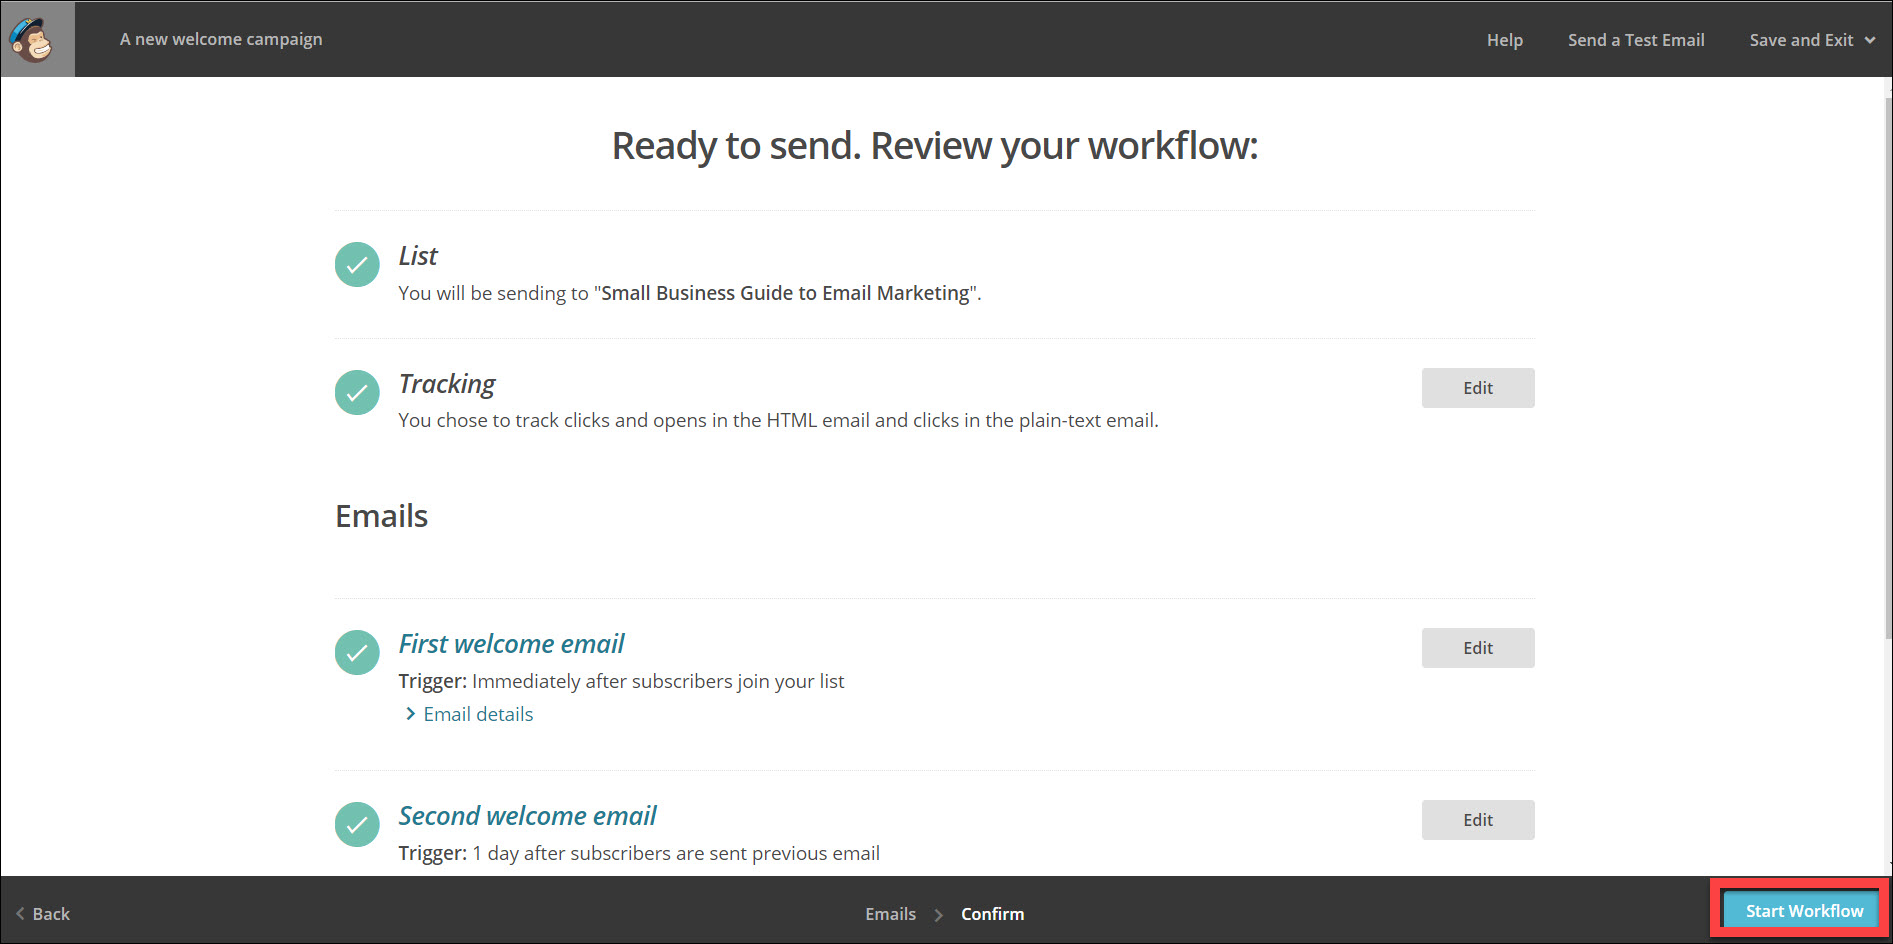
29. Review the settings in your workflow and amend if required. When you’re ready to start running the workflow, select Start Workflow.
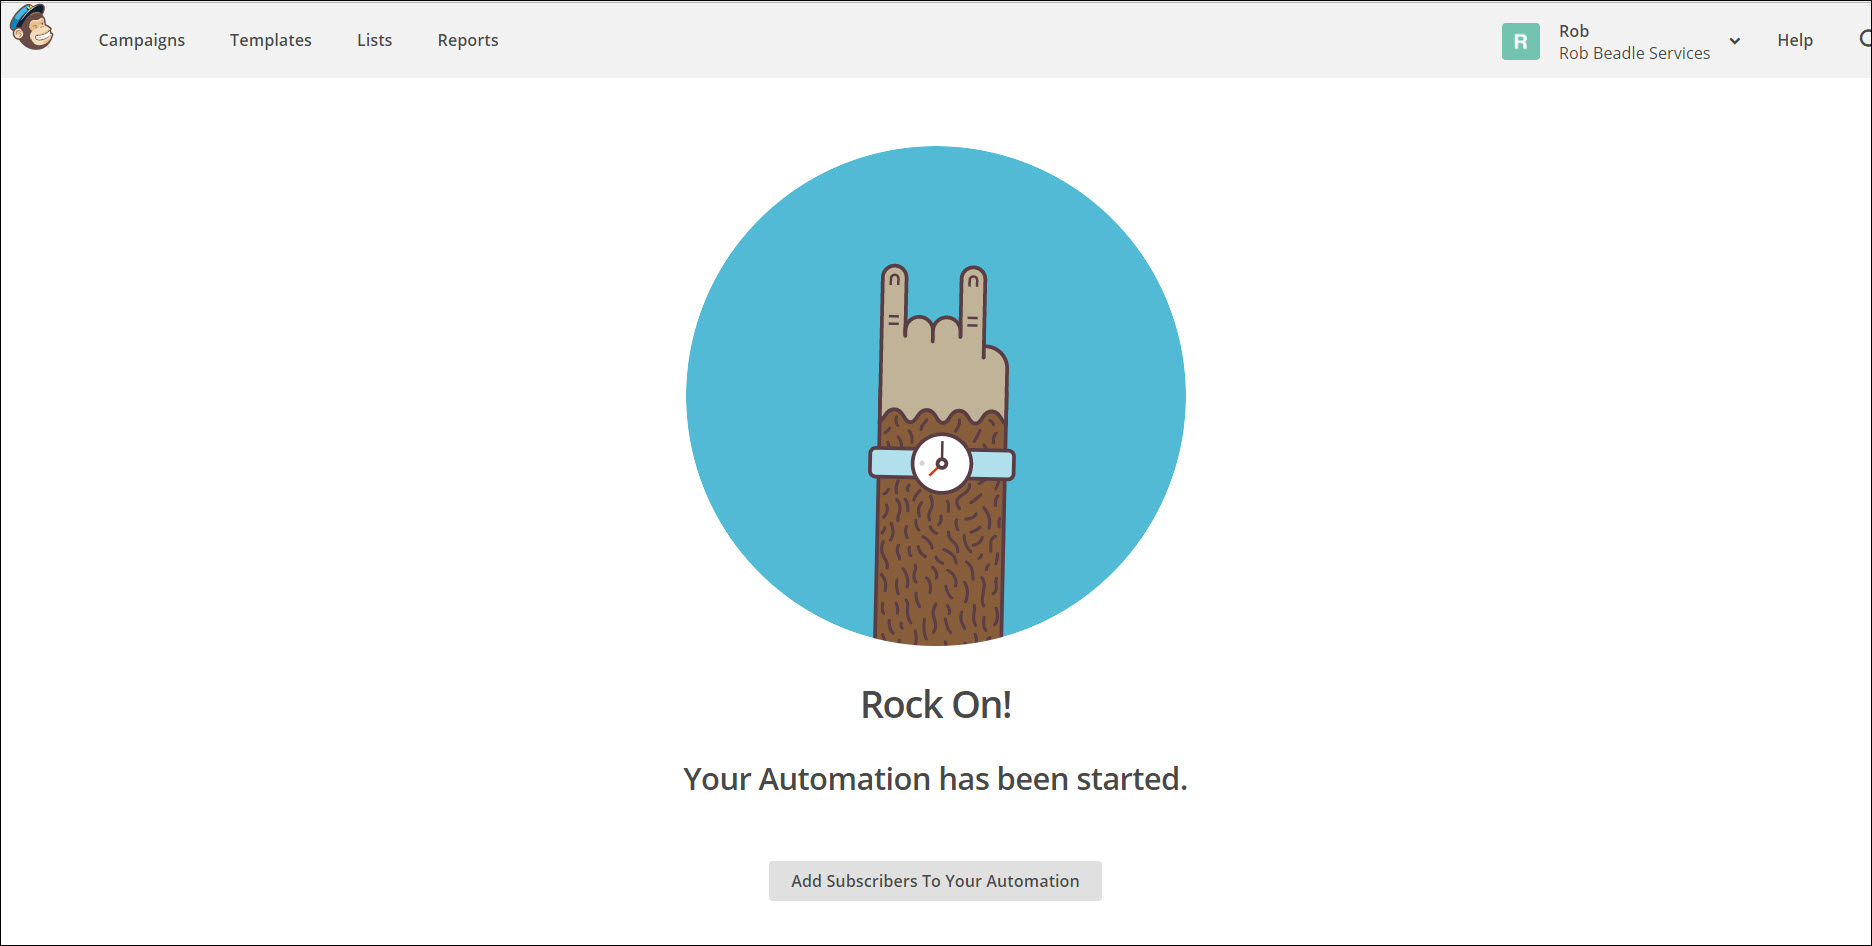
30. Select Start Workflow to launch your Automated Welcome Email campaign.

31. You’ve now started your Automated Welcome Email campaign. Congratulations!
32. As a bonus for getting to the end of this guide, I’ve added an optional video. Enjoy!
In Summary
To get the most from your email list you should engage your subscribers as soon as they join.
But to save you a ton of time, you need an automatic way to do this.
Small business owners who use the free version of MailChimp can now benefit from automatic welcome emails.
You don’t have to live on The Planet of the Apes to benefit from smart apes.
Photo Credit: PublicDomainPictures on Pixabay
FREE Guide - How to attract leads and unlock sales through case studies

0 Comments